


TRUST 910Z POWERC@M OPTICAL ZOOM
17
U K
6.2 White
balance
Not all light has the same colour. The light in a living room, for example, is more
yellow than daylight. The human eye automatically adjusts to this. The camera has
also been designed to do this. You can adjust the white balance when this does not
work (your photographs appear coloured). The white balance is set to AUTO when
the camera is turned on. This is usually the best setting. The white balance can be
set as followed:
1.
Check whether the camera is in the SNAPSHOT mode (option 4, figure 4)
and the LCD screen has been turned on using the LCD button (16, figure 2).
2.
Press the WB/DELETE button (4, figure 2) a number of times. The white
balance symbol will be displayed at the top of the LCD screen.
3.
Select one of the options from table 11 depending on the surroundings in
which the photographs will be taken.
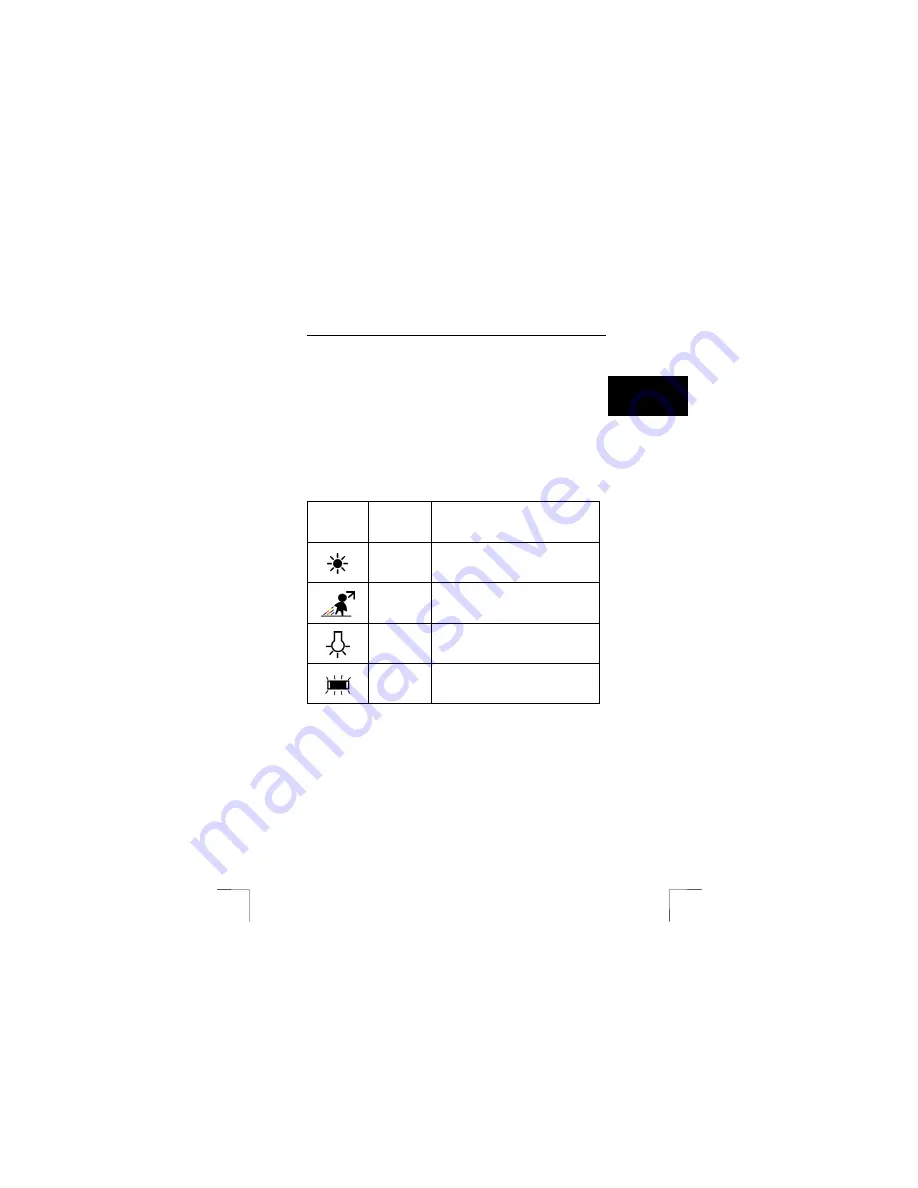
< empty >
Auto WB
The camera automatically determines the
White Balance setting.
Daylight
Use this setting when taking pictures in bright
daylight, to reduce the effect of "whitewashed"
pictures.
Shade
Use this setting when taking pictures in shade,
or any time your pictures come out too dark.
Tungsten
Use this setting for taking pictures under
tungsten or incandescent light.
Fluorescent
Use this setting for taking pictures under
fluorescent light.
Table 11: Explanation of the white balance settings
Tip
:
The wrong setting will also lead to coloured photographs. The LCD
screen will only show an approximation of the result. You can correct
coloured photographs using Photo Express, which is supplied with the
camera.
Note
:
You can only use these settings in the PLAYBACK and SNAPSHOT
mode. When in the PLAYBACK mode, the WB button is the delete
function!


