

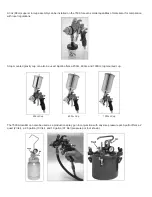

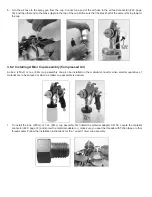

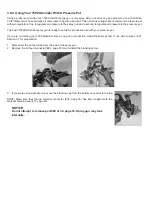
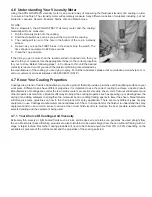
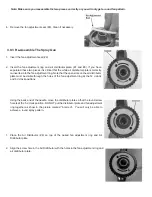

4. Connect one end of the air hose to the air feed connector (#22, page 33) and the other end to the brass nipple in the
top of the cup lid. Be sure that the black half of the valve is facing toward the cup.
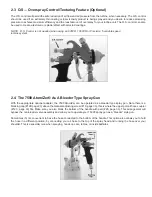
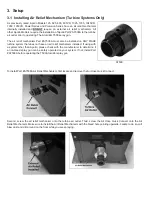
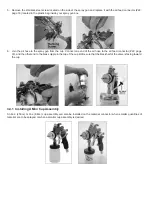
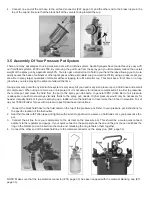
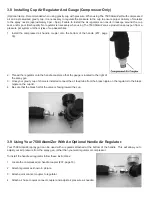
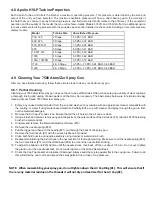
3.5 Assembly Of Your Pressure Pot System
There are many advantages to using pressure pots with a turbine system. Apollo Sprayers have made this very easy with
our fluid feed systems, 4500 and 4550. By removing the paint cup from the spray gun you immediately reduce the overall
weight of the spray gun by approximately 50%. You also get a smaller tool to hold in your hand thereby allowing you to more
easily access the back of cabinets or other tight spaces where a standard cup gun would not fit. By using a pressure pot you
are able to spray larger quantities of material without stopping to refill a smaller cup. This can save a lot of time on a long
job where you are spraying the same material all the time.
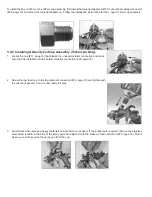
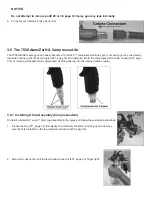
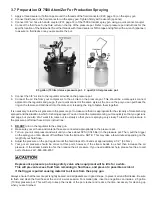
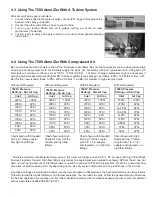
Using a pressure pot with any size turbine system is very easy. All you need is any size pressure pot, a fluid hose and a small
air compressor. When using a remote cup or pressure pot, it is necessary to introduce compressed air in order to pressurize
the remote pot and move the fluid from the pot to the spray gun tip/nozzle. In general 5PSI (0.345 Bar) of air pressure
is adequate to push most average viscosity fluids to the spray gun nozzle. Higher pressure would only be necessary for
heavier viscosity fluids or if you are spraying up a ladder where the fluid has to travel more than 6 feet in elevation. To set
up your 7500 AtomiZer for use with a pressure pot, follow these instructions:
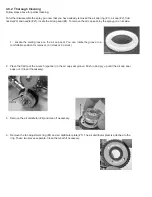
1. Connect the black fluid hose to the fluid outlet on the top of the pressure pot. Refer to your pressure pot instructions for
the specific location of the fluid outlet.
2. Seal the threads with Teflon tape and tighten with a wrench (spanner) to assure no fluid leaks once you pressurize the
pot.
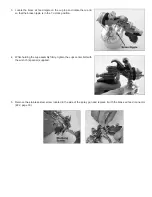
3. Connect the air line from your compressor to the air inlet on the pressure pot. This should be a male quick connect
adjacent to the regulator and gauge. If your quick connect is the same style as the one on the pot you can pull back the
ring on the female end and insert into the male end, releasing the ring to fasten them together.
4. Connect the other end of the black fluid line to the material connector on the spray gun. (#29, page 33).
NOTE: Make sure that the top material connector (#30, page 33) has been capped with the material blanking cap (#11,
page 33).
Summary of Contents for Apollo 7500 AtomiZer
Page 32: ...8 Diagram Parts List...