background image

Using the Operation Panel

7-43

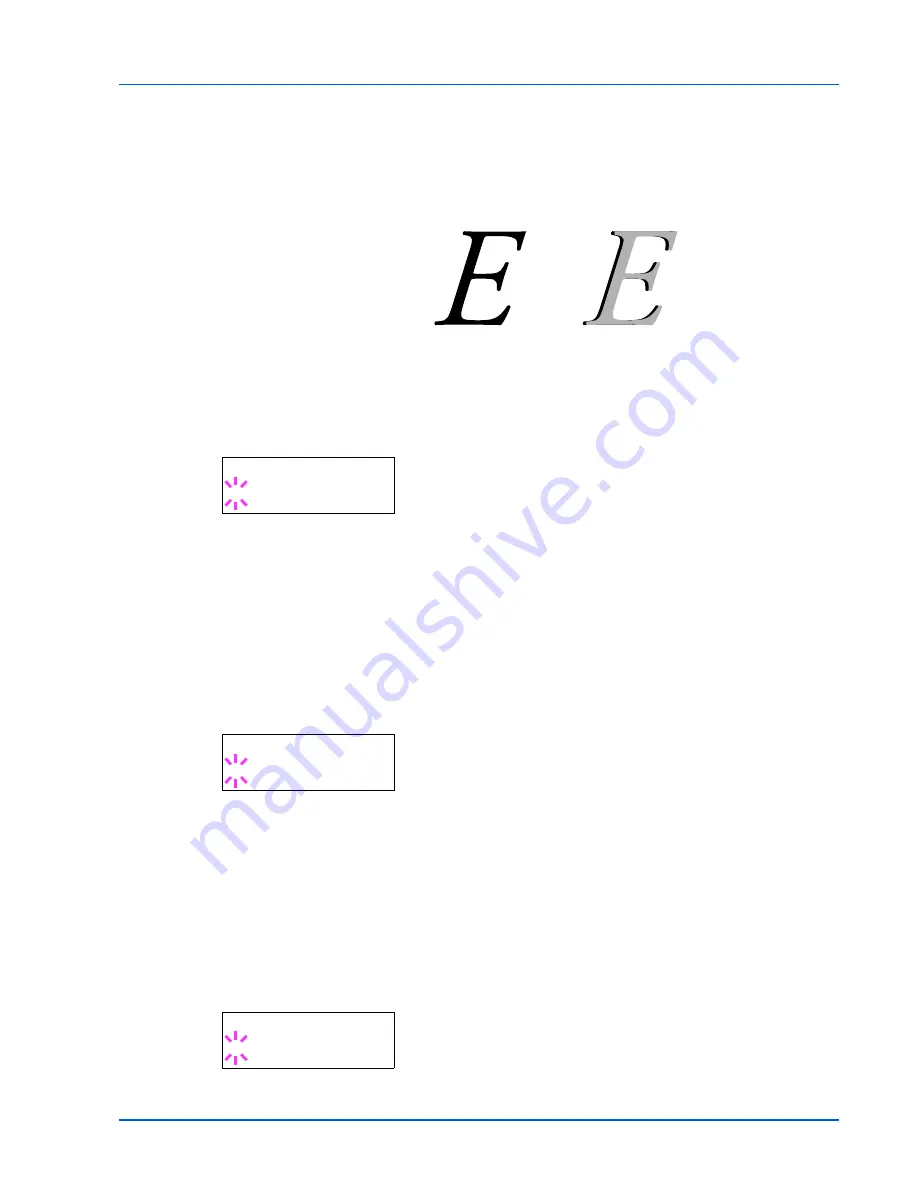
EcoPrint Mode (Selecting the EcoPrint mode)

By enabling EcoPrint mode, you can minimize the amount of toner used 

during printing. Because images printed in this mode may be slightly 

coarser than those printed in standard resolution, you should use 

EcoPrint for test prints or other situations where high-quality prints are 

not required.

Use the procedure below to select EcoPrint mode. The default setting is 

Off

.

1

Press 

Z

 while 

>Print Quality >

 is displayed.

2

Press 

U

 or 

V

 repeatedly until 

>>EcoPrint Mode

 appears.

3

Press 

[OK]

. A blinking question mark (

?

) appears.

4

Select 

On

 or 

Off

 using 

U

 or 

V

.

5

Press 

[OK]

.

6

Press 

[MENU]

. The display returns to 

Ready

.

Resolution (Selecting the print resolution)

You can set the default print resolution in four ways: 300dpi, 600dpi, Fast 

1200 mode and Fine 1200 mode. The clarity of printed characters and 

graphics becomes sharper in this order.

1

Press 

Z

 while 

>Print Quality >

 is displayed.

2

Press 

U

 or 

V

 repeatedly until 

>>Resolution

 appears.

3

Press 

[OK]

. A blinking question mark (

?

) appears.

4

Select 

Fine 1200 mode

Fast 1200 mode

600 dpi

 or 

300 

dpi

 using the 

U

 or 

V

.

5

Press 

[OK]

.

6

Press 

[MENU]

. The display returns to 

Ready

.

Print Density (Selecting the print density)

The print density can be adjusted in five steps: from 01 (light) to 05 

(dark). The default setting is 03.

1

Press 

Z

 while 

>Print Quality >

 is displayed.

2

Press 

U

 or 

V

 repeatedly until 

>>Print Density

 appears.

3

Press 

[OK]

. A blinking question mark (

?

) appears.

EcoPrint setting is 

Off

 (default)

EcoPrint setting is 

On

>>EcoPrint Mode
? Off

>>Resolution
? Fast 1200 mode

>>Print Density
? 03

Summary of Contents for LP 4235

Page 1: ...Instruction Handbook LP 4235 4240 4245 Laser Printer b w ...

Page 2: ...Windows PC 4 24 1 Maintenance 5 1 General Information 5 2 Cleaning the Printer 5 7 6 Troubleshooting 6 1 General Guidelines 6 2 Print Quality Problems 6 3 Error Messages 6 5 Clearing Paper Jams 6 12 7 Using the Operation Panel 7 1 General Information 7 2 Understanding the Operation Panel 7 3 Using the Menu Selection System 7 8 Report Print 7 11 USB Memory USB flash memory selection 7 17 Job Box 7 ...

Page 3: ...ii CompactFlash CF Card 8 6 Other Options 8 8 9 Computer Interface 9 1 General Information 9 2 Network Interface 9 3 10 Appendix 10 1 Specifications 10 2 Glossary Index ...

Page 4: ...e using your machine This chapter provides information on the following topics Legal Information iv License Agreements v Safety Information xi Symbols xvi Installation Precautions xvii Precautions for Use xix About the Operation Guide xxi Conventions in This Guide xxii ...

Page 5: ...t of this guide or any copyrightable subject must contain the same copyright notice as the material from which the copying is done Regarding Tradenames PRESCRIBE is a registered trademark of Kyocera Corporation KPDL is trademark of Kyocera Corporation Hewlett Packard PCL and PJL are registered trademarks of Hewlett Packard Company Centronics is a trade name of Centronics Data Computer Inc Adobe Ac...

Page 6: ...ights in the Programs 1 License Under this license you may use the Programs only with the device on which they are installed and transfer possession of the Programs and the device to another party If you transfer the Programs you must transfer a copy of this license and any other documentation to the other party Your license is then terminated The other party agrees to these terms and conditions b...

Page 7: ...this license is governed by the laws of the State of New York If you acquired the Program in Canada this license is governed by the laws of the Province of Ontario Otherwise this license is governed by the laws of the country in which you acquired the Program Typeface Trademark Acknowledgement All resident fonts in this printer are licensed from Monotype Imaging Inc Helvetica Palatino and Times ar...

Page 8: ... and omissions 8 THE PARTIES AGREE THAT ALL OTHER WARRANTIES EXPRESSED OR IMPLIED INCLUDING WARRANTIES OF FITNESS FOR A PARTICULAR PURPOSE AND MERCHANTABILITY ARE EXCLUDED 9 Your exclusive remedy and the sole liability of Monotype Imaging in connection with the Software and Typefaces is repair or replacement of defective parts upon their return to Monotype Imaging 10 IN NO EVENT WILL MONOTYPE IMAG...

Page 9: ...roduct includes software developed by the OpenSSL Project for use in the OpenSSL Toolkit http www openssl org THIS SOFTWARE IS PROVIDED BY THE OpenSSL PROJECT AS IS AND ANY EXPRESSED OR IMPLIED WARRANTIES INCLUDING BUT NOT LIMITED TO THE IMPLIED WARRANTIES OF MERCHANTABILITY AND FITNESS FOR A PARTICULAR PURPOSE ARE DISCLAIMED IN NO EVENT SHALL THE OpenSSL PROJECT OR ITS CONTRIBUTORS BE LIABLE FOR ...

Page 10: ...raphic can be left out if the rouines from the library being used are not cryptographic related 4 If you include any Windows specific code or a derivative thereof from the apps directory application code you must include an acknowledgement This product includes software written by Tim Hudson tjh cryptsoft com THIS SOFTWARE IS PROVIDED BY ERIC YOUNG AS IS AND ANY EXPRESS OR IMPLIED WARRANTIES INCLU...

Page 11: ...ect the equipment into an outlet on a circuit different from that to which the receiver is connected Consult the dealer or an experienced radio TV technician for help The use of a non shielded interface cable with the referenced device is prohibited CAUTION The changes or modifications not expressly approved by the party responsible for compliance could void the userÅfs authority to operate the eq...

Page 12: ...1 laser products and elsewhere is certified as a Class I laser product conforming to the requirements of IEC 825 Radio Frequency Transmitter This machine contains a transmitter module We the manufacturer TA Triumph Adler AGH hereby declare that this equipment page printer models LP 3235 3240 3245 are in compliance with the essential requirements and other relevant provisions of Directive 1999 5 EC...

Page 13: ...arketed in the United States A label indicating compliance with the CDRH regulations must be attached to laser products marketed in the United States Ozone Concentration These printers generate ozone gas O3 which may concentrate in the place of installation and cause an unpleasant smell To minimize the concentration of ozone gas to less than 0 1ppm we recommend you not to install the printer in a ...

Page 14: ...die Hauptisoliervorrichtung Die anderen Schalter auf dem Gerät sind nur Funktionsschalter und können nicht verwendet werden um den Stromfluß im Gerät zu unterbrechen DECLARATION OF CONFORMITY TO 2004 108 EC 2006 95 EEC 93 68 EEC and 1999 5 EC We declare under our sole responsibility that the product to which this declaration relates is in conformity with the following specifications EN55024 EN5502...

Page 15: ... where printer function remains in a waiting state but power consumption is still reduced to a minimum when there is no activity with the printer within a set amount of time Sleep Mode This printer automatically enters Sleep Mode when approximately 30 minutes have passed since the printer was last used The amount of time of no activity that must pass before Sleep Mode is activated may be lengthene...

Page 16: ...Star ENERGY STAR Program We have determined as a participating company in the International Energy Star Program that this product is compliant with the standards laid out in the International Energy Star Program ...

Page 17: ...ction are indicated inside the symbol Please contact your service representative to order a replacement if the safety warnings in this Operation Guide are illegible or if the guide itself is missing fee required DANGER Indicates that serious injury or even death will very possibly result from insufficient attention to or incorrect compliance with the related points WARNING Indicates that serious i...

Page 18: ...onmental conditions may affect the safe operation and performance of the machine Install in an air conditioned room recommended room temperature around 23 C 73 4 F humidity around 60 RH and avoid the following locations when selecting a site for the machine Avoid locations near a window or with exposure to direct sunlight Avoid locations with vibrations Avoid locations with drastic temperature flu...

Page 19: ...ne to an outlet with a ground connection to avoid the danger of fire or electrical shock in case of an electric short If an earth connection is not possible contact your service representative Other precautions Connect the power plug to the closest outlet possible to the machine The power supply cord is used as the main disconnect device Ensure that the socket outlet is located installed near the ...

Page 20: ... contact your service representative If anything harmful paper clips water other fluids etc falls into the machine turn the main power switch off immediately Next be absolutely certain to remove the power plug from the outlet to avoid the danger of fire or electrical shock Then contact your service representative Do not remove or connect the power plug with wet hands as there is a danger of electr...

Page 21: ... radiation exposure Cautions when Handling Consumables Caution Do not attempt to incinerate the Toner Container Dangerous sparks may cause burns Keep the Toner Container out of the reach of children If toner happens to spill from the Toner Container avoid inhalation and ingestion as well as contact with your eyes and skin If you do happen to inhale toner move to a place with fresh air and gargle t...

Page 22: ...he application software included in the CD ROM 5 Maintenance This chapter explains how to replace the toner container and how to care for your printer 6 Using the Operation Panel Explains how to use the operation panel to configure the printer 7 Option Shows the available options 8 Computer Interface Describes the possible connections between the printer and your computer 9 Troubleshooting This ch...

Page 23: ...ontainer from the carton until you are ready to install it in the printer Important Used to provide important information IMPORTANT During toner container replacement temporarily move storage media and computer supplies such as floppy disks away from the toner container This is to avoid damaging media by the magnetism of toner Caution Cautions are statements that suggest mechanical damage as a res...

Page 24: ... illustrations for you to determine the parts and their functions Try to be familiar with the names and functions of these parts for correct use and optimal performance Components at the Front of the Printer 1 2 Components at the Rear of the Printer 1 3 Operation Panel 1 4 ...

Page 25: ...r 2 Paper Stopper 3 Top Tray 4 Right Cover 5 Operation Panel 6 USB Memory Slot 7 Paper Cassette 8 MP Multi Purpose Tray Components at the Left of the Printer and Internal Components 1 Left Cover 2 Toner Container 3 Power Switch 4 Waste Toner Box 3 2 1 4 5 7 8 6 2 3 1 4 ...

Page 26: ...Printer 1 USB Interface Connector 2 Network Indicators LP 3240 3245 only 3 Network Interface Connector LP 3240 3245 only 4 Parallel Interface Connector 5 Power Cord Connector 6 Rear Unit 7 Option Interface Slot Network CF card Hard disk 1 2 3 4 5 6 7 ...

Page 27: ...1 4 Machine Parts Operation Panel 1 Indicators 2 Message Display 3 Cursor Keys 4 GO Key 5 Cancel Key 6 OK Key 7 MENU Key 2 1 3 4 5 6 7 ...

Page 28: ...andling 2 1 2 Paper Handling This chapter explains paper specifications for this printer and how to load paper into the cassette or MP tray General Guidelines 2 2 Selecting the Right Paper 2 4 Paper Type 2 11 ...

Page 29: ...hich the paper is cut The higher the grade of paper you use the less risk there will be of paper jams and other problems and the higher the level of quality your printed output will reflect Differences between paper from different suppliers can also affect the machine s performance A high quality printer cannot produce high quality results when the wrong paper is used Low priced paper is not econo...

Page 30: ...05mm 4 1 8 inches 216mm 8 1 2 inches 356mm 14 inches Minimum Paper Size Maximum Paper Size Paper cassette 70mm 2 3 4 inches 148mm 5 13 16 inches Minimum Paper Size Maximum Paper Size MP tray 216mm 8 1 2 inches 148mm 5 13 16 inches 356mm 14 inches Note The minimum paper sizes of the paper cassette for LP 3235 is 140mm 5 1 2 inches x 210mm 8 1 4 inches ...

Page 31: ...nces are 0 7mm for the length and width The angle at the corners must be 90 0 2 Smoothness The paper should have a smooth uncoated surface Paper with a rough or sandy surface can cause blank spaces in the printed output Paper that is too smooth can cause multiple feeding and fogging problems Fogging is a gray background effect MP Tray Size Cassette or MP Tray Size Envelope Monarch 3 7 8 x 7 1 2 in...

Page 32: ...ic grams per square meter g m The shaded part indicates the standard weight Thickness The paper used with the machine should be neither extremely thick nor extremely thin If you are having problems with paper jams multiple feeds and faint printing the paper you are using may be too thin If you are having problems with paper jams and blurred printing the paper may be too thick The correct thickness...

Page 33: ... short grain Short grain paper can cause feeding problems in the machine All paper used in the machine should be long grain Other Paper Properties Porosity Indicates the density of paper fiber Stiffness Limp paper may buckle in the machine resulting in paper jams Curl Most paper naturally tends to curl one way if left unpacked When paper passes through the fixing unit it curls upward a little To p...

Page 34: ...ng process The recommended transparency product is 3M PP2500 Letter A4 Transparencies must be placed on the MP tray with the long edge towards the printer When unloading transparencies e g for clearing jams hold them carefully by the edges to avoid leaving fingerprints on them Labels Labels must be fed to the MP Tray One label can be loaded at a time The basic rule for printing on adhesive labels ...

Page 35: ...th an extra margin of top sheet around the edge Do not remove the extra top sheet from the carrier sheet until after printing is finished The table below lists the specifications for adhesive label paper Postcards Up to 10 postcards can be loaded at a time Fan the stack of postcards and align the edges before loading them in the MP tray Make sure the postcards you are going to set are not curled F...

Page 36: ...nly Extended envelope printing can cause premature printer wear If jams occur try setting less envelopes on the MP tray To avoid jams caused by curled envelopes stack no more than 10 printed envelopes on the output tray Thick Paper Fan the stack of paper and align the edges before loading them in the MP tray Align the edges before loading it in the MP tray Some types of paper have rough edges on t...

Page 37: ...g process and must not be affected by silicone oil Do not use paper with any kind of surface treatment such as the type of paper commonly used for calendars Recycled paper Select recycled paper that meets the same specifications as the white bond paper except for whiteness Refer to Paper Specifications on page 2 2 Note Before purchasing recycled paper test a sample on the machine and check that th...

Page 38: ... 75 to 90g m2 Normal2 Yes Labels Yes No 105 to 135g m2 Heavy1 No Bond Yes Yes 90 to 105g m2 Normal3 Yes Recycled Yes Yes 75 to 90g m2 Normal2 Yes Vellum Yes No 60 to 64g m2 Light No Rough Yes Yes 90 to 105g m2 Normal3 Yes Letterhead Yes Yes 90 to 105g m2 Normal3 Yes Color Yes Yes 90 to 105g m2 Normal3 Yes Prepunched Yes Yes 75 to 90g m2 Normal2 Yes Envelope Yes No 170 to 220g m2 Heavy3 No Cardstoc...

Page 39: ...2 12 Paper Handling ...

Page 40: ... Loading Paper This chapter explains the procedure for loading paper in the cassette and the MP tray Loading Paper into the Cassette 3 2 Loading Paper into MP Multi Purpose Tray 3 6 Loading Envelopes into the MP Tray 3 8 ...

Page 41: ...izes are marked on the inside of the paper cassette 2 Turn the paper size dial so that the size of the paper you are going to use appears in the paper size window IMPORTANT When pulling the cassette out of the printer ensure it is supported and does not fall out Note When the paper size dial is set to OTHER the paper size must be set into the printer on the operation panel Refer to the Custom Pape...

Page 42: ...st them to the desired paper size 5 Pull the release lever and slide the paper stopper to the desired paper size When using non standard size paper move the paper guides and paper stopper all the way out insert the paper then adjust the paper guides and paper stopper to the size of the paper Adjust them so that they are in light contact with the paper 6 Fan the paper then tap it on a level surface...

Page 43: ...g down and the paper is not folded curled or damaged 8 Set the stack of paper so that it is under the clips as shown 9 Insert the paper cassette into the slot in the printer Push it straight in as far as it will go Note Do not load more paper than will fit under the load limits on the paper guides ...

Page 44: ...oading Paper 3 5 There is a paper gauge on the right side of the front of the paper cassette to indicate the remaining paper supply When paper is exhausted the pointer will go down to the level of empty ...

Page 45: ...an the media paper transparencies then tap it on a level surface to avoid media jams or skewed printing 2 Pull the MP tray towards you until it stops 3 Pull out the subtray 4 Adjust the position of the paper guides on the MP tray Standard paper sizes are marked on the MP tray For standard paper sizes slide the paper guides to the position marked correspondingly ...

Page 46: ...lap on the front or left side until they stop 6 Set the MP tray paper size on the printer s operation panel Refer to the Setting MP Tray Paper Size section in the Advanced Operation Guide Note If the paper is considerably curled in one direction for example if the paper is already printed on one side try to roll the paper in the opposite direction to counteract the curl Printed sheets will then co...

Page 47: ...ar unit 4 Follow the steps of Loading Paper into MP Multi Purpose Tray on page 2 6 When loading envelope place with the envelope flap closed and keep the printing side face up Insert envelope against the guide with the flap on the front or left side until they stop CAUTION The fuser unit inside the printer is hot Do not touch it with your hands as it may result in burn injury Correct Correct Incor...

Page 48: ...nt from your PC and use the application software included in the CD ROM Connections 4 2 Changing Network Interface Parameters 4 4 Printing a Network Interface Status Page 4 12 Installing the Printer Driver 4 13 Printing from Application Software 4 19 Status Monitor 4 20 Uninstalling Software Windows PC 4 24 ...

Page 49: ...b concentrator 2 Connect the other side of the network cable to the network interface connector at the rear of this machine and the hub Connecting the Parallel Cable Follow the steps as below for connecting the parallel cable 1 Connect the parallel cable to the parallel interface connector at the rear of this machine 2 Connect the other side of the parallel cable to the computer s interface connec...

Page 50: ...rd to a power outlet 3 Press the Power Switch to On The printer begins to warm up Note Ensure the printer s power switch is off Only use the power cord supplied with the printer IMPORTANT If you install the starter toner container and switch on the power after a moment the message Please wait Adding toner is displayed When the printer is first switched on after toner installation there will be a d...

Page 51: ...h time you press U or V the selection changes Refer to the explanations below when specifying the settings Set this item to On when you connect to a network using TCP IP Submenu has items including DHCP IP Address Subnet Mask Gateway and Bonjour Set this item to On when you connect to a network using TCP IP IPv6 Submenu has items including RA Stateless and DHCPv6 Note After all network related set...

Page 52: ...ou are setting IP Address Subnet Mask and Gateway 4 Press U or V to select On or Off as the setting for DHCP and Bonjour For the IP Address Subnet Mask and Gateway settings press U or V to move the blinking cursor to the number you want to change 000 to 255 Use Y and Z to move the cursor right and left 5 Press OK 6 Press MENU The display returns to Ready Note Check with your network administrator ...

Page 53: ...ing question mark appears while you are setting RA Stateless and DHCPv6 4 Press U or V to select On or Off as the setting for RA Stateless and DHCPv6 5 Press OK 6 Press MENU The display returns to Ready NetWare AppleTalk IPP SSL Server IPSec and Security Level settings 1 Press MENU 2 Press U or V repeatedly until Security appears Note Check with your network administrator for the network address s...

Page 54: ...ator password and press OK The default setting is the numeric part of your printer s model name If you use LP 3235 enter 2020 Set this item to On when you connect to a network using NetWare In submenu frame mode can be selected from Auto 802 3 Ethernet II SNAP and 802 2 AppleTalk must be activated On for networking with Macintosh computers Set this item to On when you connect to a network using IP...

Page 55: ...e is set to Off use U or V to select On and press OK 2 Press Z 3 Press OK A blinking question mark appears Each time you press U or V the selection changes 4 Display the item you want to set and press OK 5 Press MENU The display returns to Ready Security Level High NetWare On Frame Type Auto Frame Type 802 3 Frame Type Ethernet II Frame Type 802 2 Frame Type SNAP Frame Type Auto ...

Page 56: ... 2 Press OK A blinking question mark appears 3 Press OK again 4 Press MENU The display returns to Ready IPP This section explains the procedure for enabling IPP 1 Enter the administrator ID and password Then if IPP is set to Off use U or V to select On 2 Press OK A blinking question mark appears 3 Press OK again 4 Press MENU The display returns to Ready AppleTalk On AppleTalk On IPP On IPP On ...

Page 57: ...u want to set and press OK A blinking question mark appears 4 Select On or Off using U or V 5 Press OK 6 Press MENU The display returns to Ready IPSec This section explains the procedure for enabling IPSec 1 Enter the administrator ID and password Then if IPSec is set to Off use U or V to select On 2 Press OK A blinking question mark appears 3 Press OK again 4 Press MENU The display returns to Rea...

Page 58: ...Connecting and Printing 4 11 Security Level Security Level is primarily a menu used by service personnel for maintenance work There is no need for customers to use this menu Security Level High ...

Page 59: ...ance are as follows Restart Printer Service 1 Press MENU 2 Press U or V repeatedly until Adjust Maintenance appears 3 Press Z while Adjust Maintenance is displayed 4 Press U or V repeatedly until Service appears 5 Press Z 6 Press U or V repeatedly until Print Network Status Page appears 7 Press OK A question mark appears 8 Press OK Processing appears and a status page is printed out 9 When printin...

Page 60: ...ck Run Setup exe The Notice screen appears 3 Select View License Agreement to read the information and select Accept to proceed 4 Click Install Software Installation Method screen appears 5 Select Express Mode or Custom Mode as the installation method Express Mode If the printer is connected via USB or a network and is turned on the installer detects the printer Select Express Mode to perform a st...

Page 61: ...Printing System screen If no printer is discovered ensure the printer is plugged in and connected to the computer s USB or Network port then check Refresh to search printers again 2 Select the printer you want to install and click Next 3 Confirm the settings and click Install Printer driver installation starts 4 Installation Completed screen appears Click Finish to return to the main menu Note If ...

Page 62: ...tings and click Install Printer driver installation starts 5 Installation Completed screen appears Click Finish to return to the main menu Note When you want to add or edit the port connected to the printer select the printer and Custom Select then click Next Add Standard TCP IP Printer Port Wizard appears Follow the steps in the wizard to add or edit the port Note During any point in the installa...

Page 63: ...ram starts up 7 Choose Select Destination Installation Type and then install the printer driver as directed by the instructions in the installation software This completes the printer driver installation Next specify the print settings If an IP or AppleTalk connection is used the settings below are required If a USB connection is used the printer is automatically recognized and connected Note In a...

Page 64: ...mbol to add the installed printer driver 10Click the IP icon for an IP connection or the AppleTalk icon for an AppleTalk connection and then enter the IP address and printer name 11Select the installed printer driver and click Add 12Select the options available for the printer and click Continue ...

Page 65: ...4 18 Connecting and Printing 13The selected printer is added This completes the printer setup procedure ...

Page 66: ...nu select Print The Print dialog box appears 3 Click the drop down list of printer names All the installed printers are listed Click the name of the printer 4 Use Number of copies to enter the number of copies required Up to 999 copies can be printed For Microsoft Word we recommend that you click Options and specify Use printer settings for the Default tray 5 To start printing click OK Note You ca...

Page 67: ...he Version Info button in the KX Driver Properties dialog box Then click Status Monitor in the Version Info dialog box to launch the Status Monitor Exiting the Status Monitor Use either of the methods listed below to exit the Status Monitor Exit manually Right click the Status Monitor icon in the taskbar and select Exit in the menu to exit the Status Monitor Exit automatically The Status Monitor a...

Page 68: ... used to notify you For information on the sound notification settings refer to Status Monitor Settings on page 4 22 Status Monitor icon The Status Monitor icon is displayed in the taskbar notification area when the Status Monitor is running When you position the cursor over the icon the printer name appears ...

Page 69: ... to enter text you would like to hear played for events Although a sound file is unnecessary this function is applicable for Windows XP and Windows Vista To use this function follow these steps 1 Select Enable Event Notification 2 Select an event or sound file to use with the text to speech function in Available events 3 Click Browse to notify the event by sound file Select Use Text to speech to s...

Page 70: ... Appearance tab is contains the following items Enlarge window Doubles the size of the Status Monitor window Always on top Positions the Status Monitor in front of other active windows Transparency Displays the Status Monitor as a transparent window ...

Page 71: ...Software The Uninstaller wizard appears 4 Select the software package to remove 5 Click Uninstall The uninstaller starts 6 When Uninstall complete screen appears click Next 7 Select whether you restart your computer or not click Finish IMPORTANT On Macintosh computers because the printer settings are specified using a PPD PostScript Printer Description file the software cannot be uninstalled using...

Page 72: ...Maintenance This chapter explains how to replace the toner container and clean the printer General Information 5 2 Toner Container Replacement 5 2 Cleaning the Printer 5 7 Prolonged Non Use and Moving of the Printer 5 8 ...

Page 73: ...tainer packed with the new printer is a starter toner container The starter toner container lasts an average of 10 000 pages LP 3245 7 500 pages LP 3240 6 000 pages LP 3235 Toner Kits For best results we recommend that you only use genuine TA Triumph Adler Parts and Supplies Should any damage be caused by the application of a toner other than the original TA Triumph Adler toner then this damage is...

Page 74: ...he toner container always replace the waste toner box at the same time If this box is full the printer may be damaged or contaminated by the waste toner that may spill over the box 1 Open the top cover CAUTION Do not attempt to incinerate the Toner Container Dangerous sparks may cause burns IMPORTANT During toner container replacement temporarily move storage media and computer supplies such as fl...

Page 75: ...disposal 4 Take the new toner container out of the toner kit 5 Shake the new toner container at least 10 times as shown in the figure in order to distribute the toner evenly inside the container 6 Remove the label from the toner container 7 Set the new toner container in the printer and push down on the top of the toner container to install it firmly in place as shown at the left 8 Close the top c...

Page 76: ...er While holding the waste toner box press the lock lever and then gently remove the waste toner box 2 Close the cap to the old waste toner box after removing the box from the printer 3 To prevent toner from spilling put the old waste toner box in the plastic bag contained in the toner kit and discard it later according to the local code or regulations for waste disposal Note Remove the waste tone...

Page 77: ...own at the left When the box is set correctly it will snap into place 6 Make sure that the waste toner box is correctly inserted and close the left cover After replacing the toner containers and the waste toner box clean the internal parts For instructions refer to Cleaning the Printer on page 1 7 ...

Page 78: ...tainer replacement 1 Open the top cover and MP tray 2 Lift the developer unit together with the toner container out of the printer 3 Use a lint free cloth to clean dust and dirt away from the registration roller metal 4 Insert the developer unit together with the toner container back into the machine 5 Close the top cover and MP tray ...

Page 79: ... the power cord from the wall outlet We recommend you consult with your dealer about the additional actions you should take to avoid possible damage that may occur when the printer is used next time Moving the Printer When you move the printer Move it gently Keep it as level as possible to avoid spilling toner inside the printer Be sure to consult a service technician before attempting long distan...

Page 80: ...o handle printer problems understand messages and clean paper jams General Guidelines 6 2 Print Quality Problems 6 3 Error Messages 6 5 Ready Data and Attention Indicators 6 11 Clearing Paper Jams 6 12 If a problem cannot be corrected contact your service technician ...

Page 81: ...page 6 12 Nothing lights on the operation panel even when power is turned on and the fan makes no noise Check the power cord is property plugged into power outlet Connect both ends of the power cord securely Try replacing the power cord Refer to Installation Guide for more information Check the power switch is in the On position Refer to the Installation Guide for more information The printer prin...

Page 82: ... information on installing the toner container Refer to Toner Container Replacement on page 1 2 Check that the application software is correctly operated Black or white vertical streaks Check the operation panel for toner If the Toner low message is displayed install a new toner kit To replace the toner container refer to Toner Container Replacement on page 1 2 Faint or blurred printing Check the ...

Page 83: ...er Replacement on page 1 2 Check the print density Display the print menu from the operation panel and select a lighter density setting Dirt on the top edge or back of the paper Clean the parts in the paper paths such as the paper cassette etc Printing incomplete or out of position Check that the application software is correctly operated Refer to Tips on page 6 2 Printed Results Corrective Action...

Page 84: ...ce 0123456 represents a mechanical error 0 1 2 Call for service The printer does not operate when this message is displayed The total number of pages printed is also indicated e g 0123456 Canceling data Displayed when data is being canceled Cassette not loaded The corresponding paper cassette is not installed Install the cassette The cassette number can be 1 topmost to 4 bottom Change envelope swi...

Page 85: ...ta Turn the printer off and unplug it from the mains power supply Then contact your service representative or authorized service center See the back page of this manual for the relevant phone numbers Exceeded Max out Press GO This message is displayed when the Job Accounting function is enabled and an attempt has been made to exceed the print limit set for each account To return the printer to the...

Page 86: ...aper feeding After selecting a paper source and pressing MENU Paper Settings appears By pressing the U the paper type settings menu appears After setting the correct paper type press OK and printing starts Load MP Tray A4 PLAIN There is no paper cassette installed in the printer that matches the paper size and paper type of the print job Set paper in the MP tray Press GO to resume printing Note th...

Page 87: ...r to Storage Error Codes on page 6 10 To ignore the RAM disk error press GO Replace toner Clean printer Toner has run out in the toner container Replace the toner container using a new toner kit The printer does not operate when this message is displayed Size error Cassette A4 The paper size of the actual paper on which the print job was printed is shorter than the intended paper size the paper si...

Page 88: ...ounting Job Accounting selection setting section in the Advanced Operation Guide ID error Wrong ID The ID or Password entered for the Security Administrator or Job Accounting function is not correct Check the ID or Password For more information refer to Security section Admin Administrator settings section and Job Accounting Job Accounting selection setting section in the Advanced Operation Guide ...

Page 89: ...red reached the limit value and no more can be saved Either delete some unnecessary jobs etc or increase the limit 98 An unreadable page was found in a job The job is damaged 99 A print job for the specified ID does not exist in the hard disk Code Meaning 01 The printer does not support the CF card inserted or the CF card is broken Insert the correct CF card For more information refer to Memory Ca...

Page 90: ...Expand printer memory Indicator Description Flashing Indicates an error that you can resolve On Indicates that the printer is ready and on line The printer prints the data it receives Off Indicates that the printer is off line Data can be received but will not be printed Also indicates when printing is automatically stopped due to an error condition Flashing Indicates that a data is being received...

Page 91: ...printer will resume printing Possible Paper Jam Locations The figure below shows the printer s paper paths including the optional paper feeder The locations where paper jams might occur are also shown here with each location explained in the table below Paper jams can occur in more than one component on the paper paths Face up Tray PT 310 Paper Feeder PF 310 Paper jam message Paper jam location De...

Page 92: ...ssage display to provide simple instructions for clearing jams Press when the paper jam message has appeared Then a help message will appear to facilitate jam clearing in the location Paper jam Cassette 1 to 4 B Paper is jammed at the paper cassette The cassette number can be 1 topmost to 4 bottom LP 4235 1 and 2 page 6 15 Paper jam Duplexer C Paper is jammed inside the duplex section page 6 16 Pa...

Page 93: ...14 Troubleshooting MP Tray Paper is jammed at the MP tray Remove the jammed paper using the procedure given below 1 Remove the paper jammed at the MP tray 2 Open and close the top cover to clear the error ...

Page 94: ...er Feeder 1 Pull out the cassette or optional paper feeder 2 Remove any partially fed paper 3 Push the cassette back in securely The printer warms up and resumes printing Note Check to see if paper is loaded correctly If not reload the paper ...

Page 95: ...cedure given below 1 Pull the paper cassette all the way out of the printer 2 Open the duplexer s cover and remove any jammed paper 3 Insert the paper cassette into the slot in the printer The printer warms up and resumes printing CAUTION Do not touch parts in this area because it may result in burn injury ...

Page 96: ...rom the printer If the jammed paper appears to be pinched by rollers pull it along the normal running direction of the paper 5 Insert the developer unit together with the toner container back into the machine 6 Close the top cover and MP tray The printer warms up and resumes printing Note If you cannot find a paper jam try checking inside the rear of the printer Refer to Rear Unit on page 6 18 ...

Page 97: ...se the paper transfer unit For details refer to the User s Manual for the envelope feeder Bulk Paper Feeder Paper is jammed at the optional bulk paper feeder Detach the bulk paper feeder from the printer by sliding with the rail away from the printer holding the bulk paper feeder by both hands If paper is partially fed out from the feeder s output slot pull the paper out by hand Note If you cannot...

Page 98: ...stem 7 8 Report Print 7 11 USB Memory USB flash memory selection 7 17 Job Box 7 19 Counter Viewing the counter value 7 25 Paper Settings 7 26 Print Settings 7 34 Network Network settings 7 47 Device Common Selecting Setting the common device 7 52 Security 7 64 Job Accounting Job Accounting selection setting 7 72 Admin Administrator settings 7 78 Adjust Maintenance Adjust Maintenance selection sett...

Page 99: ...are You can also access the printer s various settings from a remote location by using the control panel the printer driver or other utilities such as the Status Monitor Utility Other printer utilities can be installed using the CD ROM supplied with the printer The chapter describes the operation panel in detail including its menus and the procedures for changing various printer settings Note Chan...

Page 100: ...the top of the printer has a 2 line by 16 character liquid crystal display LCD eight keys and three indicators LED Messages that appear on the display and functions of indicators and keys are explained in this chapter Indicators Message Display Cursor Key GO Key MENU Key OK Key Cancel Key ...

Page 101: ...message will take several minutes Please wait Adding toner Toner is currently being replenished This message may be displayed during continuous printing of a large volume of pages which require a large amount of toner such as with photographs etc Ready The printer is ready to print Processing The printer is receiving data to print This is also shown when the printer is reading a CF card USB memory...

Page 102: ...a it receives Off Indicates that the printer is off line Data can be received but will not be printed Also indicates when printing is automatically stopped due to an error condition For details refer to the Troubleshooting section in the Operation Guide Flashing Indicates that a data is being received On Indicates either that data received is being processed before printing starts or that data rec...

Page 103: ...ile using menu system Canceling a Printing Job 1 While the printer displays Processing press Cancel Print Cancel appears on the message display followed by the job name currently in progress 2 Press U or V to display the desired job and OK Canceling data appears on the message display and printing stops after the current page is printed MENU Key MENU lets you enter the menu system to change the se...

Page 104: ...uestion mark may be pressed when the paper jam message has appeared on the message display A help message will then appear to facilitate jam clearing in the location When Use alternative is shown in the message display use the U and V key to select the paper source OK Key This key is used to Finalize settings of numeric values and other selections Set the paper source when Use alternative is shown...

Page 105: ...age display Entering the Mode Selection Menu Press MENU when Ready Please wait Sleeping or Processing is indicated on the printer message display The mode selection menu is displayed Note Settings that are received from application software and the printer driver will take priority over settings made in the operation panel IMPORTANT Job Box is displayed in the selection menu when the hard disk or ...

Page 106: ...displayed before the second sub menu Setting a Menu Select the desired menu and press OK to set or change the configuration Press U or V to display the desired item and OK to finalize the value or selections set Cancelling Menu Selection If you press MENU when a menu is selected the message display returns to Ready Paper Settings Indicates that there is a sub menu Type Adjust CUSTOM 1 Indicates th...

Page 107: ...lection menu is displayed For example Report Print 2 Each time you press U or V the selection changes Report Print USB Memory Job Box Counter Paper Settings Print Settings Network Device Common Security Job Accounting Admin Adjust Maintenance Note If you use the mode first selected when the printer is turned on Report Print is displayed For the second and subsequent times the last menu option you ...

Page 108: ...until Report Print appears Note that menus shown in the list may vary depending on which optional units installed in the printer Print Menu Map The printer prints a full list of the menu selection system menu map 1 Press Z while Report Print is displayed 2 Print Menu Map appears In other displays press U or V repeatedly until the map appears 3 Press OK A question mark appears 4 Press OK The messag...

Page 109: ...7 12 Using the Operation Panel Menu Map Sample Menu Map Printer Firmware version ...

Page 110: ...the printer prints a status page For a sample status page and its full description refer to the next section Understanding the Status Page Understanding the Status Page The numbers in the following diagram refer the items explained below the diagram The items and values on the status page may vary depending on the printer s firmware version Print Status Page Network Memory Emulation Counters Toner...

Page 111: ...ormation This information shows the settings for all interfaces installed in the printer 6 Memory This item shows Standard memory in the printer Option memory slot status in megabytes Total memory in the printer Current status of the RAM disk 7 Emulation This item shows all available emulations of the printer The PCL 6 emulation is set as default when the printer is shipped from the factory The em...

Page 112: ...le Report Print is displayed 2 Press U or V repeatedly until Print Hard Disk File List appears 3 Press OK A question mark appears 4 Press OK again The message Processing appears and the printer prints a list of files stored in a hard disk Print RAM Disk File List This allows you to print a list of the files on the RAM disk 1 Press Z while Report Print is displayed 2 Press U or V repeatedly until P...

Page 113: ... Print is displayed 2 Press U or V repeatedly until Print Mem Card File List appears 3 Press OK A question mark appears 4 Press OK again The message Processing appears and the printer prints a list of files stored in a CompactFlash card IMPORTANT This message will be displayed when the CompactFlash card installed in the printer Print Mem Card File List ...

Page 114: ... question mark appears 4 Press OK again The folder or file appears For example Folder 1 Each time you press U or V the next folder or file appears in succession To view lower level folders or files press Z For example Folder 2 To view folders or files on still lower levels press Z For example File 3 You can move between the folder levels by pressing U and V or Y and Z 5 Press OK A question mark ap...

Page 115: ...stored in a USB memory Remove Device Removing the USB flash memory Specifies the setting for USB flash memory removal 1 Press Z while USB Memory is displayed 2 Press U or V repeatedly until Remove Device appears 3 Press OK A question mark appears 4 Press OK again Menu display ends and the USB flash memory device can be removed Print File List Printing a list of the files on a USB flash memory This...

Page 116: ...d Job Primary function To later print additional copies To proof the first copy before printing multiple copies To hold the document in printer to prevent unauthorized access To electronically store documents such as fax cover pages Start storing by Printer driver Printer driver Printer driver Printer driver On terminating print setting from application software Prints simultaneously Prints one co...

Page 117: ...es Number of copies deleted Job Box Configuration Job Box Configuration 1 Press MENU 2 Press U or V repeatedly until Job Box appears Note that menus shown in the list may vary depending on which optional units installed in the printer Quick Copy Using Quick Copy This mode enables you to print the requested number of copies of a job simultaneously storing the job on the hard disk RAM disk When addi...

Page 118: ...1 through 6 in the above section to let the title of the job to be deleted displayed 2 When the title of the job to be deleted is displayed e g Report press OK The cursor _ below the copy count starts to blink 3 Press V repeatedly until Delete appears below the title 4 Press OK The message Processing appears and the stored quick copy job is deleted Using Proof and Hold When you print multiple copi...

Page 119: ...l to the desired job title 7 Press OK The number of copies to be printed can be set To increase the copy count press U to decrease the copy count press V 8 Press OK to finalize the copy count The printer prints the specified number of copies for the job Deleting a Proof and Hold Job 1 Follow steps 1 through 6 in the above section to let the title of the job to be deleted displayed 2 When the title...

Page 120: ...ss Z while Job Box is displayed 2 Press U or V repeatedly until Private Stored appears The name entered in the printer driver Harold in this example also appears 3 Press OK A blinking question mark appears before the user name 4 Press U or V to display the desired user name Arlen in this example 5 Press OK The user name and the job name Agenda in this example entered in the printer driver appear w...

Page 121: ...s deleted Job Box Configuration This allows you to change the number of print jobs that can be stored on the hard disk and disk capacity allocated to each function Changing the Maximum Number of Quick Copy This changes maximum number of Quick Copy from 0 to 50 The default is 32 1 Press Z while Job Box is displayed 2 Press U or V repeatedly until Job Box Configuration appears 3 Press Z 4 Press U or...

Page 122: ...s the total number of pages printed You cannot change the displayed number 1 Press MENU 2 Press U or V repeatedly until Counter appears 3 Press Z Printed Pages appears as he total number of pages printed E g 2000 4 Press MENU The display returns to Ready Counter Printed Pages 0002000 ...

Page 123: ...s are as follows MP Tray Size Setting MP tray paper size MP Tray Type Setting the MP tray paper type Cassette 1 to 4 Size Setting the cassette paper size Cassette 1 to 4 Type Setting the cassette paper type Type Adjust Creating custom paper type Reset Type Adjust Resetting the custom paper type 1 Press MENU 2 Press U or V repeatedly until Paper Settings appears Paper Settings ...

Page 124: ...splay the desired paper size The message display toggles through the following paper sizes Env Monarch Envelope 10 Envelope 9 Envelope 6 Envelope DL Envelope C5 A6 B6 A5 B5 ISO B5 A4 Executive Letter Legal Custom Oficio II Statement Folio Youkei 2 Youkei 4 16K Hagaki OufukuHagaki 5 Press OK 6 Press MENU The display returns to Ready MP Tray Type Setting the MP tray paper type You can use this to se...

Page 125: ...e going to use appears in the paper size window To load a non standard paper size sizes other than A5 A4 B5 and Letter into a paper cassette refer to the custom paper sizes listed on page 7 29 If the PF 310 optional paper feeder is installed use the same procedure to load paper into the paper feeder cassettes 1 Pull the cassette out of the printer and set the paper size using the paper size dial 2...

Page 126: ...ize will appear for the standard paper cassette and Cassette2 Size Cassette3 Size LP 3240 3245 and Cassette4 Size LP 3240 3245 will appear for the optional paper feeders 3 Press OK A blinking question mark appears 4 Press U or V to display the desired paper size The message display toggles through the following paper sizes Envelope C5 A6 LP 3240 3245 only A5 B5 ISO B5 A4 Executive Letter Legal Cus...

Page 127: ... the unit of measurement is set press V X Dimension appears the paper width setting 2 Press OK A blinking cursor _ appears 3 Press U or V to increase or decrease the value of the figure where the cursor is blinking and display the desired width Acceptable paper widths are 140 to 216 mm 5 1 2 to 8 1 2 inches 4 Display the paper width and press OK 5 When the width is set press V Y Dimension appears ...

Page 128: ...ings is displayed 2 Press U or V repeatedly until Cassette Type appears If optional paper feeders are added Cassette1 Size will appear for the standard paper cassette and Cassette2 Size Cassette3 Size LP 3240 3245 and Cassette4 Size FS LP 3240 3245 will appear for the optional paper feeders 3 To change paper type press OK A blinking question mark appears 4 Press U or V to display the desired paper...

Page 129: ...ress Z while Paper Settings is displayed 2 Press U or V repeatedly until Type Adjust appears 3 Press OK A blinking question mark appears 4 Press U or V to display the desired paper type The display changes as shown below PLAIN TRANSPARENCY PREPRINTED LABELS BOND RECYCLED VELLUM ROUGH LETTERHEAD COLOR PREPUNCHED ENVELOPE CARDSTOCK THICK HIGH QUALITY CUSTOM 1 to 8 5 Press OK 6 Press Z and proceed to...

Page 130: ...th appears 3 Press OK A blinking question mark appears 4 Select Enable or Disable using U or V For details of the default setting for each paper type refer to Paper Specifications on page 2 2 5 Press OK 6 Press MENU The display returns to Ready The custom paper type setting is completed Reset Type Adjust Resetting the custom paper type Reset all the custom paper type that was set in Type Adjust Cr...

Page 131: ...e Selecting the paper feed source You can select the paper source from which the printer feeds paper as the default If an optional paper feeder s is installed it is also available for the default paper source 1 Press Z while Print Settings is displayed 2 Press U or V repeatedly until Paper Source appears 3 To change the current paper feed source press OK A blinking question mark appears 4 Press U ...

Page 132: ... 3 Press OK A blinking question mark appears 4 Press U or V until Auto or Fixed appears 5 Press OK 6 Press MENU The display returns to Ready When the Paper Runs Out During Printing When Paper Feed Mode is set to Fixed if the paper in the cassette runs out during printing Load Cassette 1 is displayed and the printer stands by In this event either replenish the paper in the empty cassette or use the...

Page 133: ...e joined together along their short edge In selecting a binding type you must also consider the orientation of the printed page You can use long edge or short edge binding with either landscape or portrait printing Depending on the binding type and print orientation the duplexer provides four types of binding These are 1 portrait long edge 2 portrait short edge 3 landscape long edge and 4 landscap...

Page 134: ... MENU The display returns to Ready Override A4 LT Overriding difference between A4 and Letter When the Override A4 LT is turned On using the operation panel the printer ignores the difference between A4 and Letter paper sizes Printing is performed without an error message even if the actual paper size in the current cassette differs from the paper size formatting the job By default this feature is...

Page 135: ... change the emulation mode according to the data received when printing In addition to KPDL AUTO emulation you can use the operation panel to set another emulation mode that is used very often The default setting is PCL 6 1 Press MENU 2 Press U or V repeatedly until Emulation appears on the message display 3 Press OK A blinking question mark appears 4 Press U or V repeatedly until KPDL AUTO appear...

Page 136: ...hard disk In this menu you can also set the type and pitch for Courier and Letter Gothic as well as to print a font list 1 Press Z while Print Settings is displayed 2 Press U or V repeatedly until Font Select appears 3 To select an internal font make sure that Internal is displayed and press Z The display changes If Internal is not displayed press OK then press U or V until it appears To select an...

Page 137: ...oose Letter Gothic here instead 5 Press OK A blinking question mark appears 6 Select Regular or Dark using U or V 7 Press OK 8 Press MENU The display returns to Ready Changing the Default Font Size You can change the size of the default font If you selected a proportional font the character size can also be changed 1 Press Z while Print Settings is displayed 2 Press U or V repeatedly until Font Se...

Page 138: ...ch in 0 01 character per inch increments Use Z or Y to move the cursor right and left 7 When the desired size is displayed press OK 8 Press MENU The display returns to Ready Code Set Setting the code set You can change the character code set Available character code sets vary depending on the current font The default is IBM PC 8 1 Press Z while Print Settings is displayed 2 Press U or V repeatedly...

Page 139: ...e This printer incorporates the KIR Kyocera Image Refinement smoothing function KIR users the software to enhance resolution resulting in high quality printing at resolution of 600 dpi and 300 dpi The default is On KIR has no effect on the printing speed 1 Press Z while Print Quality is displayed 2 Press U or V repeatedly until KIR Mode appears 3 Press OK A blinking question mark appears 4 Select ...

Page 140: ... Selecting the print resolution You can set the default print resolution in four ways 300dpi 600dpi Fast 1200 mode and Fine 1200 mode The clarity of printed characters and graphics becomes sharper in this order 1 Press Z while Print Quality is displayed 2 Press U or V repeatedly until Resolution appears 3 Press OK A blinking question mark appears 4 Select Fine 1200 mode Fast 1200 mode 600 dpi or 3...

Page 141: ... 2 Press U or V repeatedly until Page Set appears Copies Number of copies You can set the number of copies of each page to be printed for the current interface 1 Press Z while Page Set is displayed 2 Press U or V repeatedly until Copies appears 3 Press OK A blinking cursor _ appears 4 Press U or V to increase or decrease respectively the value at the blinking cursor The number of copies can be set...

Page 142: ...display returns to Ready CR Action Carriage Return This procedure instructs the printer what to do when it receives a carriage return code 0DH CR only A carriage return is performed Default CR and LF A linefeed and carriage return are performed Ignore CR The carriage return is ignored 1 Press Z while Page Set is displayed 2 Press U or V repeatedly until CR Action appears 3 Press OK A question mark...

Page 143: ...7 46 Using the Operation Panel 3 Press OK A blinking question mark appears 4 Select On or Off using U or V 5 Press OK 6 Press MENU The display returns to Ready Wide A4 Off ...

Page 144: ...sport TCP UDP layer and application layer The interface layer is a key layer in the TCP IP system that provides an abstracted interface that is not dependent on the link communication line frame relay or Ethernet etc to the IP module IP layer This means that the IP module can use this abstracted interface which is not dependent on the link type to exchange IP packets back and forth with the link l...

Page 145: ...sending and receiving of Internet data IP packets IP addresses can be either destination addresses or source addresses Specifically an IP address is a bit string consisting of a host address or host section that identifies a computer host connected to the Internet and a network address or network section that identifies the network to which that computer belongs or more specifically the computer s...

Page 146: ...ly the value at the blinking cursor You can set any value between 000 and 255 Use Y and Z to move the cursor right and left 5 Display the desired subnet mask and press OK 6 Press MENU The display returns to Ready Gateway Gateway setting Gateway generally refers to a protocol conversion device used to allow networks with differing protocol systems to interconnect For example a Gateway device is req...

Page 147: ...onjour 1 Press Z while TCP IP On is displayed 2 Press U or V repeatedly until Bonjour appears 3 Press OK A blinking cursor _ appears 4 Select On or Off using U or V 5 Press OK 6 Press MENU The display returns to Ready TCP IP IPv6 IPv6 settings This selects the settings for TCP IP IPv6 TCP IP IPv6 is based on the current Internet protocol TCP IP IPv4 IPv6 is the next generation Internet protocol an...

Page 148: ...DHCPv6 DHCPv6 setting DHCPv6 is the next generation of the Internet s Dynamic Host Configuration Protocol and supports IPv6 It extends the BOOTP startup protocol that defines the protocols used for transferring configuration information to hosts on the network DHCPv6 permits the DHCP server to use its expanded functionality to send configuration parameters to an IPv6 node Because the network addre...

Page 149: ...MSG Language Selecting the message language You can select the language of the message display by following the procedure given below You can optionally download messages in other languages Contact your service technician for information 1 Press Z while Device Common is displayed 2 Press U or V repeatedly until MSG Language appears The default message language is English 3 To change the language p...

Page 150: ...irm Key confirmation tone setting When On is selected in this setting a tone sounds each time a key is used The default setting is On 1 Press Z while Buzzer is displayed 2 Press U or V repeatedly until Key Confirm appears 3 Press OK A blinking question mark appears 4 Select On or Off using U or V 5 Press OK 6 Press MENU The display returns to Ready Job End Job completed tone setting When On is sel...

Page 151: ...rk appears 4 Select On or Off using U or V 5 Press OK 6 Press MENU The display returns to Ready Error Error tone setting When On is selected in this setting a tone sounds when a problem such as running out of paper or a paper jam occurs during printing The default setting is On 1 Press Z while Buzzer is displayed 2 Press U or V repeatedly until Error appears 3 Press OK A blinking question mark app...

Page 152: ...et the desired data size for the RAM disk as described in the following section This allows you to perform the following operations on the RAM disk 1 Press Z while Device Common is displayed 2 Press U or V repeatedly until RAM Disk Mode appears 3 Press OK A blinking question mark appears 4 Select On or Off using U or V 5 Press OK 6 Press MENU The display returns to Ready Note The printer supports ...

Page 153: ... returns to Ready Turn the printer off and then on again The selected RAM disk size is activated after the printer is restarted Hard Disk Using the optional hard disk Installing the optional hard disk into the printer allows you to perform the following operations on the hard disk Format Formatting hard disk When an optional hard disk is inserted into the printer for the first time it must be form...

Page 154: ...e display returns to Ready Memory Card Using the CF card The printer is equipped with a slot for a CF card memory card By inserting a CF card into the printer the following operations become available Format Formatting CF card For details about the handling of the CF card refer to CompactFlash CF Card on page 8 6 1 Press Z while Device Common is displayed 2 Press U or V repeatedly until Memory Car...

Page 155: ...Error detection setting This specifies the settings for the detection methods used for duplex printing errors and for paper size and paper type errors when the paper source is fixed The options available in Error Handling are as follows Duplex Duplex printing error detection setting Paper Mismatch Detection settings for paper size type errors when the paper source is fixed 1 Press Z while Device C...

Page 156: ... returns to Ready Paper Mismatch Detection settings for paper size type errors when the paper source is fixed Turn this setting to Off if you want to continue printing even if the paper size or type you specified is different from the fixed paper source or turn it to On to have the paper feed error displayed 1 Press Z while Error Handling is displayed 2 Press U or V repeatedly until Paper Mismatch...

Page 157: ...layed 2 Press U or V repeatedly until Timer appears Form Feed Time Out Automatic form feed timeout setting If the printer receives no data for a certain period it will time out and release the current interface It prints whatever data it has in its buffer and feeds out the page The default form feed timeout time is 30 seconds 1 Press Z while Timer is displayed 2 Press U or V repeatedly until Form ...

Page 158: ...ault time is 30 minutes 1 Press Z while Timer is displayed 2 Press U or V repeatedly until Sleep Timer appears 3 To change the timeout time press OK A blinking cursor _ appears 4 Press U or V to increase or decrease the value at the blinking cursor and set the desired time The timer can be set between 1 and 240 minutes Use Y and Z to move the cursor right and left 5 Press OK 6 Press MENU The displ...

Page 159: ...SB memory err Press GO For setting the auto error clear recovery time refer to the next section Error Clear Timer Setting the error clear time 1 Press Z while Timer is displayed 2 Press U or V repeatedly until Auto Error Clear appears 3 Press OK A blinking question mark appears 4 Select On or Off using U or V 5 Press OK 6 Press MENU The display returns to Ready Error Clear Timer Setting the error ...

Page 160: ...panel The default time is 90 seconds 1 Press Z while Timer is displayed 2 Press U or V repeatedly until Panel Reset Timer appears 3 Press OK The message display shows a blinking cursor _ 4 Press U or V to increase or decrease the value at the blinking cursor and set the desired time The time must be set between 005 and 495 seconds in 5 second increments Use Y and Z to move the cursor right and lef...

Page 161: ...ng 1 Press MENU 2 Press U or V repeatedly until Security appears ID Administrator ID input To use the Security function you must enter an administrator ID For information on how to set the administrator ID refer to Admin Administrator settings on page 7 78 1 Press Z while Security is displayed 2 The message display shows ID and a blinking cursor _ 3 Press U or V to increase or decrease respectivel...

Page 162: ...terface external device block setting You can use this to lock and thereby protect the interface The options available in Interface Block are as follows USB Host USB memory slot setting USB Device USB interface setting Parallel I F Parallel interface Option I F Network interface card setting 1 After entering the administrator ID and password press U or V repeatedly until I F Block appears USB Host...

Page 163: ...ile I F Block is displayed Parallel I F appears 2 Press OK A blinking question mark appears 3 Select Block or Unblock using U or V 4 Press OK 5 Press MENU The display returns to Ready Option I F Network interface card setting This locks and protects the network interface card NIC The default setting is Unblock 1 Press Z while I F Block is displayed Option I F appears 2 Press OK A blinking question...

Page 164: ... and protocol stacks are in the form of modules called NetWare Loadable Modules NLMs and the ability of NLMs to load and unload flexibly and dynamically is a major advantage of this system The default setting is On 1 After entering the administrator ID and password press U or V repeatedly until NetWare appears 2 Press OK A blinking question mark appears 3 Select On or Off using U or V 4 Press OK 5...

Page 165: ...ENU The display returns to Ready IPP IPP setting IPP Internet Printing Protocol is a standard that uses TCP IP networks such as the Internet to enable print jobs to be sent between remote computers and printers IPP is an extension of the HTTP protocol used to view websites and enables printing to be carried out via routers on printers in remote locations It also supports the HTTP authentication me...

Page 166: ... or Off using U or V 4 Press OK 5 Press MENU The display returns to Ready DES SSL Server DES setting DES Data Encryption Standard is a typical symmetric key cryptographic algorithm that divides data in to 64 bit blocks and then encrypts each block using a 56 bit key The default setting is Off 1 Press Z while SSL Server On is displayed DES appears 2 Press OK A blinking question mark appears 3 Selec...

Page 167: ...tructure a typical structure for repeated encryption with three selectable key lengths of 128 192 and 256 bits The default setting is Off 1 Press Z while SSL Server On is displayed AES appears 2 Press OK A blinking question mark appears 3 Select On or Off using U or V 4 Press OK 5 Press MENU The display returns to Ready IPP over SSL SSL Server IPP over SSL setting IPP over SSL is an encryption fun...

Page 168: ...PSec IP Security Protocol is a security protocol adopted as the standard by the IETF for authentication and encryption in the third network layer IP layer It can be used with both IPv4 and IPv6 The default setting is Off 1 After entering the administrator ID and password press U or V repeatedly until IPSec appears 2 Press OK A blinking question mark appears 3 Select On or Off using U or V 4 Press ...

Page 169: ...partment Removal Print Job Accounting List Job Accounting list output 1 Press MENU 2 Press U or V repeatedly until Job Accounting appears ID Administrator ID input To set up Job Accounting you must enter an administrator ID For information on how to set the administrator ID refer to Admin Administrator settings on page 78 1 Press Z while Job Accounting is displayed 2 The message display shows ID a...

Page 170: ...1 After entering the administrator ID and password press U or V repeatedly until Job Accounting appears 2 Press OK A blinking question mark appears 3 Select On or Off using U or V 4 Press OK 5 Press MENU The display returns to Ready Job Accounting enabled If department administration is enabled an account ID entry screen appears each time you retrieve a status page or list 1 A blinking cursor _ ap...

Page 171: ...rinted for the currently selected account 1 Set the account ID and then press U or V repeatedly until Counter appears E g 100 The counter shows a number between 0000000 and 9999999 2 Press MENU The display returns to Ready Restriction Print restriction selection Sets restricted functionality for all printing on the currently selected account You can use the restrictions to prohibit printing by ind...

Page 172: ... the blinking cursor Set the desired number of pages You can set a number between 0000001 and 9999999 as the number of pages Use Y and Z to move the cursor right and left 4 Press OK 5 Press MENU The display returns to Ready Reset Counter Counter reset Resets the counter pages used for the currently selected account 1 Set the account ID and then press U or V repeatedly until Reset Counter appears 2...

Page 173: ...lete Account appears 3 Press OK A blinking question mark appears E g 001 4 Each time you press U or V the next registered account ID in the sequence appears 5 Display the desired account ID and press OK The account ID is deleted 6 Press MENU The display returns to Ready IMPORTANT Because account IDs are managed as numeric strings 1 and 001 are handled as different accounts Also once Job Accounting...

Page 174: ...ages for all accounts as a Job Accounting list 1 Press Z while Job Accounting is displayed 2 Press U or V repeatedly until Print Job Accounting List appears 3 Press OK A blinking question mark appears 4 When you press OK again Processing appears and printing begins 5 Press MENU The display returns to Ready Print Job Accounting List ...

Page 175: ..._ 3 Press U or V to increase or decrease respectively the value at the blinking cursor Enter the specified ID Use Y and Z to move the cursor right and left Enter an ID consisting of between 1 and 16 numbers 4 Press OK Proceed to the next step Password Administrator Password input Password Administrator Password input You can use this to set the administrator password The default setting is the num...

Page 176: ...umbers 4 Press OK A confirmation screen appears E g Where the administrator ID is changed to 002 5 Press OK The new administrator ID is confirmed 6 Press MENU The display returns to Ready Change Password Administrator Password change You can use this to change the administrator password 1 In step 3 in Password Administrator Password input above press U or V while the Admin Change screen is display...

Page 177: ...7 80 Using the Operation Panel 5 Press OK The new administrator password is confirmed 6 Press MENU The display returns to Ready ...

Page 178: ...ow resets the printer s temporary conditions such as the current page orientation font etc set by commands to their default values Downloaded fonts and macros are deleted from the printer s memory 1 Press Z while Adjust Maintenance is displayed 2 Press U or V repeatedly until Restart Printer appears 3 Press OK A question mark appears 4 Press OK again Self test appears while the printer is resettin...

Page 179: ...s OK A question mark appears 4 Press OK again Processing appears and a service status page is printed out 5 When printing ends the display returns to Ready Print Network Status Page Printing the network status page The network status page contains detailed information on the network settings This is primarily used for maintenance by service personnel but it contains information that may also be us...

Page 180: ...installed and the printer is turned on This is primarily used for maintenance by service personnel DRUM CTRL Setting the automatic drum surface refreshing The drum surface can be refreshed automatically at a predetermined period of time using this menu regardless of the status detected by the temperature humidity sensor This is primarily used for maintenance by service personnel Drum Setting the d...

Page 181: ...7 84 Using the Operation Panel ...

Page 182: ...Option 8 1 8 Option This chapter explains the options for this printer General Information 8 2 Expansion Memory Modules 8 3 Paper Feeder PF 310 8 5 CompactFlash CF Card 8 6 Other Options 8 8 ...

Page 183: ...tions are explained in the following sections Note Install the memory module before installing the optional paper feeder PF 310 Envelope Feeder EF 310 for LP 4240 4245 Faceup Output Tray PT 310 for LP 4240 4245 Expansion Memory DIMM 64 128 256 512 MB Network Interface Card UT 110G for LP 4235 Hard Disk HD 5A CompactFlash USB Flash Memory Paper Feeder PF 310 LP 4235 x 1 LP 4240 4245 x 3 Bulk Paper ...

Page 184: ...he memory module To protect electronic parts discharge static electricity from your body by touching a water pipe faucet or other large metal object before handling the memory module Or wear an antistatic wrist strap if possible when you install the memory module Always hold the main controller board or a memory module by its edges as shown below to avoid damaging electronic parts Note The expansi...

Page 185: ... the memory socket until it clicks in place Then push down the memory module to secure 6 After you finish installing the memory module secure the inner cover with screws removed in step 3 and close the right cover Removing a Memory Module To remove a memory module remove the right cover and the memory slot cover from the printer Then carefully push out the two socket clamps Ease the memory module ...

Page 186: ...r cassettes to the bottom of the printer for continuous feeding of a large volume of paper Each paper cassette can hold up to approximately 500 sheets of ISO A4 ISO A5 JIS B5 letter and legal size 80g m2 paper This feeder is attached at the bottom of the printer as shown on below LP 4235 LP 4240 4245 ...

Page 187: ...cros and overlays 1 Turn off the printer and disconnect the power cord and printer cable 2 Remove the screws and the option interface slot cover 3 Install the CompactFlash card into the slot 4 Secure the option interface slot cover with screws removed in step 2 CAUTION Before inserting a CF card in the printer make sure that the printer is switched off ...

Page 188: ...r to be used 2 Install the faceup output tray on the rear of the printer UT 110G Network Interface Cards for LP 4235 Along with the standard for the network interface on the printer the network interface card supports TCP IP IPX SPX NetBEUI and AppleTalk protocols so that the printer can be used on network environments including Windows Macintosh UNIX NetWare etc The network interface card must be...

Page 189: ...5 Holds more envelopes at a time than the MP tray This envelope feeder can be attached to the front of the printer after the MP tray has been removed HD 5A Hard Disk If a hard disk is installed in the printer received data can be rasterized and stored on this hard disk This enables to use the Job Box functions For details refer to Job Box on page 7 19 USB Flash Memory See your dealer for purchasin...

Page 190: ...Computer Interface 9 1 9 Computer Interface This chapter contains explanations on the following topics General Information 9 2 Parallel Interface 9 2 USB Interface 9 2 Network Interface 9 3 ...

Page 191: ...h the Universal Serial Bus Specification Revision 2 0 Connectors Printer B type receptacle female with upstream port Cable B type plug male Cable Use a shielded cable that complies with USB 2 0 Hi Speed USB and not longer than 5 meters 16 feet Transfer Mode High speed 480 Mbps maximum Full Speed 12 Mbps maximum Power Control Self power device Interface Signals USB Connector Pin Assignment Note Use...

Page 192: ... authentication Supports IPv6 Supports IPv6 which is based on IPv4 with improvements such as increased manageable address space additional security functions and priority based data transmission Supports IPSec Supports IPSec the security protocol that authenticates and encrypts in the network layer IP layer Specifications Connector 10 Base T 100 Base TX Operating Systems Windows 2000 XP Vista Serv...

Page 193: ...9 4 Computer Interface EMI Countermeasures VCCI Class B FCC Class B U S CE Europe IMPORTANT When IPv6 functions are used the devices used on the network routers PCs etc must support IPv6 ...

Page 194: ...Appendix 10 1 10 Appendix This section lists the following information of this printer Specifications 10 2 Environmental Standard Requirements 10 4 ...

Page 195: ...Legal Letter Oficio II Statement Executive A6 JIS B6 ISO B5 Envelope C5 Envelope 10 Envelope 9 Envelope 6 Envelope Monarch Envelope DL Hagaki Ofuku Hagaki 16K Yokei 2 Yokei 4 Custom 70 148 to 216 356mm Magnification ratio 25 to 400 1 increments Printing Speed Simplex A6 21 ppm A6 22 ppm A6 23 ppm A5 21 ppm A5 22 ppm A5 23 ppm A4 35 ppm A4 40 ppm A4 45 ppm Letter 37 ppm Letter 42 ppm Letter 47 ppm ...

Page 196: ...16 8 kg 37 lb Power Requirements 120 V AC 60 Hz 7 6 A 220 to 240 V AC 50 60 Hz 4 1 A 120 V AC 60 Hz 7 7 A 220 to 240 V AC 50 60 Hz 4 2 A 120 V AC 60 Hz 7 7 A 220 to 240 V AC 50 60 Hz 4 3 A Power Consumption Maximum 947 W U S A Canada 1004 W European countries 964 W U S A Canada 1022 W European countries 970 W U S A Canada 1029 W European countries During printing 583 W U S A Canada 560 W European ...

Page 197: ...Duplex Printing Standard Equipment Durable paper for feeding Paper made of 100 recycled paper Options Expanded memory Paper Feeder 250 sheet x 1 Hard disk HD 5A Expanded memory Paper Feeder 250 sheet x 3 Hard disk HD 5A Only applicable to feeding from MP tray Item Description LP 4235 LP 4240 LP 4245 Note Contact your Dealer or Service Representative for recommended paper types ...

Page 198: ...er of client computers where it is not specifically necessary to assign a separate IP address to each client including printers dpi dots per inch This indicates the number of dots printed per inch 25 4mm as a unit for expressing resolution EcoPrint This is a printing mode that reduces toner consumption Pages printed in the EcoPrint mode are lighter than pages printed in the normal mode Emulation T...

Page 199: ...r outlines are represented with numerical expressions and fonts can be enlarged or reduced in different ways by changing the numeric values of those expressions Printing remains clear even if you enlarge fonts since the characters are defined with outlines represented with numerical expressions You can specify the font size in steps of 0 25 points up to 999 75 points Parallel interface With this i...

Page 200: ... the operation panel Subnet Mask This is a 32 bit numerical value that defines which bits of the IP address specify the network address and which specify the host address TCP IP Transmission Control Protocol Internet Protocol TCP IP is a suite of protocols designed to define the way computers and other devices communicate with each other over a network USB Universal Serial Bus An interface standar...

Page 201: ...11 4 ...

Page 202: ...nt size 7 40 Changing network interface parameters 4 4 Character pitch 7 41 Cleaning printer 5 7 Document processor 6 3 Clearing paper jams bulk paper feeder 6 18 duplexer 6 16 envelope feeder 6 18 inside the printer 6 17 MP tray 6 14 paper cassette 6 15 paper feeder 6 15 rear unit 6 18 Code set Setting 7 41 Common device Selecting or setting 7 52 CompactFlash card 8 6 Components at the front of t...

Page 203: ...rd 8 6 Installing memory module 8 4 Installing the printer driver 4 13 Mac OS 4 16 Windows PC 4 13 IPP Internet Printing Protocol 7 68 IPP over SSL setting SSL server 7 70 IPSec IP Security Protocol 7 71 J Job Accounting 7 73 Job Box 7 19 Configuration 7 24 Private Print Stored Job 7 23 Proof and Hold 7 21 Quick Copy 7 20 Job Retention 7 19 Job Storage 7 20 K Keys Basic operation 7 6 Cancel 7 6 Cu...

Page 204: ...opies USB flash memory 7 18 O OK key operation panel 1 4 Online help messages for clearing paper jams 6 13 Operation Panel diagram 7 3 Operation panel components 1 2 indicators keys 1 4 Option Bulk paper feeder 8 2 CompactFlash 8 2 Document finisher 5 7 Envelope feeder 8 2 expansion memory module 8 2 Faceup output tray 8 2 Hard disk 8 2 Network interface card 8 2 Paper feeder 8 2 paper feeder 8 2 ...

Page 205: ...interface status page 4 12 Printing from application software 4 19 Printing KPDL error report 7 39 Prolonged non use 5 8 R RAM Disk 7 55 Rear unit clearing paper jams 6 18 components 1 3 Removing memory module 8 4 Removing USB flash memory 7 18 Replacement toner container 5 2 5 3 waste toner box 5 5 Replacing toner container 5 3 Replacing waste toner box 5 5 Resetting custom paper type 7 33 Restar...

Page 206: ... 5 2 Toner kit toner container plastic waste bag waste toner box instal lation guide 5 2 Top cover components 1 2 Top tray components 1 2 Transparency 2 7 Troubleshooting 6 1 general problems 6 2 print quality problems 6 3 Turning on the power 4 3 U Uninstalling software 4 24 Unit of measurement Selecting 7 30 USB cable connection 4 2 USB Interface 9 2 USB interface 7 66 USB interface connector co...

Page 207: ...Index 6 ...

Page 208: ... Memo ...

Page 209: ... Memo ...

Page 210: ...d eine optimale Geräteleistung zu erzielen empfiehlt es sich nur Originalverbrauchsmaterial für das Produkt zu verwenden Bei Beschädigungen durch die Verwendung von Verbrauchsmaterial anderer Anbieter übernehmen wir keine Haftung ...

Page 211: ...UTAX GmbH Ohechaussee 235 22848 Norderstedt Germany ...

Reviews: