background image

Using the Operation Panel 

ADVANCED OPERATION GUIDE

2-81

6

Press 

?

 or 

@

 to increase or decrease the value at the blinking cursor and 

set the desired time. The timer can be set between 

5

 and 

240

 min, in 5-

minute increments. Use 

B

 and 

A

 to move the cursor right and left.

7

When the desired timeout time is displayed, press

 [OK]

.

8

To exit the menu selection, press 

[Menu]

Received Data Dump

You can print data received by the printer as hexadecimal code for 
debugging programs and files.

1

Press 

[Menu]

.

2

Press 

?

 or 

@

 repeatedly until 

Others >


appears.

3

Press 

B

.

4

Press 

?

 or 

@

 repeatedly until 

>Print 

HEX-DUMP

 appears.

5

Press

 [OK]

. A question mark (

?

) appears.

6

Press

 [OK]

 again. The message 

Processing

 appears for a second, 

followed by 

Waiting

.

7

While the message display is indicating 

Waiting

 (for 30 seconds by 

default), send data to be hex-dumped to the printer. The message display 
indicates 

Processing

 while the data is being received.

You can cancel printing of any more dump data by pressing 

[GO]

 and then 

[Cancel]

.

8

Once all data has been received, the message 

Waiting

 will appear. 

Press 

[GO]

 to finish hex-dump printing.

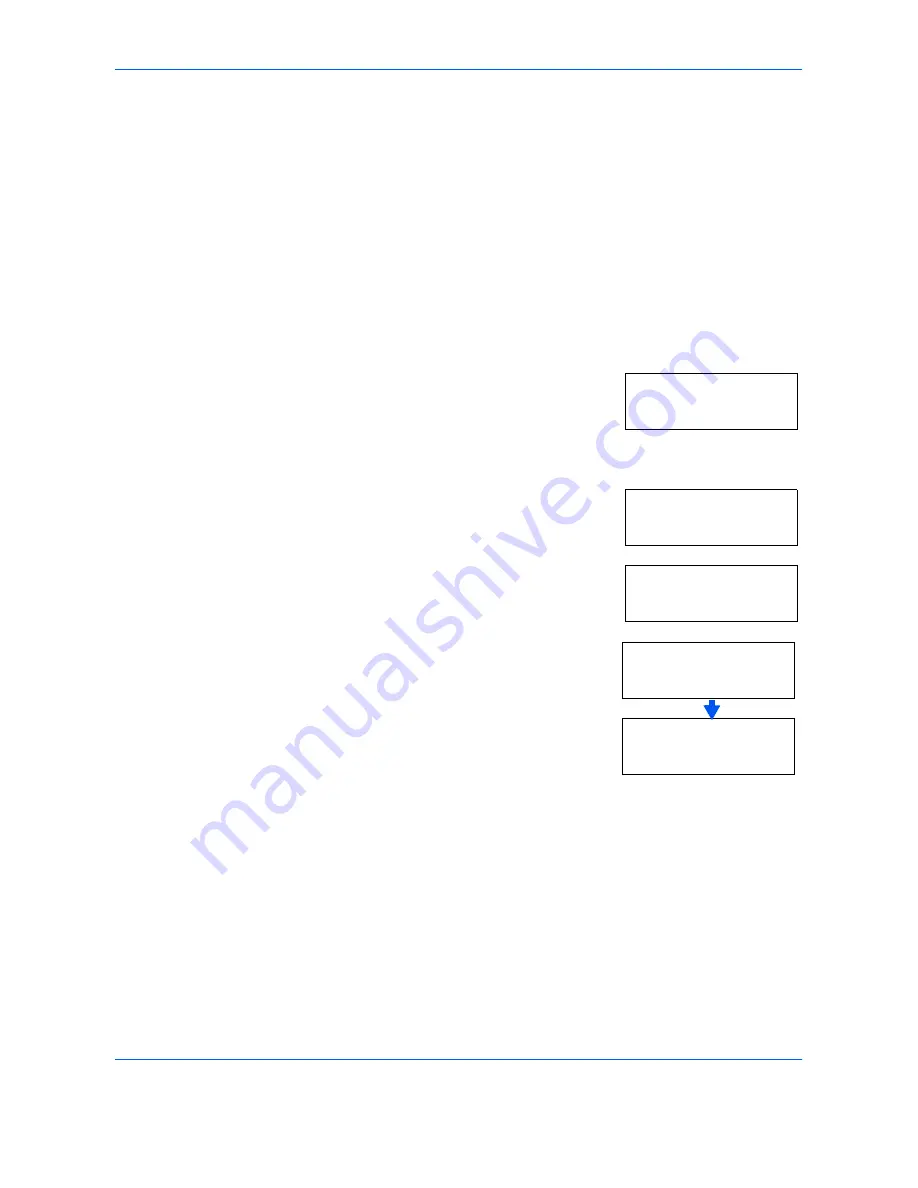
Others         >

>Print HEX-DUMP

>Print HEX-DUMP?

Processing

Waiting

Summary of Contents for LP 4030

Page 1: ...Instruction Handbook Advanced LP 4030 4035 4045 Laser Printer b w ...

Page 2: ......

Page 3: ...nging the Interface Parameters 2 30 Making Default Settings 2 38 Pagination 2 45 Setting Print Quality 2 50 Operating the Storage Device 2 54 Paper Handling 2 64 Reading Life Counters 2 77 Other Modes 2 78 3 Options General Information 3 2 Expansion Memory Modules 3 3 General Description 3 6 IB 21E IB 30 Network Interface Cards 3 8 Other Options 3 9 4 Computer Interface General Information 4 2 Par...

Page 4: ...Contents ii ADVANCED OPERATION GUIDE ...

Page 5: ...how choose handle and load paper 2 Using the Operation Panel Explains how to use the operation panel to configure the printer 3 Options Shows the available options 4 Computer Interface Describes the possible connections between the printer and your computer Glossary A Glossary of terms used is provided here ...

Page 6: ...message is displayed Bold Typeface Used to operation panel keys Press Menu Notes Used to provide additional or useful information about a function or feature NOTE For information about storing the pin refer to step 10 Important Use to provide important information IMPORTANT Ensure paper is not folded curled or damaged Caution Cautions are statements that suggest mechanical damage as a result of an...

Page 7: ...ADVANCED OPERATION GUIDE 1 1 1 Handling Paper This chapter contains explanations on the following topics General Guidelines 1 2 Selecting the Right Paper 1 4 Paper Type 1 12 Loading Paper 1 13 ...

Page 8: ...dard and premium The most significant difference between grades is the ease with which they pass through the machine This is affected by the smoothness size and moisture content of the paper and the way in which the paper is cut The higher the grade of paper you use the less risk there will be of paper jams and other problems and the higher the level of quality your printed output will reflect Dif...

Page 9: ...s For non standard paper the MP tray must be used Moisture content 4 to 6 Direction of grain Long grain Pulp content 80 or more Item Specification 10 5cm LP 4030 14 8cm 14 8cm LP 4030 21cm 21 6cm 35 6cm Minimum Paper Size Maximum Paper Size Paper cassette 7cm 14 8cm Minimum Paper Size Maximum Paper Size MP tray 21 6cm 35 6cm ...

Page 10: ...ul fumes Bond paper should contain at least 80 pulp Not more than 20 of the total paper content should consist of cotton or other fibers Paper Sizes Cassettes and the MP Tray are available for the paper sizes listed in the table below The dimensional tolerances are 0 7mm for the length and width The angle at the corners must be 90 0 2 MP tray Size Cassette or MP tray Size Envelope Monarch 3 7 8 7 ...

Page 11: ...y uneven paper thickness may cause multiple sheet feeding or print quality problems such as blurring because of poor toner fusing The recommended basis weight is between 60 and 105g m for the cassette and between 60 and 220g m for the MP tray Paper Weight Equivalence Table The paper weight is listed in pounds lb and metric grams per square meter g m The shaded part indicates the standard weight Yo...

Page 12: ...ges shrink and tighten and print contrast may suffer Wavy or tight edges can cause jams and alignment anomalies The moisture content of the paper should be 4 to 6 To ensure correct moisture content it is important to store the paper in a controlled environment Some tips on moisture control are Store paper in a cool dry location Keep the paper in its wrapping as long as possible Re wrap paper that ...

Page 13: ...ious ways A quality paper supplier should take considerable care to ensure that these problems do not occur Packaging Paper should be packed in a sturdy carton to protect it from damage during transport Quality paper obtained from a reputable supplier is usually correctly packaged Special Paper The following types of special paper can be used Use paper that is sold specifically for use with copier...

Page 14: ...printing on adhesive labels is that the adhesive must never come into contact with any part of the machine Adhesive paper sticking to the drum or rollers will damage the machine Label paper has a structure comprising of three layers as shown in the diagram The top sheet is printed on The adhesive layer consists of pressure sensitive adhesives The carrier sheet also called the linear or backing she...

Page 15: ... MP tray Make sure the postcards you are going to set are not curled Feeding curled postcards may cause paper jams Some postcards have rough edges on the back those are created when the paper is cut In this case put the postcards on a flat place and rub the edges with for example a ruler to smooth them Item Specification Weight of top sheet 44 to 74g m Composite weight 104 to 151g m Thickness of t...

Page 16: ...id jams caused by curled envelopes stack no more than 10 printed envelopes on the output tray Thick Paper Fan the stack of paper and align the edges before loading them in the MP tray Some types of paper have rough edges on the back those are created when the paper is cut In this case put the paper on a flat place and rub the edges once or twice with for example a ruler to smooth them Feeding roug...

Page 17: ...ith any kind of surface treatment such as the type of paper commonly used for calendars Recycled paper Select recycled paper that meets the same specifications as the white bond paper except for whiteness refer to Paper Specifications on page 1 2 NOTE Before purchasing recycled paper test a sample on the machine and check that the printing quality is satisfactory ...

Page 18: ...following types of paper can be used Paper Type Paper source MP tray Paper Cassette Paper Weight Duplex path MP tray available only in Cassette mode Plain Yes Yes Normal 2 Yes Transparency Yes No Extra Heavy No Preprinted Yes Yes Normal 2 Yes Labels Yes No Heavy 1 No Bond Yes Yes Normal 3 Yes Recycled Yes Yes Normal 2 Yes Vellum Yes No Light No Rough Yes Yes Normal 3 Yes Letterhead Yes Yes Normal ...

Page 19: ...er in the cassette and the MP tray Loading Paper into the Cassette The paper cassette can accommodate A6 LP 4030 A5 to A4 Letter and Legal size paper and can hold approximately 500 sheets 1 Pull the paper cassette all the way out of the printer Standard paper sizes are marked on the inside of the paper cassette ...

Page 20: ... the paper size window NOTE When the paper size dial is set to OTHER the paper size must be set into the printer on the operation panel Refer to Setting the Cassette Paper Size on page 2 67 3 Pull the release lever on the left side guide and slide to the desired paper size Paper Size Dial Paper Size Window Release Lever Paper Guides ...

Page 21: ...st them to the desired paper size 5 Pull the release lever and slide the paper stopper to the desired paper size When using non standard size paper move the paper guides and paper stopper all the way out insert the paper then adjust the paper guides and paper stopper to the size of the paper Adjust them so that they are in light contact with the paper Release Lever Paper Stopper ...

Page 22: ...ate down until it locks FS 2000D only 7 Fan the paper then tap it on a level surface to avoid media jams or skewed printing 8 Place the paper in the paper cassette Ensure the side to be printed is facing down and the paper is not folded curled or damaged Bottom Plate ...

Page 23: ... more paper than will fit under the load limits on the paper guides 9 Set the stack of paper so that it is under the clips as shown 10 Insert the paper cassette into the slot in the printer Push it straight in as far as it will go Load Limit Load Limit Clip Clip ...

Page 24: ...r is exhausted the pointer will go down to the level of empty Loading Paper into the MP Multi Purpose Tray The MP tray can accommodate the various paper sizes and can hold approximately 100 sheets of paper 1 Fan the media paper transparencies then tap it on a level surface to avoid media jams or skewed printing 2 Pull the MP tray towards you until it stops Paper Gauge ...

Page 25: ... the position of the paper guides on the MP tray Standard paper sizes are marked on the MP tray For standard paper sizes slide the paper guides to the position marked correspondingly 5 Align the paper with the paper guides and insert as far as it will go Load Limit Load Limit ...

Page 26: ...he paper is considerably curled in one direction for example if the paper is already printed on one side try to roll the paper in the opposite direction to counteract the curl Printed sheets will then come out flat 6 Set the MP tray paper size on the printer s operation panel Refer to Setting MP Tray Paper Size on page 2 65 Correct Incorrect ...

Page 27: ...Understanding the Operation Panel 2 3 Canceling a Printing Job 2 10 Using the Menu Selection System 2 11 Status Pages 2 15 e MPS 2 19 Changing the Interface Parameters 2 30 Making Default Settings 2 38 Pagination 2 45 Setting Print Quality 2 50 Operating the Storage Device 2 54 Paper Handling 2 64 Reading Life Counters 2 77 Other Modes 2 78 ...

Page 28: ...ication software NOTE Changes to printer settings made using a software application override changes made using the operation panel You can also rely on other printer utilities such as NET for Clients if you need to change settings that are not available on the printer driver It will allow remote access to printer settings Printer utilities are supplied in the CD ROM supplied with the printer The ...

Page 29: ...crystal display LCD eight keys and three indicators LED Messages that appear on the display and functions of indicators and keys are explained in this chapter Menu Menu LP 4035 4045 LP 4030 Ready PAR A4 PLAIN Ready PAR A4 PLAIN Message Display Indicators Menu Key OK Key Cursor Key GO Key Cancel Key Message Display Indicators Menu Key OK Key Cursor Keys GO Key Cancel Key ...

Page 30: ...ner Toner is currently being replenished When the printer is switched on for the first time this message will take several minutes Ready The printer is ready to print Processing The printer is receiving data to print This is also shown when the printer is reading a CompactFlash card Microdrive RAM disk or USB flash memory Sleeping The printer is in Auto Sleep The printer wakes from Auto Sleep when...

Page 31: ...ette The default paper cassette is determined by the operation panel keys For details refer to Paper Handling on page 2 64 While the printer is printing the paper size used to format the document to print by the application software The abbreviations used to indicate the paper sizes and their dimensions are as follows Ready PAR A4 PLAIN PAR Parallel interface is in use USB USB interface is in use ...

Page 32: ... Executive 7 1 4 10 1 2 inches 6 Envelope 6 3 5 8 6 1 2 inches 9 Envelope 9 3 7 8 8 7 8 inches 10 Envelope 10 4 1 8 x 9 1 2 inches HA Hagaki 10 14 8cm OH Oufuku Hagaki 14 8 20cm O2 Oficio II 8 1 2 13 inches 16K 16 kai 19 7 27 3cm ST Statement 5 1 2 8 1 2 inches FO Folio 21 33cm Y2 Yokei 2 11 4 16 2cm Y4 Yokei 4 10 5 23 5cm CU Custom Size Cassette 10 5 14 8cm to 21 6 35 6cm FS 2000D 148 210cm to 21...

Page 33: ...ng section in the Operation Guide On Indicates that the printer is ready and on line The printer prints the data it receives Off Indicates that the printer is off line Data can be received but will not be printed until the printer is switched on line by pressing GO Also indicates when printing is automatically stopped due to an error condition For details refer to the Troubleshooting section in th...

Page 34: ... page when the printer displays Waiting Recover from certain errors Recover from Auto Sleep Cancel Key This key is used to Cancel a printing job Stop the alarm sound Reset numeric values or cancel a setting procedure while using menu system 1 While the printer displays Processing press Cancel Print Cancel appears on the message display followed by the interface in use The interface is indicated by...

Page 35: ...ssage will then appear to facilitate jam clearing in the location OK Key This key is used to Finalize settings of numeric values and other selections Set the paper source when Use alternative is shown in the message display NOTE If you hold down OK and press Menu when Ready is shown on this printer the AdministrationID menu will be displayed This menu is the setting menu for administration under t...

Page 36: ... display followed by the interface in use The interface is indicated by one of the following messages Parallel USB Network LP 4030 appears only when the optional network interface card is installed Serial option serial interface Option option network interface 2 Press OK Cancelling data appears on the message display and printing stops after the current page is printed ...

Page 37: ...sage display NOTE Settings that are received from application software and the printer driver will take priority over settings made in the operation panel Entering the Mode Selection Menu Press Menu when Ready is indicated on the printer message display The mode selection menu is displayed Selecting a Menu The mode selection menu is hierarchical Press or to display the desired menu If the selected...

Page 38: ...he desired menu and press OK to set or change the configuration Press or to display the desired item and OK to finalize the value or selections set Cancelling Menu Selection If you press Menu when a menu is selected the message display returns to Ready Type Adjust Indicates that there is another sub menu Indicates that this is the sub menu Paper Weight Normal 1 Indicates that this is the second su...

Page 39: ...h the menu selection system Printing a Menu Map The printer prints a full list of the menu selection system Menu Map Note that menus shown in the list may vary depending on which optional units installed in the printer 1 Press Menu 2 Press or repeatedly until Print Menu Map appears 3 Press OK A question mark appears 4 Press OK The message Processing appears and the printer prints a Menu Map Print ...

Page 40: ...Using the Operation Panel 2 14 ADVANCED OPERATION GUIDE Menu Map Sample MENU MAP LP 3045 4045 Laser Printer ...

Page 41: ...rvice to the printer Printing a Status Page You can check the printer s current status including available memory space and option settings by printing a status page 1 Press Menu 2 Press or repeatedly until Print Status Page appears 3 Press OK A question mark appears 4 Press OK again The message Processing appears and the printer prints a status page For a sample status page and its full descripti...

Page 42: ...tus page may vary depending on the printer s firmware version 1 Firmware Version This item shows the version and release date of the printer firmware 2 Hardware Information This item shows various printer settings for hardware related items MP tray paper size and type Paper cassette size and type Buzzer control Host buffer size KIR Test pattern ON 2 4 6 3 1 5 7 8 9 10 11 LP 3045 4045 Laser Printer...

Page 43: ...he IP address subnet mask address and default gateway address for the network interface card in the printer 7 Emulation This item shows all available emulations of the printer The PCL 6 emulation is set as default when the printer is shipped from the factory The emulations are PCL 6 KPDL3 Line Printer IBM Proprinter DIABLO 630 EPSON LQ 850 8 Error Log This item shows the last three instances of th...

Page 44: ...smaller the amount of remaining toner If you use non original toner kit the toner gauge measurement will not be indicated correctly 10 Interface Information This information shows the emulation and the default font for all interfaces installed in the printer 11 KIR Test Pattern KIR is the Kyocera s original smoothing function This test pattern shows the effect of the KIR Kyocera Image Refinement s...

Page 45: ... selected from the printer driver through the application software Quick Copy Proof and Hold Private Print Stored Job Primary function To later print additional copies To proof the first copy before printing multiple copies To hold the document in printer to prevent unauthorized access To electronically store documents such as fax cover pages Start storing by Printer driver Printer driver Printer ...

Page 46: ... The virtual mailbox can be used in PCL 6 emulation only Using Quick Copy This mode enables you to print the requested number of copies of a job simultaneously storing the job on the Microdrive When additional copies are required you can reprint the required number of copies from the printer operation panel The default number of print jobs that can be stored on the Microdrive is 32 This value can ...

Page 47: ...e title of the job to be deleted displayed 2 When the title of the job to be deleted is displayed e g Report press OK The cursor below the copy count starts to blink 3 Press repeatedly until Delete appears below the title 4 Press OK The stored quick copy job is deleted Using Proof and Hold When you print multiple copies this mode first prints one copy so that you can proof it before continuing to ...

Page 48: ...e access codes are not mandatory but can be set on the printer driver if printing with PIN security is required Then the access code must be entered on the operation panel to print a stored job Print data will be stored in the Microdrive after printing Releasing a Private Stored Job 1 Press Menu 2 Press or repeatedly until e MPS appears 3 Press B 4 Press or repeatedly until Private Stored appears ...

Page 49: ...jobs by performing the following procedure Jobs saved using Private Print will be automatically deleted if you turn the power off after printing but jobs saved using Stored Job will not be deleted automatically 1 Follow steps 1 through 8 in the above section 2 When the title of the job to be printed is displayed Agenda in this example press OK Enter the four digit access code entered in the printe...

Page 50: ... operation panel 1 Press Menu 2 Press or repeatedly until e MPS appears 3 Press B 4 Press or repeatedly until List of Code JOB appears 5 Press OK A question mark appears 6 Press OK again The printer prints a Code Job list as shown below Retrieving Jobs from Virtual Mailbox VMB 1 Press Menu 2 Press or repeatedly until e MPS appears 3 Press B e MPS List of Code JOB List of Code JOB e MPS ...

Page 51: ...ing question mark appears 6 Press OK The document in the mailbox is printed and automatically deleted from the mailbox Printing a List of VMB A Virtual Mailbox list includes the jobs currently stored in the mailboxes 1 Press Menu 2 Press or repeatedly until e MPS appears 3 Press B 4 Press or repeatedly until List of VMB appears 5 Press OK A question mark appears Print VMB Data Tray001 Print VMB Da...

Page 52: ...pace assigned to temporary code jobs Maximum space assigned to permanent code jobs Maximum space assigned to virtual mailboxes NOTE The total amount of storage areas specified must not exceed the total size of the Microdrive Changing the Maximum Number of Quick Copy Proof and Hold Jobs This changes maximum number of Quick Copy Proof and Hold jobs from 0 to 50 The default is 32 1 Press Menu 2 Press...

Page 53: ...om 0 to 9999 megabytes The actual maximum size depends on the size of free Microdrive space The default size is 1 6 of the total Microdrive space rounded off in units of 50MB For example if the total Microdrive space is 10GB the default size is 1550MB 1 Press Menu 2 Press or repeatedly until e MPS appears 3 Press B 4 Press or repeatedly until e MPS Configuration appears 5 Press B 6 Press or repeat...

Page 54: ...Microdrive space rounded off in units of 50MB For example if the total Microdrive space is 10GB the default size is 1550MB 1 Press Menu 2 Press or and select e MPS 3 Press B 4 Press or and select e MPS Configuration 5 Press B 6 Press or and select Perm Code JOB Size 7 Press OK the message display shows a blinking cursor _ 8 Press or to increase or decrease respectively the value at the blinking cu...

Page 55: ...MB For example if the total Microdrive space is 10GB the default size is 1550MB 1 Press Menu 2 Press or and select e MPS 3 Press B 4 Press or and select e MPS Configuration 5 Press B 6 Press or and select VMB Size 7 To change the maximum size press OK The message display shows a blinking cursor _ 8 Press or to increase or decrease respectively the value at the blinking cursor Use B and A to move t...

Page 56: ...face Mode The parallel interface supports a bi directional high speed mode according to IEEE standards Normally this interface is used under the default setting Auto For details refer to Parallel Interface on page 4 3 After setting the interface be sure to reset the printer or turn the power off at least once The new setting will be enabled thereafter You can select from the following Auto default...

Page 57: ...l serial interface board kit IB 11 installed You can confirm or change the serial interface parameters including baud rate data bits stop bits parity and protocol These parameters must match those of the computer s serial interface 1 Press Menu 2 Press or repeatedly until Interface appears 3 If the interface is other than serial press OK A blinking question mark appears 4 Press or repeatedly until...

Page 58: ...uestion mark appears 7 Press or to scroll through values When 115200 is displayed press OK Press Menu to exit the menu selection NOTE Some computers may not be able to handle a baud rate of 115200 bps If you set the baud rate to 115200 and encounter communication problems select a lower baud rate Range Baud Rate 9600 1200 2400 4800 9600 Default 19200 38400 57600 115200 Data Bits 8 7 or 8 Default S...

Page 59: ...vate TCP IP NetWare and AppleTalk Activate or deactivate DHCP Enter IP address subnet mask address and default gateway address Determine whether to print a network status page when the printer is turned on 1 Press Menu 2 Press or repeatedly until Interface appears 3 If the current interface is other than Network press OK A blinking question mark appears If the optional network interface card is in...

Page 60: ...ng TCP IP protocol you must set the IP address on the printer The IP address must be unique to the printer and should be obtained from your network administrator 1 Activate TCP IP protocol in the manner described above Set this item to On when you connect to a network using NetWare In submenu frame mode can be selected from Auto 802 3 Ethernet II 802 2 and SNAP NetWare On Set this item to On when ...

Page 61: ...s or to move to Subnet Mask Perform the same procedure to complete entering the subnet mask address 7 Then press or to move to Gateway Perform the same procedure to complete entering the gateway address 8 Press Menu The display returns to Ready You can print a network status page to confirm that the IP address subnet mask address and the gateway address have been properly set To print a network st...

Page 62: ...ce status page may not be possible with the optional network interface card For details refer to the manual for the network interface 1 Press Menu 2 Press or repeatedly until Interface appears 3 If the current interface is other than Network press OK A blinking question mark appears 4 Press or repeatedly until Network appears Press OK 5 Press B and then press or repeatedly until the display shows ...

Page 63: ...Using the Operation Panel ADVANCED OPERATION GUIDE 2 37 9 Press Menu The display returns to Ready The printer prints a network status page as an example shown in the following illustration ...

Page 64: ...ears on the message display One of the emulation modes appears indicating the emulation currently in use PCL 6 default KPDL KPDL AUTO Line Printer IBM Proprinter DIABLO 630 EPSON LQ 850 To change the default emulation press OK A blinking question mark appears 3 Press or repeatedly until the desired emulation mode is displayed 4 Press OK 5 Press Menu The display returns to Ready Printing KPDL Error...

Page 65: ... you can also set the type and pitch for Courier and Letter Gothic as well as to print a font list 1 Press Menu 2 Press or repeatedly until Font appears 3 Press B Press or until Font Select appears 4 To select an internal font make sure that Internal is displayed and press B The display changes If Internal is not displayed press OK then press or until it appears To select an optional font press OK...

Page 66: ...elected as Regular or Dark In the procedure below it is assumed that Courier is selected The procedure is the same for Letter Gothic 1 Press Menu 2 Press or repeatedly until Font appears 3 Press B Press or until Font Select appears 4 Make sure that Internal is displayed and press B 5 Press or repeatedly until Courier appears If you are selecting the thickness of the Letter Gothic font choose Lette...

Page 67: ...ress B Press or until Font Select appears 4 Make sure that Internal is displayed and press Z 5 Press or repeatedly until Size appears 6 Press OK A blinking cursor _ appears 7 Press or to increase or decrease the value at the blinking cursor The font size can be set between 4 and 999 75 points in 0 25 point increments Use B or A to move the cursor right and left 8 When the desired size is displayed...

Page 68: ...ing cursor _ appears 7 Press or to increase or decrease the value at the blinking cursor The character pitch can be set between 0 44 and 99 99 characters per inch in 0 01 character per inch increments Use B or A to move the cursor right and left 8 When the desired size is displayed press OK 9 Press Menu The display returns to Ready Setting the Code Set You can change the character code set Availab...

Page 69: ...s of the internal fonts or the optional fonts including downloaded fonts 1 Press Menu 2 Press or repeatedly until Font appears 3 Press B 4 Press or repeatedly until List of Internal Fonts or List of Option Fonts appears 5 Press OK A question mark appears 6 Press OK again Processing appears then Ready The printer prints out a list of fonts with a sample and font ID number for each of them Sample li...

Page 70: ... GUIDE Samples of Fonts List Internal Scalable and Bitmapped Fonts List Font Name Scalable Bitmap Password Selection FSET Font ID PRESCRIBE Internal Scalable and Bitmapped Fonts List Font Name Scalable Bitmap Password Selection FSET Font ID PRESCRIBE ...

Page 71: ... Press Menu 2 Press or repeatedly until Page Set appears 3 Press B 4 Press or repeatedly until Copies appears 5 Press OK A blinking cursor _ appears 6 Press or to increase or decrease respectively the value at the blinking cursor Use B and A to move the cursor right and left 7 When the desired size is displayed press OK 8 Press Menu The display returns to Ready Print Orientation You can select por...

Page 72: ...ge Protect Menu does not normally appear however Page Protect will be forcibly set to On if a print overrun error occurs because the print job is too complex When this has happened be sure to reset Page Protect to Auto default in order to maintain the optimum use of printer memory 1 Press Menu 2 Press or repeatedly until Page set appears 3 Press B 4 Press or repeatedly until Page Protect appears 5...

Page 73: ...formed Default CR and LF A linefeed and carriage return are performed Ignore LF The linefeed is ignored 1 Press Menu 2 Press or repeatedly until Page Set appears 3 Press B 4 Press or repeatedly until LF Action appears 5 Press OK A blinking question mark appears 6 Press or repeatedly until the desired linefeed action appears 7 When the desired action is displayed press OK 8 Press Menu The display r...

Page 74: ...eatedly until CR Action appears 5 Press OK A blinking question mark appears 6 Press or repeatedly until the desired carriage return action appears 7 When the desired action is displayed press OK 8 Press Menu The display returns to Ready Wide A4 Pitch Turn this to On to increase the maximum number of characters that can be printed in a line for an A4 page 78 characters at 10 pitch and Letter size p...

Page 75: ...el ADVANCED OPERATION GUIDE 2 49 4 Press or repeatedly until Wide A4 appears 5 Press OK A blinking question mark appears 6 Select On or Off using or 7 Press OK 8 Press Menu The display returns to Ready Wide A4 Off Wide A4 Off ...

Page 76: ...t density refer to Print Density on page 2 52 You can monitor the KIR test pattern the last line on a status page to make the optimum KIR mode setting Look at the check line the last line on a status page to make the optimum KIR mode setting Optimized stripes The current KIR setting is optimal Dark vertical stripes Set the KIR mode to Off Try printing the status page again If you still get dark ve...

Page 77: ...Print enables you to reduce the amount of toner consumed on the page so as to save your printing costs You can set the EcoPrint mode to On as follows The factory default setting is Off When the EcoPrint mode is set to On the toner consumption is reduced and the print density becomes lighter The EcoPrint setting has no effect on the print speed 1 Press Menu 2 Press or repeatedly until Print Quality...

Page 78: ...of printed characters and graphics becomes sharper in this order 1 Press Menu 2 Press or repeatedly until Print Quality appears 3 Press B 4 Press or repeatedly until Resolution appears 5 Press OK A blinking question mark appears 6 Select Fine 1200 mode Fast 1200 mode 300 dpi or 600 dpi using the or 7 Press OK 8 Press Menu The display returns to Ready Print Density The print density can be adjusted...

Page 79: ...nt Quality appears 3 Press B 4 Press or repeatedly until Print Density appears 5 Press OK A blinking question mark appears 6 Select the print density from five steps from 01 light to 05 dark using the or 7 Press OK 8 Press Menu The display returns to Ready Print Quality Print Density 03 Resolution 03 ...

Page 80: ...lash card Using the CompactFlash Card The printer is equipped with a slot for a CompactFlash card By inserting a CompactFlash card into the printer the following operations become available Reading Font Data Reading Data Writing Data Deleting Data Formatting CompactFlash Card Printing a List of Data Names For details about the handling of the memory card refer to Microdrive Hard Disk CompactFlash ...

Page 81: ...d 1 Press Menu 2 Press or repeatedly until Memory Card appears 3 Press B 4 Press or repeatedly until Read Data appears Report in this example To read macro data or program data press or to display Read Macro or Read Program 5 Press OK A blinking question mark appears before the data name 6 Press or to display the desired data name 7 Press OK Processing appears and the reading of data from the Comp...

Page 82: ... the CompactFlash card Refer to Formatting a Memory Card on page 2 58 1 Press Menu 2 Press or repeatedly until Memory Card appears 3 Press B 4 Press or repeatedly until Write Data appears 5 Press OK A question mark appears 6 Press OK Processing appears then Waiting 7 Send the file from the computer to the printer As the printer receives data the message display changes to Processing then when the ...

Page 83: ...ertaining only to the data just written To see all data contained in the CompactFlash card at once print a list of data names as explained Refer to Printing a List of Data Names Partitions on page 2 59 Deleting Data It is possible to use the printer to delete data from a CompactFlash card Check that the CompactFlash card contains data Otherwise the Delete Data menu will not appear on the message d...

Page 84: ...emory Card A new CompactFlash card must be formatted before it can be used in the printer Formatting allows data to be written to the CompactFlash card NOTE Formatting will destroy any existing data on a storage device including a used CompactFlash card Formatting of the CompactFlash card must be executed from the printer When a new CompactFlash card is inserted in the memory card slot Format erro...

Page 85: ...ns to Ready Printing a List of Data Names Partitions The printer prints a list of all data names referred to as partitions stored in a CompactFlash card for reference Printing a list is also available for a font card 1 Press Menu 2 Press or repeatedly until Memory Card appears 3 Press B 4 Press or repeatedly until List of Partitions appears Item Description Capacity The total size of the CompactFl...

Page 86: ...Y CARD A is indicated for the CompactFlash card Capacity The total capacity of the CompactFlash card in kilobytes Used Space The total size of the data stored in the CompactFlash card in kilobytes Free Space The size of the capacity remaining in the CompactFlash card for storing further data including the amount of memory that the printer uses for its system Partition Name The name of the written ...

Page 87: ...rarily store print jobs The stored print job can then be used to print multiple copies of the job reducing the total amount of time required to print the whole job It acts similar to the Microdrive except that the data is effective only when the printer is powered up To use the RAM disk activate and enter the desired size of the RAM disk in the manner described below The maximum RAM disk size can ...

Page 88: ...rge the printing speed may decrease or the memory may become insufficient Setting the RAM Disk Size 1 Press Menu 2 Press or repeatedly until RAM Disk Mode appears 3 Press OK A blinking question mark appears Press or to select On Press OK 4 Press B Press or repeatedly until RAM Disk Size appears The data size also appears 5 Press OK A blinking cursor _ appears Press or to display the desired size D...

Page 89: ...er allows you to perform the following operations Reading PDF file Removing the USB flash memory Printing a list of data names partitions The operations of the USB flash memory are the same as those of the CompactFlash card Refer to the relevant sections in Using the CompactFlash Card on page 2 54 Removing the USB Flash Memory 1 Press Menu 2 Press or repeatedly until USB memory appears 3 Press B 4...

Page 90: ... The MP tray automatically feeds paper placed on the MP tray overriding another paper source that is selected on the printer driver After all sheets in the MP tray have been used up approximately 100 sheets paper will be fed from the paper source originally selected This mode is convenient to feed paper of special size or type without reloading the current paper source However the MP tray must be ...

Page 91: ...s on page 1 2 NOTE Feeding the paper having a paper size which does not match the current paper size from the MP tray can cause paper jam 1 Press Menu 2 Press or repeatedly until Paper Handling appears 3 Press B 4 Press or repeatedly until MP Tray Size appears In this example the current MP tray paper size is A4 5 To change the paper size press OK A blinking question mark appears 6 Press or to dis...

Page 92: ...fault setting is plain paper For more information about paper types that can be fed from the MP tray refer to Paper Availability on page 1 2 1 Press Menu 2 Press or repeatedly until Paper Handling appears 3 Press B 4 Press or repeatedly until MP Tray Type appears 5 To change paper type press OK A blinking question mark appears 6 Press or to display the desired paper type The message display toggle...

Page 93: ...n standard size paper load the paper and turn the paper size dial to OTHER refer to Loading Paper on page 1 13 1 Press Menu 2 Press or repeatedly until Paper Handling appears 3 Press B 4 Press or repeatedly until Cassette Size appears If optional paper feeders are added Cassette 1 Size will appear for the standard paper cassette and Cassette 2 Size Cassette 3 Size LP 4035 LP 4045 and Cassette 4 si...

Page 94: ... optional feeder A6 does not appear Selecting the Unit of Measurement 1 Press B 2 Press or repeatedly until Unit appears The unit of measurement can be selected between millimeters and inches The current unit of measurement is displayed 3 Press OK A blinking question mark appears 4 Select mm or inch using or 5 Press OK Set the dimensions of the paper as described in the next section Entering the W...

Page 95: ...u The display returns to Ready 9 To print using the custom size set above define the same custom size on the printer driver Setting the Cassette Paper Type By setting a paper type plain recycled etc for the paper cassette you can automatically select the paper in the paper cassette according to the paper type you command on the printer driver The default setting is plain paper for all paper casset...

Page 96: ... the menu selection press Menu Selecting the Paper Feed Source You can select the paper source from which the printer feeds paper as the default If an optional paper feeder s is installed it is also available for the default paper source 1 Press Menu 2 Press or repeatedly until Paper Handling appears 3 Press 4 Press or repeatedly until Feed Select appears 5 To change the current paper feed source ...

Page 97: ...ex printing can be also performed from the MP tray When the MP tray is set to First Mode First the paper size and paper type will be the same as those of the paper cassette currently set at the paper feed source If the paper to be fed from the MP tray does not match the paper size and paper type of the current paper feed source cassette a paper jam may occur Binding Modes Binding refers to the man...

Page 98: ... appears 5 To activate duplex printing press OK A blinking question mark appears 6 Press or to display the desired binding mode The message display toggles through the following Off default Short edge bind Long edge bind 7 When the desired binding mode is displayed press OK The binding mode is set 8 To exit the menu selection press Menu Portrait long edge Landscape long edge Portrait short edge La...

Page 99: ...y FaceDn or RearTray FaceUp 7 When the desired output stack is displayed press OK Overriding Difference between A4 and Letter When the Override A4 LT is turned On using the operation panel the printer ignores the difference between A4 and Letter paper sizes Printing is performed without an error message even if the actual paper size in the current cassette differs from the paper size formatting th...

Page 100: ...er source The paper weight and duplex path can be set refer to Setting the Paper Weight on page 2 75 and Setting the Duplex Path on page 2 75 after selecting the paper type to be customized as follows For how to reset the customized settings refer to Resetting the Custom Paper Type on page 2 76 1 Press Menu 2 Press or repeatedly until Paper Handling appears 3 Press B 4 Press or repeatedly until Ty...

Page 101: ...eight appears 3 Press OK A blinking question mark appears 4 Press or to display the desired paper thickness The display changes as shown below For details of the default setting for each paper type refer to Paper Availability on page 1 2 Light Normal 1 Normal 2 Normal 3 Heavy 1 Heavy 2 Heavy 3 Extra Heavy 5 When the desired paper thickness is displayed press OK and proceed to Setting the Duplex Pa...

Page 102: ...Press Menu The display returns to Ready The custom paper type setting is completed Resetting the Custom Paper Type 1 Press Menu 2 Press or repeatedly until Paper Handling appears 3 Press B 4 Press or repeatedly until Reset Type Adjust appears 5 To reset all custom paper types press OK A question mark appears 6 Press OK All customized paper types will be reset to the default The display returns to ...

Page 103: ...e status page Refer to Printing a Status Page on page 2 15 Displaying the Total Printed Pages This procedure displays the total number of printed pages You cannot change the displayed value 1 Press Menu 2 Press or repeatedly until Life Counters appears 3 Press B 4 Press or repeatedly until Printed Pages appears and the latest total print count is shown 5 To exit the menu selection press Menu Life ...

Page 104: ...ou can select the language of the message display by following the procedure given below You can optionally download messages in other languages Contact your service technician for information 1 Press Menu 2 Press or repeatedly until Others appears 3 Press B 4 Press or repeatedly until MSG Language appears The default message language is English 5 To change the language press OK A blinking questio...

Page 105: ...d Time Out appears 5 To change the timeout time press OK A blinking cursor _ appears 6 Press or to increase or decrease the value at the blinking cursor and set the desired time The timeout time can be between 0 and 495 seconds in 5 second increments Use B and A to move the cursor right and left 7 When the desired timeout time is displayed press OK 8 To exit the menu selection press Menu Setting t...

Page 106: ...he length of time the printer waits before entering Auto Sleep in the absence of data The default time is 15 minutes The printer reverts to normal operation mode when the printer receives a print job the operation panel is operated or one of the exterior covers is opened 1 Press Menu 2 Press or repeatedly until Others appears 3 Press B 4 Press or repeatedly until Sleep Timer appears 5 To change th...

Page 107: ...files 1 Press Menu 2 Press or repeatedly until Others appears 3 Press B 4 Press or repeatedly until Print HEX DUMP appears 5 Press OK A question mark appears 6 Press OK again The message Processing appears for a second followed by Waiting 7 While the message display is indicating Waiting for 30 seconds by default send data to be hex dumped to the printer The message display indicates Processing wh...

Page 108: ...OK again Self test appears while the printer is resetting itself followed by Please wait and then Ready Resource Protection By default when you switch from the PCL 6 emulation to another all downloaded fonts and macros will be lost Resource protection preserves these PCL resources in memory so that they remain intact even when you have switched back in PCL 6 NOTE Resource protection requires extra...

Page 109: ... is displayed press OK 8 To exit the menu selection press Menu Alarm Buzzer Setting You can set an alarm sound in addition to the message displayed when the paper supply is exhausted or when paper jamming occurs This setting is useful for example when the printer is located some distance from the user The audio alarm is set to On when leaving the factory If the alarm is set to Off it will not soun...

Page 110: ... For example if the printer is shared over a network as a network printer and one person causes one of the following errors after the set period of time elapses the data sent from the next person is printed The default setting is Off Auto Error Clear disabled The auto clear errors are Memory overflow Print overrun KPDL error File is not found RAM disk error CompactFlash card error Microdrive error...

Page 111: ...enu 2 Press or repeatedly until Others appears 3 Press B 4 Press or repeatedly until Auto Error Clear appears 5 Press B and display Error Clear Timer The default setting is 30 seconds 6 Press OK A blinking cursor _ appears 7 Press or to increase or decrease the value at the blinking cursor and set the desired time The time must be set between 000 and 495 seconds in 5 second increments If set to 00...

Page 112: ...size and paper type that cannot be used for duplex printing the Duplex disabled Press GO error message will be displayed and printing will stop To print onto one side of the paper only when this message is displayed press GO The default setting is Off 1 Press Menu 2 Press or repeatedly until Others appears 3 Press B 4 Press or repeatedly until Finishing Error appears 5 Press B and display Duplex 6...

Page 113: ...vice purposes However there is a great deal of information on the service status page that may be useful to you 1 Press Menu 2 Press or repeatedly until Others appears 3 Press B 4 Press or repeatedly until Service appears 5 Press B 6 Press or repeatedly until Print Status Page appears 7 Press OK A question mark appears 8 Press OK The display indicates Processing and printing starts Others Service ...

Page 114: ...Using the Operation Panel 2 88 ADVANCED OPERATION GUIDE ...

Page 115: ...ptions This chapter contains explanations on the following topics General Information 3 2 Expansion Memory Modules 3 3 General Description 3 6 Network Interface Cards 3 8 For availability of the options consult your service technician ...

Page 116: ...vidual options refer to the documentation included with the option Some options are explained in the following sections Paper Feeder PF 310 LP 4030 x 1 LP 4035 LP 4045 x 3 Expansion Memory DIMM 64 128 256 512MB Network Interface Card for LP 4030 Printer Faceup Output Tray PT 310 for LP 4035 4045 CompactFlash Card Microdrive Envelope Feeder EF 310 for LP 4035 4045 USB Flash Memory ...

Page 117: ...n We shall not be liable for any damages caused by improper installation of expansion memory Precautions for handling the printer s main controller board and memory module To protect electronic parts discharge static electricity from your body by touching a water pipe faucet or other large metal object before handling the memory module Or wear an antistatic wrist strap if possible when you install...

Page 118: ...ve the memory module from its package Aligning the cutouts of the memory module with the matching keys of the socket carefully plug the memory module into the memory socket until it clicks in place 6 Push the two socket clamps to secure the memory module 7 After you finish installing the memory module close the right cover Clamp Clamp Cutouts ...

Page 119: ...en the right cover and inner cover then carefully push out the two socket clamps Ease the memory module out of the socket to remove Testing the expanded memory To verify that the memory module is working properly test it by printing a status page refer to Printing a Status Page on page 2 15 ...

Page 120: ... copies using an electric sort function Also you can use the e MPS functions For details refer to e MPS on page 2 19 For details of available Microdrive CompactFlash card refer to your dealer 1 Turn off the printer and disconnect the power cord and printer cable 2 Open the option interface slot cover 3 Install the Microdrive CompactFlash card into the slot 4 Close the option interface slot cover P...

Page 121: ...SO A5 JIS B5 letter and legal size 80g m paper This feeder is attached at the bottom of the printer as shown below PT 310 Faceup Output Tray for LP 4035 4045 Use the faceup output tray when you wish paper to be stacked with the printed side facing up reverse order To install the faceup output tray perform the following procedures 1 Install the paper stopper according to the size of paper to be use...

Page 122: ...ter the network interface card supports TCP IP IPX SPX NetBEUI and AppleTalk protocols so that the printer can be used on network environments including Windows Macintosh UNIX NetWare etc The network interface card must be installed in the option interface slot that is located at the back of the printer as shown below Network interface card Network connections UT 110 10Base T 100Base TX ...

Page 123: ... be attached to the front of the printer after the MP tray has been removed EF 310 Envelope Feeder for LP 4035 4045 Holds more envelopes at a time than the MP tray This envelope feeder can be attached to the front of the printer after the MP tray has been removed USB Flash Memory See your dealer for purchasing information of this optional device that are best suited for use with this printer ...

Page 124: ...Options 3 10 ADVANCED OPERATION GUIDE ...

Page 125: ...4 1 4 Computer Interface This chapter contains explanations on the following topics General Information 4 2 Parallel Interface 4 3 USB Interface 4 5 Serial Interface Option 4 6 RS 232C Protocol 4 7 RS 232C Cable Connection 4 10 ...

Page 126: ...explains the signals used in the printer s parallel USB and serial option interfaces It also lists pin assignments signal functions timings connector specifications and voltage levels This chapter explains the following topics Parallel Interface USB Interface Serial Interface Option ...

Page 127: ...ion of each signal is also given in the table The description in indicates signal names in Auto mode and Nibble high mode IEEE 1284 compliant In Auto and Nibble modes these signals are bidirectional Communication Mode Reception Transmission Auto default High speed ECP Nibble ECP Nibble High speed Nibble High speed High speed Normal Normal Pin In or out Signal Description 1 In Strobe nStrobe A nega...

Page 128: ...d 18 5 V DC This pin is used for the printer s 5 V DC power supply 5 0 5 V 400 mA maximum with fuse 19 Ground return 20 Ground return 21 Ground return 22 Ground return 23 Ground return 24 Ground return 25 Ground return 26 Ground return 27 Ground return 28 Ground return 29 Ground return 30 Ground return 31 In nInit Ignored 32 Out Error nFault When the high speed parallel line control is on this lin...

Page 129: ...Speed USB Connectors Printer B type receptacle female with upstream port Cable B type plug male Cable Use a shielded cable that complies with USB 2 0 Hi Speed USB and not longer than 5 meters 16 feet Transfer Mode High speed 480 Mbps maximum Power Control Self power device Interface Signals USB Connector Pin Assignment Pin Signal Description 1 Vbus Power supply 5 V 2 D Data transmission 3 D Data t...

Page 130: ... FG Frame Ground This pin is connected directly to the printer frame 2 Out TXD Transmit Data This pin is used to output asynchronous data sent from the printer to the computer This signal is often used in handshaking 3 In RXD Receive Data This pin is used to input serial asynchronous data sent from the computer to the printer 4 Out RTS Request To Send This output is always high above 3 volts 5 In ...

Page 131: ...5 Protocol logic H6 Buffer nearly full threshold H7 Buffer nearly empty threshold H8 Received data buffer size The parameters can be changed from the printer operation panel To change the value for the serial interface parameters refer to Changing Serial Interface Parameters on page 2 31 This following section outlines the parameters and their values you can select on the operation panel H1 Baud r...

Page 132: ...without notice The difference between the nearly full and nearly empty thresholds allows the computer to send a fairly large amount of data in a continuous stream H8 Received data buffer size The input buffer size is specified in increments which vary depending on the S5 parameter When S5 is 0 the increment is 10KB When S5 is 1 the increment is 100KB When S5 is 2 the increment is 1024KB The factor...

Page 133: ...ulating XON XOFF when an error has occurred on the serial interface The following table summarizes the error status corresponding to different D0 values Timing of XON transfer to host while Ready or Waiting Serial interface error error not handled error handled XON sent every 3 5 seconds D0 0 default D0 1 XON not sent D0 10 D0 11 ...

Page 134: ...rity none The two RS 232C protocols are XON XOFF and DTR The printer executes both of these protocols simultaneously using positive logic for DTR If you are not sure about the printer s current parameter settings reset them to the values shown above i e baud rate 9600 bps etc You can perform parameter settings from the operation panel Refer to Changing Serial Interface Parameters on page 2 31 6 On...

Page 135: ...tions Port Properties dialog is displayed for the selected COM port Click on the Port Settings tab and set the port properties 6 After setting the properties click the OK button With Windows 95 98 Me make settings as follows 1 Click on the Start button in the Windows 95 98 Me task bar and align the cursor with Settings then click on Control Panel from among the items displayed 2 The Control Panel ...

Page 136: ... click on Communications Port 5 The Communications Port Properties dialog is displayed for the selected COM port Click on the Port Settings tab and set the port properties 6 After setting the properties click the OK button The software settings made using the above procedures are temporary On most computers permanent settings must be made with DIP switches ...

Page 137: ... inch 25 4mm as a unit for expressing resolution EcoPrint This is a printing mode that reduces toner consumption Pages printed in the EcoPrint mode are lighter than pages printed in the normal mode Emulation This refers to emulation of other manufacturers printers The printer emulates operation of the following printers PCL6 KPDL Line Printer IBM Proprinter DIABLO 630 and EPSON LQ 850 Form Feed Ti...

Page 138: ...s and highly functional graphics allowing higher quality printing PPM prints per minute This indicates the number of printouts made in one minute Printer driver The printer driver makes it possible for you to print data created using application software The printer driver for the printer is contained on the CD ROM supplied with the printer Install the printer driver on the computer connected to t...

Page 139: ...de jobs 2 24 Emulation appearing on the status page 2 17 KPDL printing errors 2 38 setting the default using the operator panel 2 38 Envelope 1 10 Error log on the status page 2 17 F Faceup output tray 3 7 Font adjusting character pitch for fixed fonts 2 42 changing the default size 2 41 printing lists of fonts 2 43 sample of the font list 2 44 selecting regular or dark Courier Letter Gothic 2 40 ...

Page 140: ...le of the network status page 2 37 interface cards diagrammed 3 8 printing a network status page 2 36 protocols and parameters 2 33 resolving the IP address 2 34 Number of copies how to select 2 45 O Operator panel configuring the printer defaults 2 38 diagram 2 3 function 2 3 Options 3 2 Orientation how to select 2 45 Outline font Glossary 2 Output device how to select 2 73 Override A4 Letter des...

Page 141: ...n 2 82 S Serial interface changing parameters 2 31 computer interface 4 10 protocol RS 232C 4 7 signals and definitions 4 6 Setting the Timer 2 79 Sleep mode Glossary 2 Sleep timer setting the timer 2 79 setting timeout time 2 80 Special paper 1 7 Specifications Paper 1 2 Status page how to print 2 15 understanding 2 16 Storage device reading fonts from 2 54 reading writing 2 55 writing data 2 56 ...

Page 142: ...Index 4 ADVANCED OPERATION GUIDE ...

Page 143: ...A1 ...

Page 144: ...2006 2 UTAX GmbH Ohechaussee 235 22848 Norderstedt Germany ...

Reviews: