31
Chapter 5
Customize Your Network
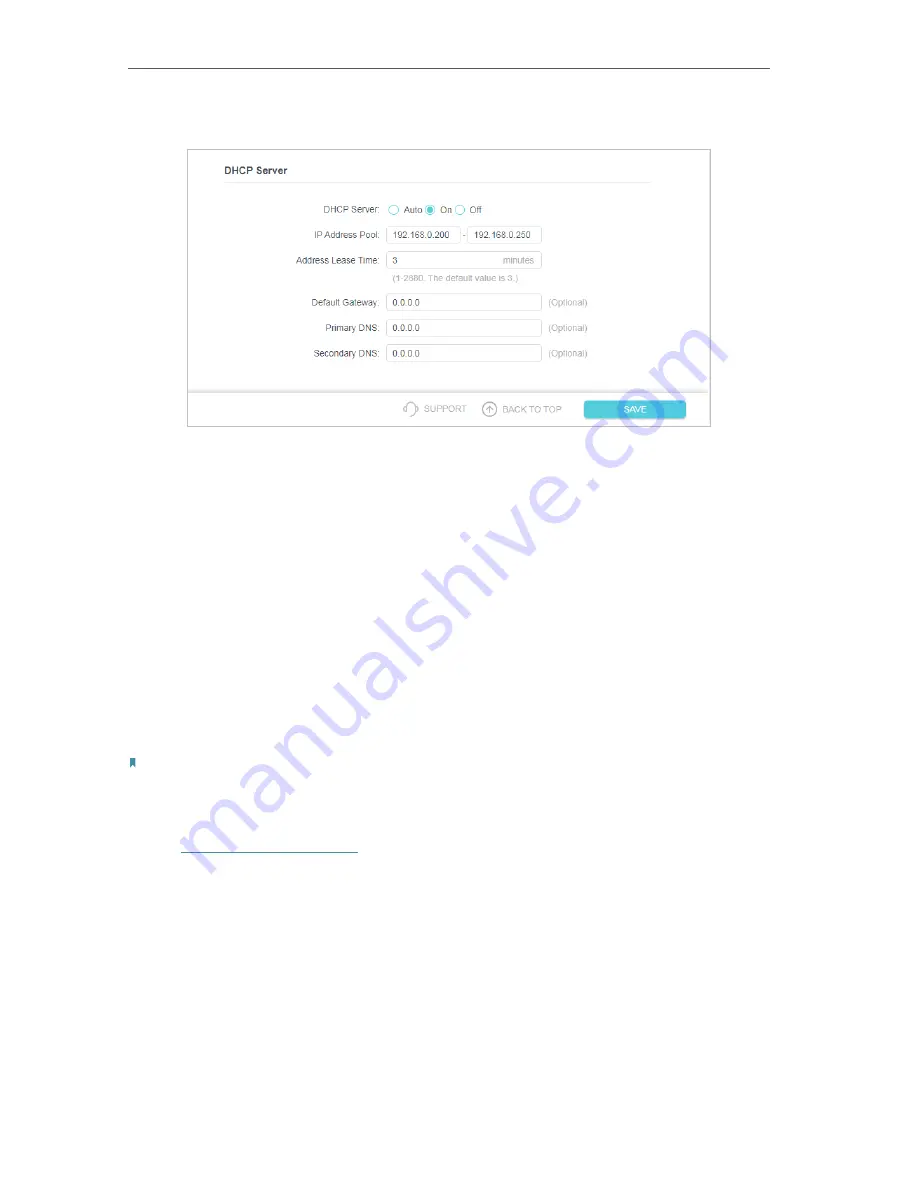
2. Go to
Settings
>
Network
>
DHCP Server
.
1. Select
On
to enable the DHCP Server of the extender.
2. Enter the starting and ending IP addresses in the
IP Address Pool
.
3. Enter other parameters if the ISP offers. The Default Gateway is automatically filled in
and is the same as the LAN IP address of the router.
4. Click
SAVE
.
5 5 Set High Speed Mode
The High Speed feature switches off one of the wireless bands to leave one high-
performance, super-fast network, ideal for HD streaming and gaming applications.
If most of your devices are connected to one wireless band, this feature can increase
the overall performance of your wireless network.
Note:
Before enabling this feature, please go to
Settings
>
Wireless
>
Extended Network
and check that the 2.4GHz and 5GHz
bands are both enabled. Additionally, if you are going to disable the 2.4GHz network, it’s recommended to first make sure
all your wireless devices support 5GHz network connection.
1. Visit
http://tplinkrepeater.net
and log in with your TP-Link ID or the password you set
for the extender.
2. Go to
Settings
>
Advanced Settings
>
High Speed
.
3. Enable
High Speed Mode
.
4. Select a high speed mode as needed.
• Select the
Auto
mode. The extender will decide which band the high-speed
network will work on based on its wireless connection to your host router. The
other band will be disabled.


