


51
3. In the
Scheduler Association
section, configure the scheduler rule. There are two
association modes:
and
. The following
sections introduce how to configure each mode.
■
Association with SSID
If you select
Association with SSID
in step 1, the Scheduler Association table will
display all the SSIDs on the EAP. For each SSID, you can select a profile in the
Profile
Name
column and select the scheduler rule
(Radio On/Radio Off)
in the
Action
column.
Then click
Save
.
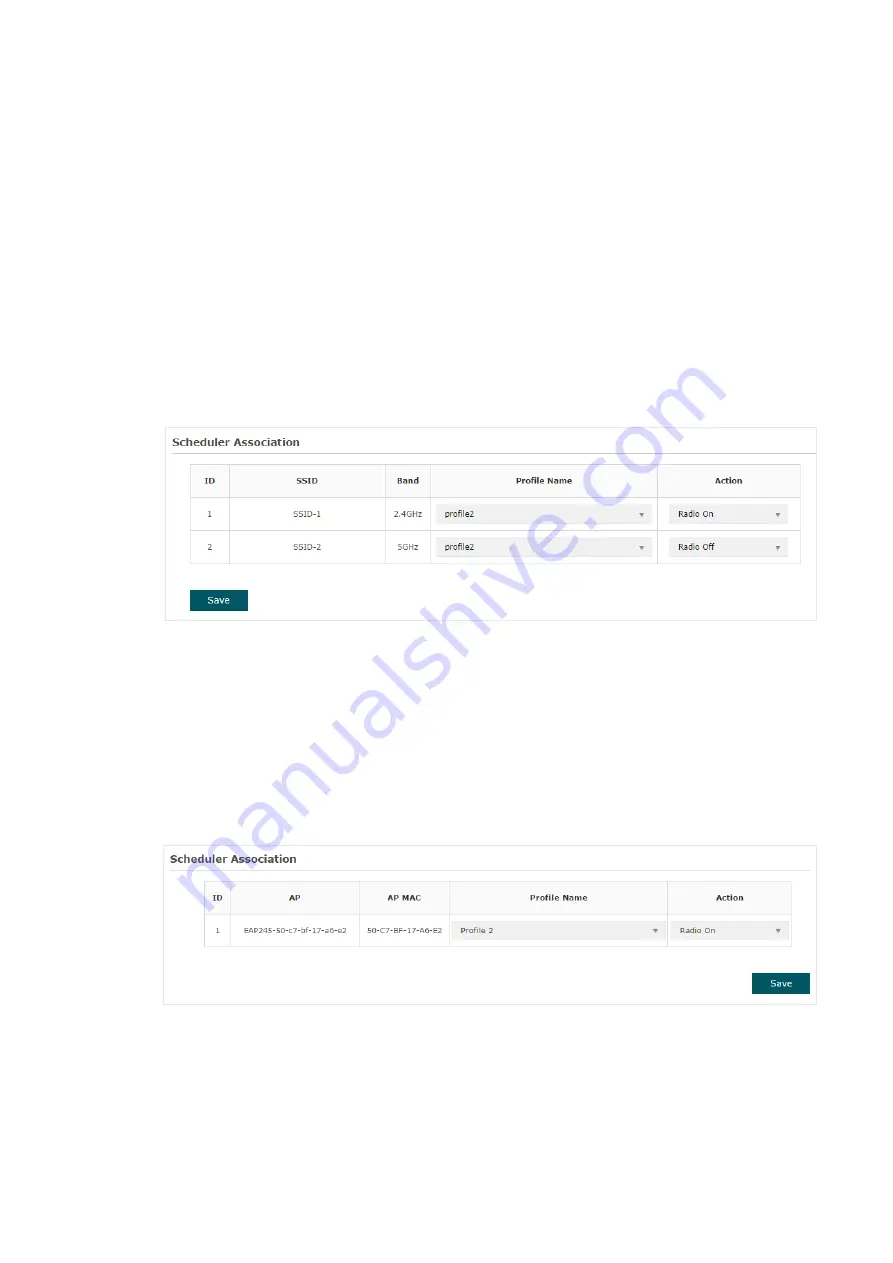
For example, the following configuration means that during the time range defined in
Profile2, the radio of SSID
SSID-1
is on and the radio of SSID
SSID-2
is off.
■
Association with AP
If you select
Association with AP
in step 1, the Scheduler Association table will display
the name and MAC address of the EAP. Select a profile in the
Profile Name
column and
select the scheduler rule
(Radio On/Radio Off)
in the
Action
column. Then click
Save
.
For example, the following configuration means that during the time range defined in
Profile2, the radio of all SSIDs on the EAP is on.