background image


NC260

HD  Day/Night  Wi-Fi  Cloud  Camera


20 


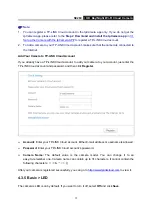
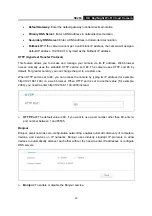
Default Gateway:

 Enter the default gateway in dotted-decimal notation. 


Primary DNS Server: 

Enter a DNS address in dotted-decimal notation. 


Secondary DNS Server:

 Enter a DNS address in dotted-decimal notation. 


Fallback IP:

 If the camera cannot get a valid static IP address, the camera will assign a 

default IP address, 192.168.0.10, by itself as the Fallback IP address. 

HTTP (Hypertext Transfer Protocol)


This feature allows you to access and manage your camera via its IP address. Web browser 
access normally uses the standard HTTP service port 80. The camera uses HTTP port 80 by 
default. For greater security, you can change the port to a custom one. 

When HTTP port is set to 80, you can access the camera by typing its IP address (for example, 
http://192.168.1.100) on a web browser. When HTTP port is set to another value (for example, 
2000), you need to enter http://192.168.1.100:2000 instead. 


HTTP Port:

 The default value is 80. If you want to use a port number other than 80, enter a 

port number between 1 and 65535. 

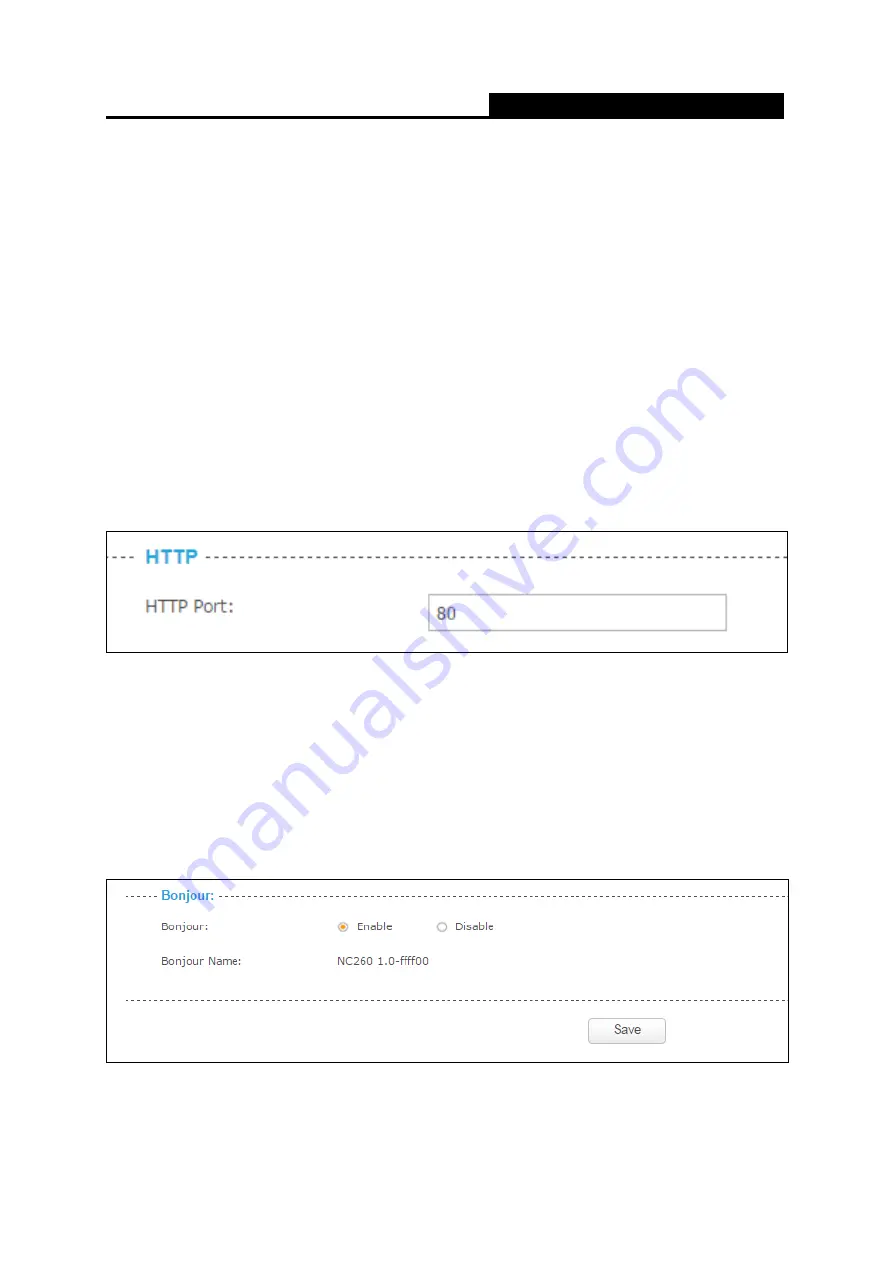
Bonjour 

Bonjour, also known as zero-configuration networking, enables automatic discovery of computers, 
devices, and services on IP networks. Bonjour uses industry standard IP protocols to allow 
devices to automatically discover each other without the need to enter IP addresses or configure 
DNS servers. 


Bonjour:

 To enable or disable the Bonjour service. 

Summary of Contents for NC260

Page 1: ...NC260 HD Day Night Wi Fi Cloud Camera 1910011847 REV1 0 0...

Page 2: ...Your Camera 8 4 2 Live View 10 4 3 Basic 11 4 3 1 Basic Status 12 4 3 2 Basic Network 13 4 3 3 Basic Wireless Connection 14 4 3 4 Basic Cloud Setting 16 4 3 5 Basic LED 17 4 4 Advanced 18 4 4 1 Advanc...

Page 3: ...ew of This Guide Chapter Introduction Chapter 1 About This Guide Introduces the guide structure and conventions Chapter 2 Get to know about your camera Introduces the features application and appearan...

Page 4: ...es it easy to stay connected with what you care most Easy to install with tpCamera app Remote monitoring via TP LINK Cloud website or tpCamera app Get notifications when motion or sound is detected an...

Page 5: ...he camera is connected to a network Solid Green The camera is transferring data Microphone The camera has a built in internal microphone This microphone is hidden in the pinhole located on the front p...

Page 6: ...then the LED above this button will start flashing quickly When this LED becomes solid on the WPS is successful Used as the Reset button With the camera powered on press and hold the WPS Reset button...

Page 7: ...apter as shown 2 Connect a smartphone to the router as shown 3 Connect the camera to the router via wired or wireless connection and then wait till the camera s system LED become solid green Wired Con...

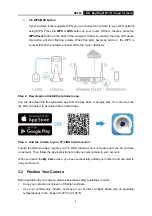
Page 8: ...era app from the App Store or Google play You can also scan the QR code below to download the tpCamera app OR Step 3 Add the camera to your TP LINK Cloud account Launch the tpCamera app log into your...

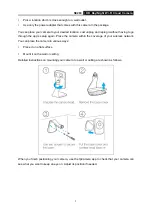
Page 9: ...having to go through the app s setup again Place the camera within the coverage of your wireless network You can place the camera in various ways Place it on a flat surface Mount it on the wall or cei...

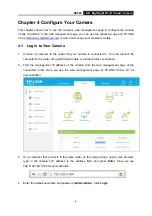
Page 10: ...that your camera is connected to You can connect the computer to the router using an Ethernet cable or via the wireless connection 2 Find the management IP address of the camera from the web manageme...

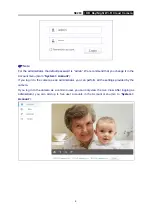
Page 11: ...n the Account menu Go to System Account If you log in to the camera as an administrator you can perform all the settings provided by the camera If you log in to the camera as a common user you can onl...

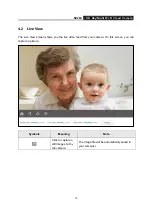
Page 12: ...ve View The Live View screen shows you the live video feed from your camera On this screen you can capture a picture Symbols Meaning Note Click to capture a still image shot by the camera The image fi...

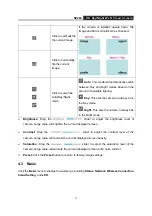
Page 13: ...the camera to always be in the Night mode Brightness Drag the slider to adjust the brightness level of camera Large value will brighten the current displayed screen Contrast Drag the slider to adjust...

Page 14: ...NC260 HD Day Night Wi Fi Cloud Camera 12 4 3 1 Basic Status The Status page displays the current configuration information of the camera All the information is read only...

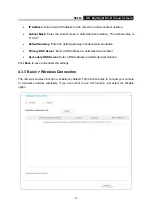
Page 15: ...etwork to issue IP address assignment With this setting the IP address of the camera is assigned automatically Static IP Select this option when a static or fixed IP address is obtained for the camera...

Page 16: ...gateway in dotted decimal notation Primary DNS Server Enter a DNS address in dotted decimal notation Secondary DNS Server Enter a DNS address in dotted decimal notation Click Save to save and enable t...

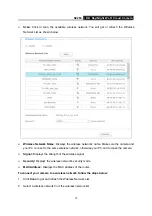
Page 17: ...and your PC connect to the same wireless network otherwise your PC can t access the camera Signal Displays the strength of the wireless signal Security Displays the wireless network s security mode M...

Page 18: ...ick Change and then click OK on the next pop up screen The camera will connect to the wireless network that you have selected 5 To log into the web management page of the camera you need to connect yo...

Page 19: ...have a TP LINK Cloud account to add your camera to your account just enter the TP LINK Cloud account and password and then click Register Account Enter your TP LINK Cloud account Either E mail address...

Page 20: ...loud Setting Video Sound Detection Motion Detection SD Card Notification Delivery and LED 4 4 1 Advanced Status Refer to 4 3 1 Basic Status 4 4 2 Advanced Network On this page you can configure the ne...

Page 21: ...P address 192 168 0 10 by itself as the Fallback IP address Static IP Select this option when a static or fixed IP address is obtained for the camera A static IP address will ease your access to the c...

Page 22: ...es HTTP port 80 by default For greater security you can change the port to a custom one When HTTP port is set to 80 you can access the camera by typing its IP address for example http 192 168 1 100 on...

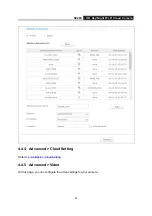
Page 23: ...n manually besides the basic settings for wireless connection Refer to 4 3 3 Basic Wireless Connection For example a hidden wireless network does not broadcast its SSID and you cannot find it from the...

Page 24: ...NC260 HD Day Night Wi Fi Cloud Camera 22 4 4 4 Advanced Cloud Setting Refer to 4 3 4 Basic Cloud Setting 4 4 5 Advanced Video On this page you can configure the video settings for your camera...

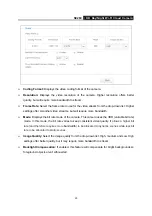
Page 25: ...Mode Displays the bit rate mode of the camera This camera uses the VBR variable bit rate mode In this mode the bit rate varies to keep consistent video quality It allows a higher bit rate and therefor...

Page 26: ...is Auto which is recommended Time Stamp On Screen Display OSD If enabled the current time of your camera which can be set on the System Date Time page will be displayed on the Live View screen Meanwhi...

Page 27: ...sitivity Specify the level of difference between current sound and the threshold you set Select one of the three levels of sensitivity from the drop down list High Medium and Low Threshold Select the...

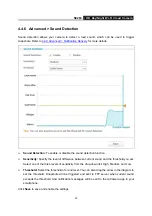
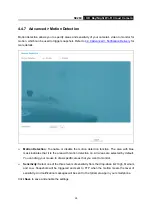
Page 28: ...otion detection function The area with blue mask indicates that it is the area with motion detection on All areas are selected by default You can drag your mouse to draw specific areas that you want t...

Page 29: ...ty is insufficient it will overwriting the oldest data Back Click to go back to the previous path of the folder Type Displays the type of the file or folder such as the photo video and file Name Displ...

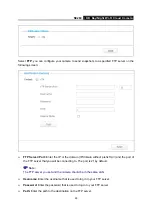
Page 30: ...main IP domain without prefix ftp and the port of the FTP server that you will be connecting to The port is 21 by default Note The FTP server you set and the camera should be in the same LAN Username...

Page 31: ...rver e g 192 168 1 168 2 Remain the FTP port number as the default value 21 3 Enter your username to log in to the FTP server e g test 4 Enter your password to log in to the FTP server 5 Enter the pat...

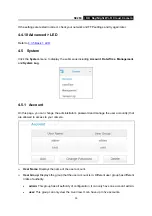
Page 32: ...System Log 4 5 1 Account On this page you can change the administrator s password and manage the user account s that are allowed to access to your camera User Name Displays the name of the user accou...

Page 33: ...ll see the following screen 2 Enter a username for your new account 3 Enter a password for your new account The password should contain 5 to 20 characters 4 Enter the password again to confirm it 5 Cl...

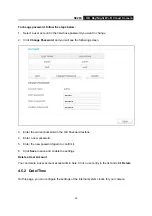
Page 34: ...ing screen 3 Enter the current password in the Old Password textbox 4 Enter a new password 5 Enter the new password again to confirm it 6 Click Save to save and enable the settings Delete a User Accou...

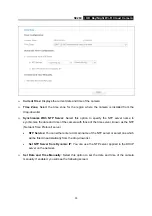
Page 35: ...ize the date and time of the camera with those of the time server known as the NTP Network Time Protocol server NTP Service You can either enter a domain name of the NTP server or select one which wil...

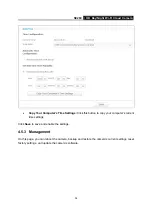
Page 36: ...ngs Click this button to copy your computer s current time settings Click Save to save and enable the settings 4 5 3 Management On this page you can reboot the camera backup and restore the camera s c...

Page 37: ...amera to its factory defaults Don t turn off the camera while resetting After resetting you need to add the camera to your TP LINK Cloud account again find out the IP address of your camera refer to 4...

Page 38: ...e log can get the correct time after you configure on the Date Time page Go to Advanced Date Time Module Displays the module to which the log information belongs You can specify the module by selectin...

Page 39: ...NC260 HD Day Night Wi Fi Cloud Camera 37 Log Control You may be asked to use this function when contacting our technical support for troubleshooting...

Page 40: ...s are trademarks or registered trademarks of their respective holders No part of the specifications may be reproduced in any form or by any means or used to make any derivative such as translation tra...

Page 41: ...he equipment and receiver Connect the equipment into an outlet on a circuit different from that to which the receiver is connected Consult the dealer or an experienced radio TV technician for help Thi...

Page 42: ...requirements 1999 5 EC Article 3 1a on the limitation of exposure of the general public to electromagnetic fields by way of health protection The device complies with RF specifications when the devic...

Page 43: ...ne non inclus dans cette liste Annexe A et dont le gain est sup rieur au gain maximal indiqu sont strictement interdits pour l exploitation de l metteur Radiation Exposure Statement This equipment com...

Page 44: ...assemble the product or make repairs yourself You run the risk of electric shock and voiding the limited warranty If you need service please contact us Avoid water and wet locations Adapter shall be i...

Page 45: ...rical and electronic equipment WEEE This means that this product must be handled pursuant to European directive 2012 19 EU in order to be recycled or dismantled to minimize its impact on the environme...

Reviews: