background image

E

ng

lis

h

DVD Menu Options

B

  Use 

 / 

 to select a setting and press OK to 


confirm.


Tip:


-Depending on the type of disc, you may not be able 

to view the mode as selected.


TV System

      The video standard of the DVD player output can be 

selected from “NTSC”, “PAL” or “Multi”.


{ NTSC }

: Select if your TV system is NTSC.


{ PAL }

: Select if your TV system is PAL.


{ Multi }

: The DVD video player automatically 

identifies PAL or NTSC video system of a disc. 

Connect a multisystem TV (PAL/NTSC compatible) to 

view a picture.


A playback picture may be distorted when detected a 

signal change between PAL and NTSC on the disc.


 With the disc tray opened, you can also press 

number button “3” to switch between “NTSC” and 

“PAL”

.


Video Out


The video output of the DVD player can be selected 

as “RGB” or “HDMI”.

A

  In 

Video 

'

, press 

 / 

 to select { 

Video Out 

}, then 

press 

.


RGB

 }


Select this for Scart connection.

       { 

HDMI

 }


Select this for HDMI output.

B

  Use 

 / 

 to select a setting and press OK to con

-

firm.


 When SCART and HDMI cable are connected at 

the same time, "HDMI" will be automatically selected 

as the output of the DVD player. You cannot switch 

to "RGB". Composite video will be output for scart 

output. To select "RGB" output, simply disconnect 

the HDMI cable. The video output will be switched to 

"RGB".


Smart Picture


This DVD player provides four predefined sets of  

picture color settings.

A

  In 

Video 

'

, press 

 / 

 to select {

Smart Picture

 },  

then press 

.


Standard

 }


Select this for a preset standard picture setting.


Vivid

 }


Select this to make the picture brighter.


Cool

 }


Select this to make the picture softer.


Personal

 } 


Select this to personalize your picture color by       

adjusting the brightness, contrast, tint and color 
(saturation).

B

  Use 

 / 

 to select a setting and press OK to 


confirm.

C

  If you select { 

Personal 

}, then proceed to steps 

D

~

G

.

  

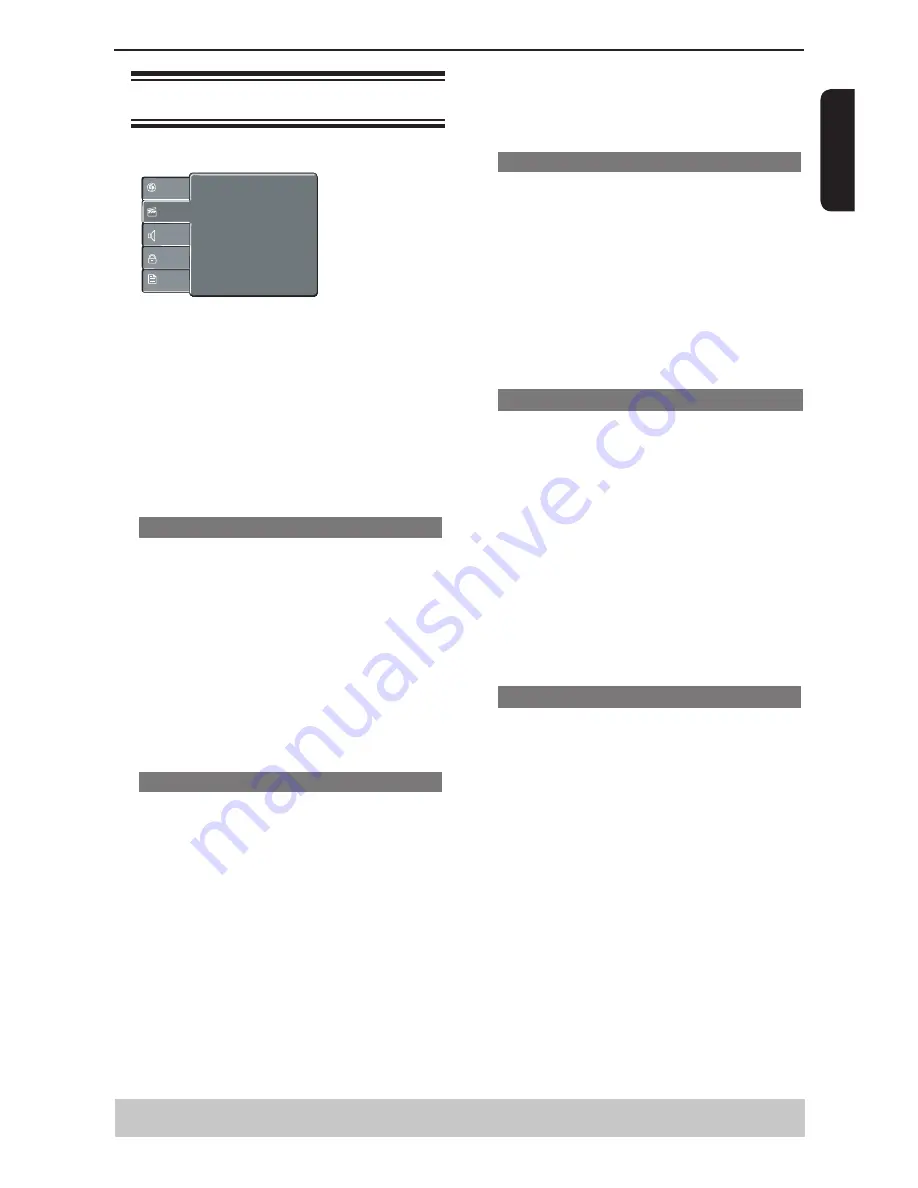
The setup menu appears.

Using the Video setup menu

A


Press SETUP on the remote control.

  

The system setup menu appears.


Aspect Ratio           : 
View Mode                 :


4:3

Auto Fit

Aspect Ratio           : 
View Mode                 :


4:3

Auto Fit

Aspect Ratio           : 
View Mode                 :


16:9
Auto Fit

Video Out                  
Smart Picture            :

:

HDMI
Standard

HD Resolution           :

Auto

JPEG Interval            :

5 Seconds

Language

Video

Audio

Misc

Rating

TV System                 :

PAL

B


Press 

 / 

 to select { 

Video

 }, then press 

C

  Press 

 / 

 to select an item, then press 

 to 

access.


Example: { 

Video Out

 }

  

The options for the selected item appears.

  

If the selection in the menu is greyed out, that 

means the feature is not available or not possible to 

change at the current state.

D

  Use 

 / 

 to select a setting and press OK to 


confirm.


Example: { 

RGB

 }

  

The setting is selected and setup is completed.

E

  To exit, press SETUP.


 Aspect Ratio


The picture shape can be adjusted to fit your TV and 

the format must be available on the playback disc. 

Otherwise, the TV display will not affect the picture 

during playback.

A

  In 

Video 

'

, press 

 / 

 to select {

Aspect Ratio

 }, 

then press 

.


{


4:3

 }


Select this if you have a normal TV. A  

'

wide-screen

'


source display with black bars on the top and bottom 
will be displayed on the TV screen.


16:9

 }


Select this for wide-screen TV (frame ratio 16:9).

B

  Use 

 / 

 to select a setting and press OK to 


confirm.


View Mode


Use view mode to scale an image that fits to the TV 

screen

'

s width and height.

A

  In 

Video 

'

, press 

 / 

 to select { 

View Mode

 }, 

then press 

.  


Fill

 }


Fill the screen with decoded image.


Original

 }


Display image as its original size.


Height Fit

 }


Fit the screen height with image height.


Width Fit

 }


Fit the screen width with image width.


Auto Fit

 }


Automatically display the decoded image on screen 

at a suitable size.


Pan Scan

 }


Automatically display decoded image on full screen 

without distortion.


Helpful hint

:  Press 

 to go back to previous menu item.


          Press SETUP to exit the menu item.

Summary of Contents for SD3010KB

Page 1: ...SD3010KB ...

Page 2: ...ience receptacles and the point where they exit from the apparatus 10 Only use attachments accessories specified by the manufacturer 11 Use only with the cart stand tripod bracket or table specified by the manufacturer or sold with the apparatus When a cart is used use caution when moving the cart apparatus combination to avoid injury from tip over 12 Unplug this apparatus during lightning storms ...

Page 3: ...d or legs with the fixings provided according to the instructions DON T listen to headphones at high volume as such use can permanently damage your hearing DON T leave equipment switched on when it is unattended unless it is specifically stated that it is designed for unattended operation or has a stand by mode Switch off using the switch on the equipment and make sure that your family know how to...

Page 4: ...ed when in standby mode To disconnect this equipment completely from the mains power pull out the power plug from the wall outlet Environmental Information All unnecessary packaging has been omitted The packaging has been made easy to separate into three materials cardboard box polystyrene foam buffer and polyethylene bags protective foam sheet Your DVD player consists of materials which can be re...

Page 5: ...f disc or condition of the recording If you are having trouble playing a certain disc remove the disc and try a different one Improperly formatted disc will not play on this DVD Player WARNING RISK OF ELECTRIC SHOCK Never attempt to service this product yourself Opening and removing the covers may expose you to dangerous voltage or other hazards Failure to follow this WARNING may result in death o...

Page 6: ...ddlestone Road Weybridge Surrey KT15 2UL United Kingdom Following information is only for EU member States The use of the symbol indicates that this product may not be treated as household waste By ensuring this product is disposed of correctly you will help prevent potential negative consequences for the environment and human health which could otherwise be caused by inappropriate waste handling ...

Page 7: ...Setting the language 12 13 Playback from Disc Playable discs 13 Playback Feature Starting disc playback 13 14 Basic playback control 14 Operations for video playback DVD VCD SVCD 14 15 Selecting various repeat functions 15 Viewing the disc playback Information 15 Special DVD Features 15 16 Special VCD and SVCD Features 16 Playing MP3 JPEG Kodak picture CD 16 17 DVD Menu Options Using the Language ...

Page 8: ...make sure that all the devices are disconnected from the power outlet If your TV has a DVI IN jack you need a HDMI DVI adapter cable to connect the HDMI out jack on the DVD player This HDMI DVI cable has only video output capability so it is necessary to use separate analogue cable to transfer the audio signals See Connecting to a Stereo System or Connecting to a Digital AV Receiver in page 8 Sele...

Page 9: ... on the stereo system cable not supplied Connecting to a Digital AV Receiver Receiver has a PCM Dolby Digital or MPEG decoder A Select one of the video connections CVBS VIDEO IN SCART IN or HDMI IN depending on the options available on your TV B Connect the COAXIAL jack of the DVD player to the corresponding Digital Audio In jack on your Receiver cable not supplied C Set the DVD Player s Digital O...

Page 10: ... any connections make sure that all the devices are disconnected from the power outlet Connecting the power cord After everything is connected properly plug in the AC power cord to the power outlet Never make or change any connections with the power switched on ...

Page 11: ...put of a TV an amplifier receiver or stereo system Product Overview Front and Rear panels I 2ON STANDBY Turns the player on or switches it to standby mode B X PLAY PAUSE Starts or pauses playback STOP Stops playback SCART OUT Connects to SCART input of a TV VIDEO Out CVBS Connects to CVBS Video input of a TV HDMI Connect to HDMI compatible device No disc Bad disc Multifunctional indicator indicate...

Page 12: ...ack from point A to B on a disc 14 SLOW Do a slow forward 14 CLEAR Delete the mistyped entries or cancel some functions REMOTE SIGNAL EMITTER 12 Point remote control to the sensor on the front panel 2ON STANDBY 13 To switch the DVD player to ON or standby mode T SEARCH 15 Start playback from a designated point SETUP 12 17 Enters or exits the system setup menu 14 16 17 Cursor buttons for moving to ...

Page 13: ...ween the lowest and highest channels and may be called FRONT A V IN or VIDEO See your TV s manual for more details Or you may go to channel 1 on your TV then press the Channel down button repeatedly until you see the Video In channel Or the TV remote control may have a button that chooses different video modes C If you are using external equipment such as audio system or receiver turn it on and se...

Page 14: ...nt only as a guide Use of CD RW for MP3 files is not recommended You must obtain any required permission from copyright owners to download or use copyrighted content Toshiba cannot and does not grant such permission Tip MPEG Layer 3 audio coding technology licensed from Fraunhofer IIS and Thomson Supported Formats MP3 tracks The file extensions have to be mp3 ISO format Maximum 8 characters displa...

Page 15: ...ss any buttons for about 22 minutes after the disc has stopped playing Program playback During playback press PROG then the OSD will appear as below For VCD Program Track 1 Track 2 Track 3 Track 4 Track 5 Track 6 Play Clear Clear All 1 3 5 7 9 11 13 15 2 4 6 8 10 12 14 16 For DVD Program Title 1 Title 2 Title 3 Title 4 Play Clear Clear All 1 3 5 7 9 11 13 15 2 4 6 8 10 12 14 16 A Use the and OK bu...

Page 16: ... display the status of the disc The following display appears For VCD VCD 2 0 Time 00 02 10 00 03 00 Track 1 14 Elapsed remaining time for current track Track No If PBC is enabled PBC on will be displayed For DVD DVD Video Time 00 03 33 01 24 46 Title 1 1 Chapter 2 8 Elapsed remaining time for current title Title No Chapter No B Press DISPLAY again Audio 1 1 D 5 1Ch Eng Subtitle 1 1 Eng Angle 1 1 ...

Page 17: ... repeatedly to pause resume playback For MP3 Within the first 5 seconds press PREV to go back to the previous track After the first 5 seconds of playback press PREV to go back to the beginning of current track During playback press to access fast forward or fast reverse with the required speed X2 X8 X30 X100 Play modes for MP3 Audio CD JPEG You are able to modify the play modes through the toolkit...

Page 18: ...onsistent with the disc s initial language setting Helpful hint The operating features described here might not be possible for certain discs Always refer to the instructions supplied with the discs If Repeat Single is selected Random cannot be selected and vice versa Edit Mode Program operation works only when Edit Mode is selected After finished storing the files tracks you want into the Program...

Page 19: ...confirm C If you select Personal then proceed to steps D G The setup menu appears Using the Video setup menu A Press SETUP on the remote control The system setup menu appears Aspect Ratio View Mode 4 3 Auto Fit Aspect Ratio View Mode 4 3 Auto Fit Aspect Ratio View Mode 16 9 Auto Fit Video Out Smart Picture HDMI Standard HD Resolution Auto JPEG Interval 5 Seconds Language Video Audio Misc Rating TV...

Page 20: ... Using the Audio setup menu A Press SETUP on the remote control The system setup menu appears Digital Output Night Mode Down Sampling All Off On Language Video Audio Misc Rating 3D Effects Off B Press to select Audio then press C Press to select an item then press to access Example Night Mode The options for the selected item appears If the selection in the menu is greyed out that means the featur...

Page 21: ...he menu item E To exit press SETUP Rating Level settings Depending on the DVD you may be asked to change the parental level while playing the disc The rating levels are from 1 to 8 and are country dependent You can prohibit the playing of certain discs that are not suitable for your children or have certain discs played with alternative scenes A In Rating press to select Parental control then pres...

Page 22: ...ears Use Default Settings Language Video Audio Misc Rating B Press to select Misc then press C Use Default Settings will be highlighted then press OK The menu will appear Use Default Settings Use Default Settings No Yes Yes Select this to reset to factory default settings No Select this to close the menu D Use to select a setting and press OK to confirm E To exit press SETUP Tray Lock Press SETUP ...

Page 23: ... 65 dB Wow and flutter Below measurable level less than 0 001 W PEAK Operating conditions Temperature 5 O C to 35 O C Operation status Horizontal Outputs Video output 1 0 V p p 75 Ω pin jack x 1 Video output SCART 1 0 V p p 75 Ω SCART socket x 1 Audio output SCART 2 0 V rms 10K Ω SCART socket x 1 Audio output COAXIAL DIGITAL 0 5 V p p 75 Ω pin jack x 1 Audio output ANALOG 2 0 V rms 10K Ω pin jacks...

Page 24: ...amount of picture distortion may appear depending on the disc being played back This is not malfunction May be caused by View Mode Setting see page 18 Set to Original for normal viewing Connect DVD Player directly to the TV Make sure the disc is compatible with the DVD player Ensure that the DVD Player s setting is set to match that of the disc and your TV Adjust the volume Check that the speakers...

Page 25: ...reset the player unplug theAC cord from AC outlet for 5 10 seconds Operations may not be permitted by the disc Refer to the instructions of the disc jacket Use a commonly available cleaning CD DVD to clean the lens before sending the DVD Player for repair Press STOP twice before selecting system setup menu Depending on the disc availability some menu items cannot be selected Troubleshooting ...

Page 26: ...the DVD System that send audio to another system TV Stereo etc Bit rate The amount of data used to hold a given length of music measured in kilobits per seconds or kbps Or the speed at which you record Generally the higher the bit rate or the higher the recording speed the better the sound quality However higher bit rates use more space on a disc Chapter Just as a book is split up into several cha...

Reviews: