


E
ng
lis
h
Inserting Batteries
A
Open the battery compartment.
B
Insert two batteries type R03 or AAA, following the
indications (+ / - ) inside the compartment.
C
Close the cover.
CAUTION:
-
Never throw batteries into a fire.
- The batteries shall not be exposed to excessive heat
such as sunshine, fire or the like.
Note:
- Be sure to use AAA size batteries.
- Dispose of batteries in a designated disposal area.
- Batteries should always be disposed of with the
environment in mind. Always dispose of batteries in
accordance with applicable laws and regulations.
- If the remote control does not operate correctly, or if
the operating range becomes reduced, replace batteries
with new ones.
- When necessary to replace batteries in the remote
control, always replace both batteries with new ones.
Never mix battery types or use new and used batteries
in combination.
- Always remove batteries from remote control if they
are dead or if the remote control is not to be used for an
extended period of time. This will prevent battery acid
from leaking into the battery compartment.
Using the Remote Control to Operate
the System
30
30
Within about 6m (19 feet)
A
Aim the Remote Control directly at the remote sensor
(IR) on the front panel.
B
Do not put any objects between the Remote Control
and DVD Player while operating the DVD Player.
Finding your viewing channel
A
Press I/
2
ON/STANDBY on the DVD player to turn it
on.
B
Turn on the TV and set it to the correct Video-In
channel. You should see the blue DVD background
screen.
Usually these channels are between the lowest
and highest channels and may be called FRONT,
A/V IN or VIDEO. See your TV
'
s manual for more
details.
Or, you may go to channel 1 on your TV, then
press the Channel down button repeatedly until you
see the Video In channel.
Or, the TV remote control may have a button that
chooses different video modes.
C
If you are using external equipment, (such as
audio system or receiver), turn it on and select the
appropriate input source for the DVD player output.
Refer to the equipment user’s manual for detail.
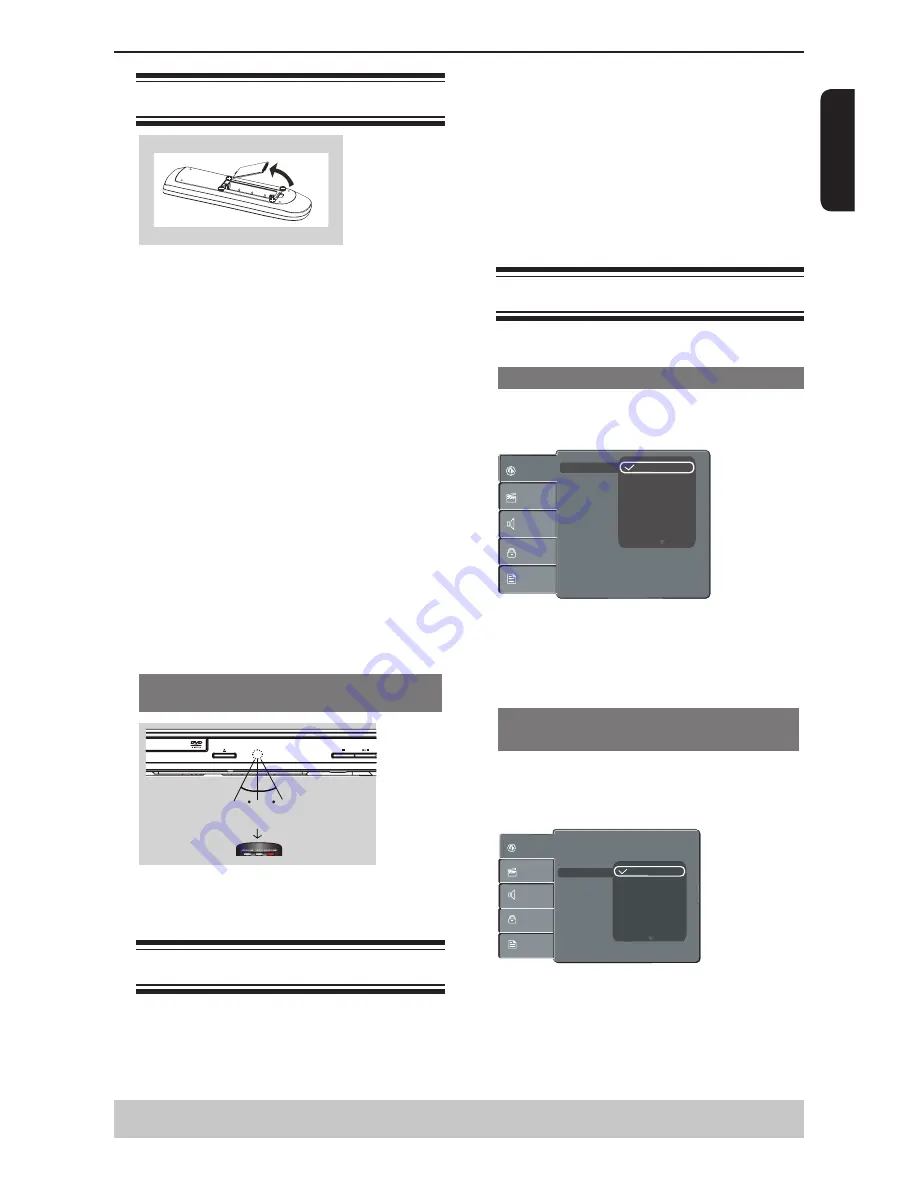
Setting the language
Choose your desired On-Screen Display(OSD)language
where available.
On-Screen Display (OSD) Language
The On-screen language for the system setup menu
will remain as you set it, regardless of various disc
languages.
Audio :
English
DVD Menu :
English
Subtitle
Language
Video
Audio
Misc
Rating
OSD language English
Polski
Hungarian
Português
Français
Deutsch
A
Press SETUP.
B
Press
/
to select {
Language
}.
C
Press
to highlight {
OSD language
}, then press
.
D
Press
/
to select a language and press OK to
confirm.
Subtitle, Audio and DVD Menu
language
You can choose your own preferred language or
soundtrack from Subtitle, Audio and DVD Menu
languages. If the language selected is not available on
the disc, the disc’s default language will be used instead.
OSD language : English
Subtitle : Off
Language
Video
Audio
Misc
Rating
DVD Menu
Audio
English
French
German
Polish
Hungarian
Portuguese
A
Press SETUP.
B
Press
/
to select {
L
anguage
}, then press
.
C
Press
/
to highlight one of the options below,
then press
.
{
Subtitle
}
Select this to change the subtitle language.
{
Audio
}
Select this to change the disc soundtrack language.
Getting Started
Helpful hint
: Press
to go back to previous menu item.
Press SETUP to exit the menu item.
Summary of Contents for SD3010KB
Page 1: ...SD3010KB ...