4 Replacement Procedures
4.10 Display Assembly
5.
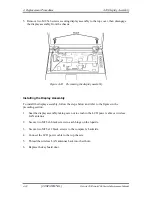
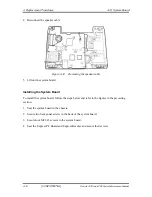
Remove two M2.5x6 screws securing display assembly to the top cover, then disengage
the display assembly from the chassis.
Figure 4-24
Removing the display assembly
Installing the Display Assembly
To install the display assembly, follow the steps below and refer to the figures in the
preceding section.
1.
Seat the display assembly taking care not to crush to the LCD power cable or wireless
LAN antenna.
2.
Secure two M2.5x6 black screws to each hinge on the topside.
3.
Secure two M2.5x12 black screws to the computer’s backside.
4.
Connect the LCD power cable to the top chassis.
5.
Thread the wireless LAN antennas back into their hole.
6.
Replace the keyboard door.
4-24
[CONFIDENTIAL]
Detroit 20 /Detroit 20E Series Maintenance Manual
Summary of Contents for Satellite Pro A110
Page 6: ...vi CONFIDENTIAL Satellite A110 Satellite Pro A110 Series Maintenance Manual ...
Page 11: ...Chapter 1 Hardware Overview 1 CONFIDENTIAL ...
Page 12: ...1 Hardware Overview 1 ii CONFIDENTIAL Detroit 20 Detroit 20E Series Maintenance Manual ...
Page 30: ...Chapter 2 Troubleshooting Procedures 2 ...
Page 33: ......
Page 85: ...3 Tests and Diagnostics 3 10 Keyboard Test 3 16 Satellite A110 Series Maintenance Manual ...
Page 100: ...4 Chapter 4 Replacement Procedures CONFIDENTIAL ...
Page 101: ...4 Replacement Procedures 4 ii CONFIDENTIAL Detroit 20 Detroit 20E Series Maintenance Manual ...
Page 105: ...4 Replacement Procedures 4 vi CONFIDENTIAL Detroit 20 Detroit 20E Series Maintenance Manual ...


