57
TIME-BASED RECORDING
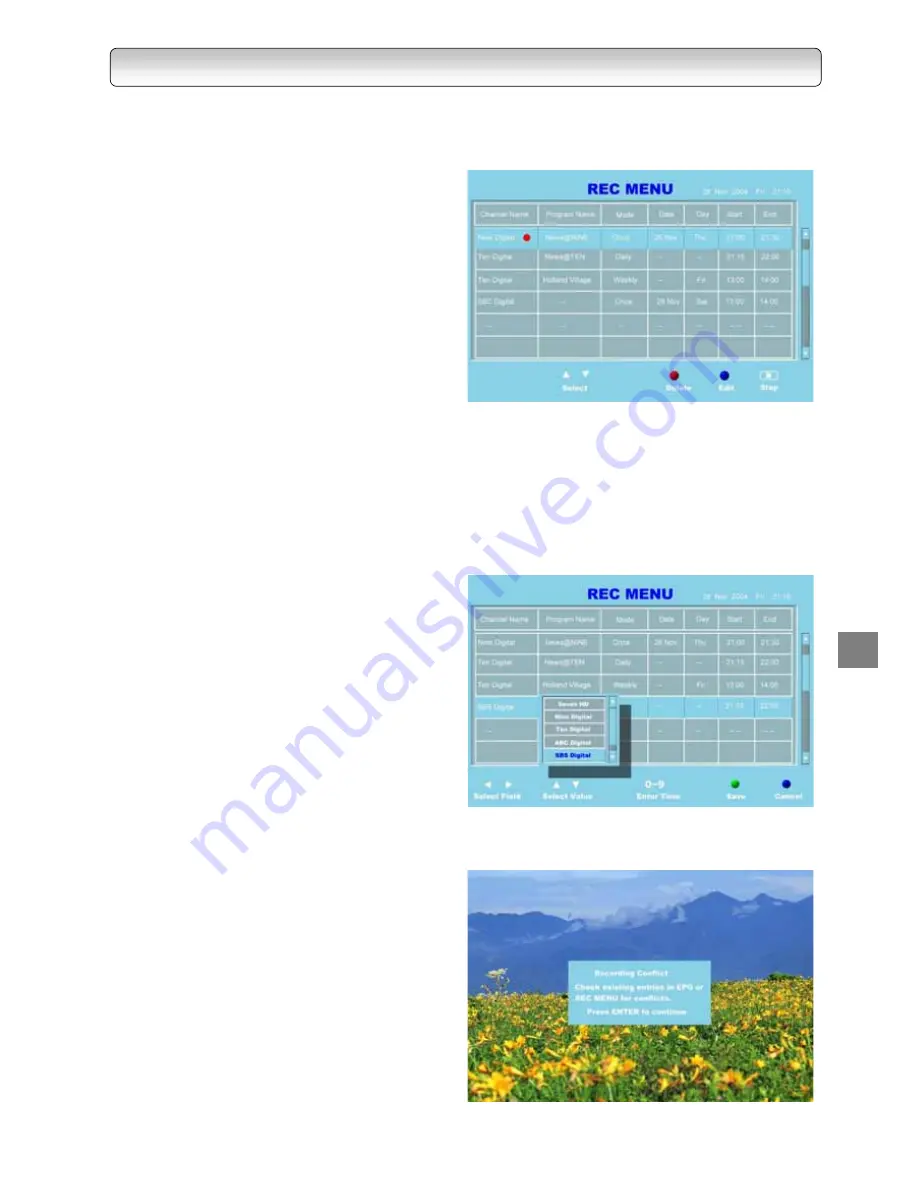
Use the REC MENU to program a recording. It will take less time to prepare, as it provides all necessary
information for recording.
1.
Before recording, ensure that there is sufficient
space remaining in the HDD. Delete unwanted
files or archive some files using VCR to create
space for recording. Refer to Library Menu and
External Recording in the next chapter for
instructions on deleting and archiving files.
2.
Press the “REC MENU” button on the remote
control to call up the Record Menu. A pop-up
menu will appear displaying the various inputs
required to schedule to a recording.
3.
Press the “BLUE” button to enter a new entry or to
edit an existing entry. Use the “
Ż
” and “
Ź
”
buttons to select an input for editing, e.g. Channel
Name, Mode, Date, Day, Start Time and End Time.
(A smaller menu appears showing the various
values under Channel Name and Mode. Use
“ENTER” and “EXIT” buttons to go in and out of
these smaller menus.) Take note that the menu
legend changes after the “BLUE” button is
pressed.
4.
Under the respective subjects, use the “
Ÿ
” and
“
ź
” buttons to select between different values.
- Channel Name: Select desired channel to
record. (Press enter to select)
- Mode: Select between “Once”, “Daily” or
“Weekly” (Press enter to select)
- Date: Select date of recording (Editable only for
“Once” mode)
- Day: Select day of recording (Editable only for
“weekly” mode)
- Start: Select time to begin recording
- End: Select time to end recording
5.
After all the values are set, press the “GREEN”
button to save the settings.
6.
Press the “BLUE” button to cancel any settings
made.
7.
If the new entry causes a conflict with the existing
entries (i.e. overlapping recording time), the new
entry cannot be saved. To overcome the conflict:
−
Amend new entry by selecting other recording
day or time values OR
−
Press “BLUE” colour button to exit edit mode
and amend existing entries (Scroll list for
highlighted entries) that is in conflict with the
new entry, after which the new entry is to be
made again.
RE
CORD
IN
G
Summary of Contents for HDD-J35
Page 54: ...54 ...
Page 60: ...60 ...
Page 66: ...66 ...
Page 72: ...72 3 PARENTAL GUIDANCE CODES APPENDIX ...
Page 87: ...87 MEMO ...
Page 88: ...88 2005 Toshiba Corporation Printed in Taiwan ...


