


e-STUDIO203S/203SD UNPACKING AND INSTALLATION 5 - 7
14) Follow the instructions in the plug and play window to install the
driver.
Follow the on-screen instructions.
Caution:
• If you are using Windows Vista and a security warning window
appears, be sure to click "Install this driver software anyway".
• If you are running Windows 2000/XP and a warning message
appears regarding the Windows logo test or digital signature, be
sure to click "Continue Anyway" or "Yes".
This completes the installation of the software.
• If you installed Button Manager, set up Button Manager as
explained in "C. Setting up Button Manager".
• If you installed Desktop Document Manager, the Desktop Docu-
ment Manager setup screen will appear. Follow the instructions in
the screen to set up Desktop Document Manager.
(1) Connecting a USB cable
Follow the procedure below to connect the machine to your com-
puter.
A USB cable for connecting the machine to your computer is not
included with the machine. Please purchase the appropriate cable
for your computer.
Caution:
• USB is available with a PC/AT compatible computer that was orig-
inally equipped with USB and had Windows 98, Windows Me,
Windows 2000 Professional, Windows XP or Windows Vista pre-
installed.
• Do not connect the USB cable before installing the printer driver.
The USB cable should be connected during installation of the
printer driver.
Note
• If the machine will be connected using a USB 2.0 port of your
computer, please purchase a USB cable that supports USB 2.0.
• To obtain the fastest USB 2.0 data transfer speed, "USB2.0
MODE SWITCH" in the machine's user programs must be set to
"HI-SPEED". For more information, see "[12] USER PROGRAM".
• Use the machine's "HI-SPEED" mode only when using a com-
puter that is running Windows 2000/XP/Vista.
• Even when the Microsoft USB 2.0 driver is used, it may not be
possible to obtain full USB 2.0 speed if a PC card supporting
USB 2.0 is used. To obtain the latest driver (which may enable a
higher speed), contact the manufacturer of your PC card.
• Connection is also possible using a USB 1.1 port on your com-
puter.
However, the specifications will be USB 1.1 specifications (Full-
Speed).
1) Insert the cable into the USB connector on the machine.
2) Insert the other end of the cable into your computer's USB port.
(2) Using the machine as a shared printer
If the machine will be used as a shared printer on a network, follow
these steps to install the printer driver in the client computer.
Note: To configure the appropriate settings in the print server, see
the operation manual or help file of your operating system.
1) Perform steps 2) through 6) in "Installing the software".
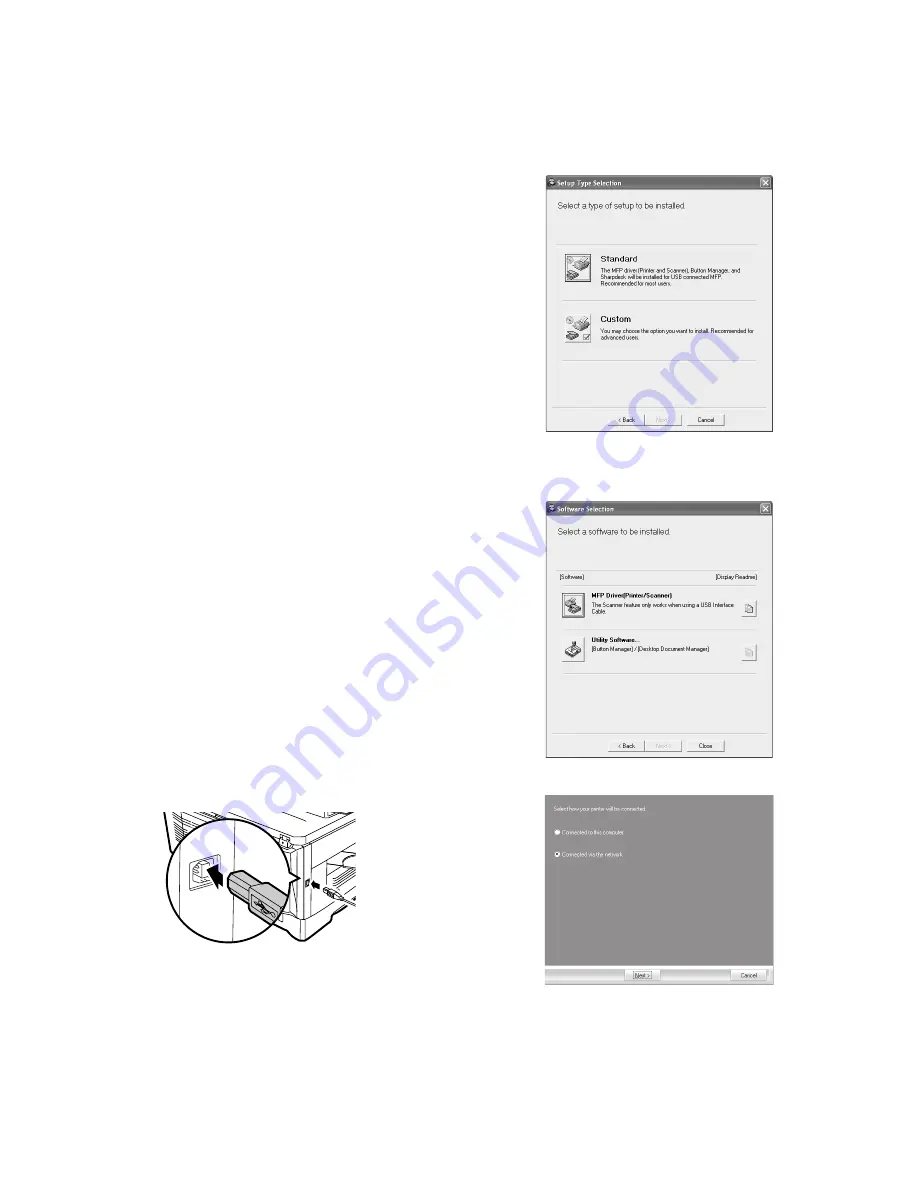
2) Click the "Custom" button.
3) Click the "MFP Driver" button.
Click the "Display Readme" button to show information on pack-
ages that are selected.
4) Select "Connected via the network" and click the "Next" button.


