e-STUDIO203S/203SD UNPACKING AND INSTALLATION 5 - 6
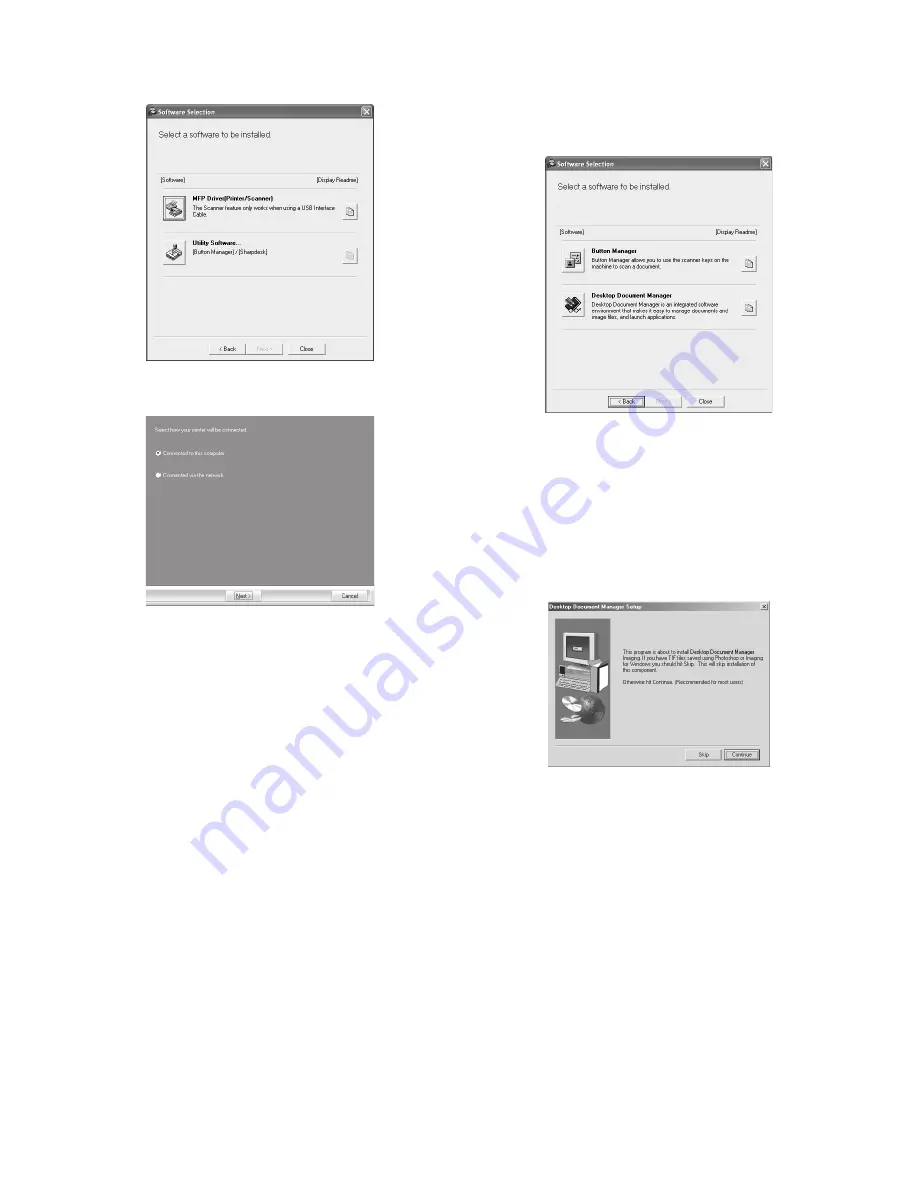
8) Click the "MFP Driver" button.
Click the "Display Readme" button to show information on pack-
ages that are selected.
9) Select "Connected to this computer" and click the "Next" button.
Follow the on-screen instructions.
Caution:
• If you are using Windows Vista and a security warning window
appears, be sure to click "Install this driver software anyway".
• If you are running Windows 2000/XP and a warning message
appears regarding the Windows logo test or digital signature, be
sure to click "Continue Anyway" or "Yes".
10) You will return to the window of step 8). If you wish to install But-
ton Manager or Desktop Document Manager, click the "Utility
Software" button.
If you do not wish to install the Utility Software, click the "Close"
button and go to step 12).
Note: After the installation, a message prompting you to restart
your computer may appear. In this case, click the "Yes" but-
ton to restart your computer.
Installing the Utility Software
11) Click the "Button Manager" or the "Desktop Document Man-
ager" button.
Click the "Display Readme" button to show information on pack-
ages that are selected.
Follow the on-screen instructions.
Caution: In Windows 98/Me/2000, if the following screen appears,
click the "Skip" button or the "Continue" button as appro-
priate to continue the Desktop Document Manager instal-
lation.
If "Skip" is selected, the Desktop Document Manager
installation will continue without installing Desktop Docu-
ment Manager Imaging.
If "Continue" is selected, Desktop Document Manager
Imaging will be installed. If Imaging for Windows is
installed on your computer, Desktop Document Manager
Imaging will overwrite Imaging for Windows.
12) When installing is finished, click the "Close" button.
Caution:
• If you are using Windows Vista and a security warning window
appears, be sure to click "Install this driver software anyway".
• If you are running Windows 2000/XP and a warning message
appears regarding the Windows logo test or digital signature, be
sure to click "Continue Anyway" or "Yes".
A message will appear instructing you to connect the machine
to your computer. Click the "OK" button.
Note: After the installation, a message prompting you to restart
your computer may appear. In this case, click the "Yes" but-
ton to restart your computer.
13) Make sure that the power of the machine is turned on, and then
connect the USB cable.
Windows will detect the machine and a Plug and Play screen
will appear.


