background image

Diagnostic Light

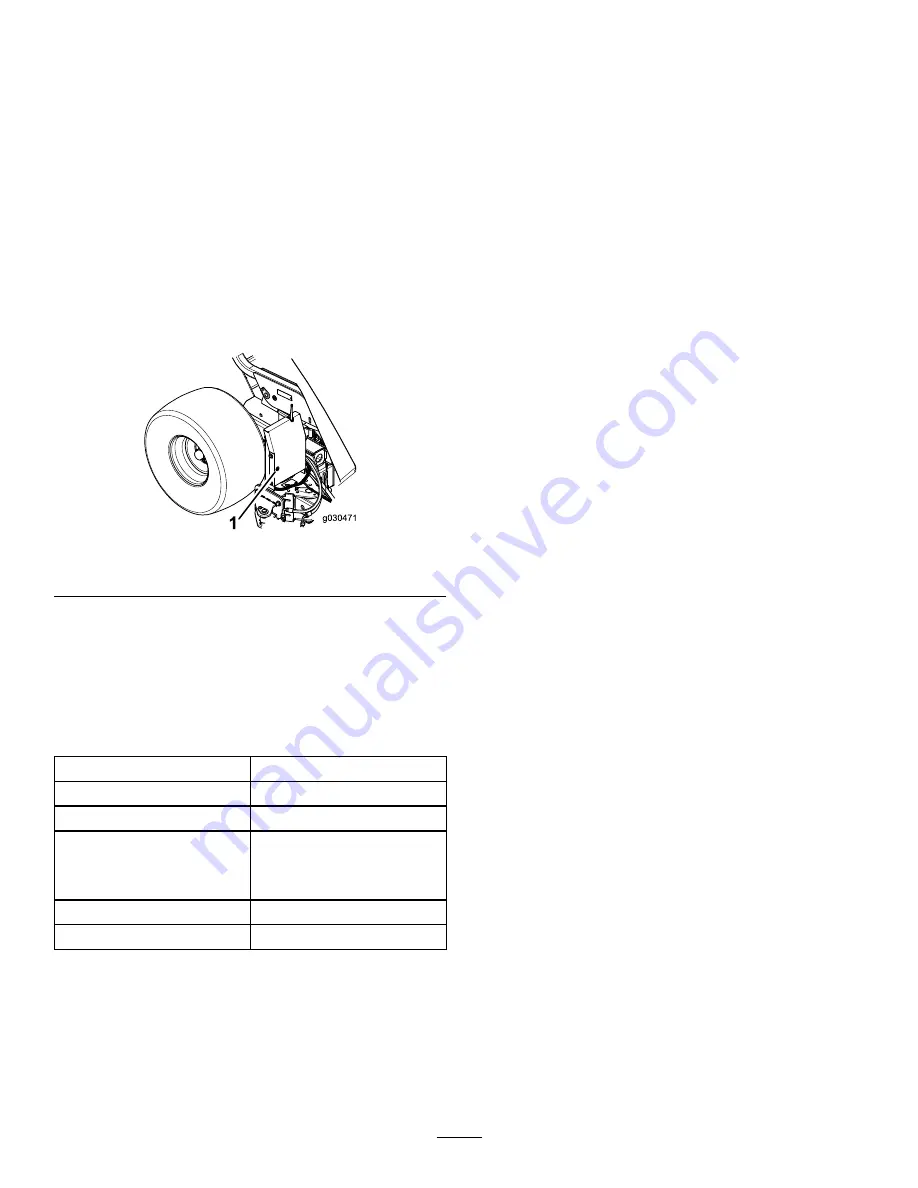
The diagnostic light (

Figure 18

) is located on the front cover

and indicates machine fault codes. After you turn the key
to the R

UN

position, the diagnostic light will illuminate for

5 seconds, turn off for 5 seconds, and then begin flashing
3 times a second until you push a button on the handheld
remote. If the light turns on for 5 seconds and then starts
blinking 10 times a second (with or without a 5 second pause)
there is a fault with the machine; refer to

Checking Fault

Codes (page 31)

.

Note:

The diagnostic light illuminates when a button is

pushed on the handheld remote.

Note:

If you have a button depressed on the handheld

remote when you start the machine, the light will not flash 3
times a second after it turns off for 5 seconds.

Figure 18

1.

Diagnostic light

Specifications

Note:

Specifications and design are subject to change

without notice.

Dimensions and Weights

Width

221 cm (87 inches)

Height

202 cm (79-1/2 inches)

Dump height clearance

173 cm (68 inches)

Length

Hopper lowered -
173 cm (68 inches)
Hopper raised - 229-249
cm (90-98 inches)

Empty weight

680 kg (1500 lb)

Gross vehicle weight (GVW)

1588 kg (3500 lb)

Attachments/Accessories

A selection of Toro approved attachments and accessories is
available for use with the machine to enhance and expand
its capabilities. Contact your Authorized Service Dealer or
Distributor or go to www.Toro.com for a list of all approved
attachments and accessories.

18


Summary of Contents for 07068

Page 1: ...Form No 3395 469 Rev A Pro Sweep Turf Sweeper Model No 07068 Serial No 315000001 and Up Register at www Toro com Original Instructions EN 3395 469 A...

Page 2: ...e Washington DC 20402 Stock No 004 000 00345 4 FCC ID OA3MRF24J40MC BASE OA3MRF24J40MA HANDHELD IC 7693A 24J40MC BASE 7693A 24J40MA HANDHELD Operation is subject to the following two conditions 1 this...

Page 3: ...he potential for injury or death comply with the following safety instructions The following instructions are from ANSI standard B71 4 2012 Safe Operating Practices Supervisor s Responsibilities Ensur...

Page 4: ...death Drive carefully To prevent tipping or loss of control Operate only in daylight or when there is good artificial light Drive slowly Watch for holes or other hazards Use care when backing machine...

Page 5: ...ct warranty of The Toro Company Safety and Instructional Decals Safety decals and instructions are easily visible to the operator and are located near any area of potential danger Replace any decal th...

Page 6: ...afe distance from the machine when dumping sweeper 108 0861 1 Warning read the Operator s Manual do not operate this machine unless you are trained 2 Crushing dismemberment hazard of bystanders do not...

Page 7: ...hen the sweeper is raised 110 7999 1 Warning 3 The machine must be parked with the attachment in the tow position before raising the sweeper to dump 2 Tipping hazard When the attachment is in the swee...

Page 8: ...1 4 inch 2 Pin assembly 2 4 Flange nut 3 8 inch 2 Install the hydraulic cylinder Power wiring harness 1 5 Cable tie 2 Install the power wiring harness Hitch pin 1 6 Hairpin cotter 1 Mount the sweeper...

Page 9: ...utility vehicle or run about These machines do not have adequate brakes suspension or frame strength to handle the weight of the sweeper Trailer brakes are recommended when using the sweeper in hilly...

Page 10: ...e mounting holes Figure 3 Note The hose guides are to be positioned on top of hitch tongue 2 Insert the hitch pin through the mounting plates and the hitch tongue Figure 3 3 Secure the top of the hitc...

Page 11: ...8 Flat washer 531 x 063 4 Locknut 1 2 inch 2 Bolt 3 8 x 1 1 4 inch 2 Pin assembly 2 Flange nut 3 8 inch Procedure 1 Mount the rear actuator tab to the sweeper frame with 4 bolts 1 2 x 2 inch 8 flat wa...

Page 12: ...eral places with cable ties Keep the harness away from any hot or rotating components Note The harness is equipped with a connector for the optional brake control kit 6 Connect the vehicle battery 6 M...

Page 13: ...d hairpin cotter 7 Remove the spring pin rotate the jack and up to the storage position and install the spring pin 7 Routing and Securing the Hydraulic Hoses and Wiring Harness Parts needed for this p...

Page 14: ...pinched in the hitch and ensure the harness is not on top of or around the hitch pin 10 Mounting the Windrow Blades Parts needed for this procedure 1 Blade mounting assembly 1 Bolt 7 16 x 3 3 4 inch...

Page 15: ...th No 2 lithium grease Note When the windrow is not required unhook the chain from the snap link pivot the windrow assembly upward and hook the chain at the raised level Figure 15 1 Bolt 7 16 x 3 3 4...

Page 16: ...the batteries are improperly installed the unit will not be damaged but it will fail to operate The cradle is embossed with polarity markings for each terminal Figure 16 1 Screw 4 Steel gasket 2 Cover...

Page 17: ...ton The hopper will stop at the pre defined height Figure 17 Transport height home position is 13 1 4 to 15 1 4 inches Turn around height off set position is 8 1 2 to 10 1 2 inches Sweeper Up Button O...

Page 18: ...button depressed on the handheld remote when you start the machine the light will not flash 3 times a second after it turns off for 5 seconds Figure 18 1 Diagnostic light Specifications Note Specifica...

Page 19: ...buttons Positon the sweeper in the following heights when transporting and turning Transport height home position is 33 7 to 38 7 cm 13 1 4 to 15 1 4 inches Turn around height offset position is 21 6...

Page 20: ...nd Brush should be engaged into the top 1 3 of the grass height Sports fields 5 to 7 notches from bottom 25 to 76 mm 1 to 3 inches from ground Brush should be engaged into the top 1 3 of the grass hei...

Page 21: ...uts 3 Roller height adjusting nuts 4 Loosen the roller height adjustment locknuts Figure 20 5 Pull out the height adjustor key and move the rear roller up or down by sliding the roller height adjustin...

Page 22: ...the tire pressure daily to ensure they are inflated properly Correct tire air pressure 86 2 kPa 12 1 2 psi Maximum tire air presssure of 124 kPa 18 psi Note The valve stem is located on the back side...

Page 23: ...od making sure the support end rests against the cylinder barrel and the cylinder rod end Figure 26 Note Secure the hopper safety support to the cylinder rod with the hair pin cotter and pin Figure 26...

Page 24: ...slowly downhill Do not attempt to turn Dumping the Hopper DANGER Tip over or electrical shock could cause serious injury or death Never dump the hopper on a slope Always dump the hopper on level groun...

Page 25: ...g temperature of 82 degrees C 180 degrees F for proper operation of the floating sweeper head Switching the Sweeper Up Mode The sweeper up button has 2 possible modes standard and optional The standar...

Page 26: ...the first 10 hours Torque the wheel lug nuts Every 25 hours Clean the reel drive area Every 50 hours Grease the sweeper Every 100 hours Inspect the condition of the tires Replace the brush Every 200...

Page 27: ...heck the tire pressure Check hydraulic hoses for damage Check for fluid leaks Check control operation Check hopper Clean wrapped material from brush Check brush wear 1 Lubricate all the grease fitting...

Page 28: ...perating conditions could cause dirt to get into the bearings and bushings resulting in accelerated wear 1 Lubricate the following grease fittings Hopper pivot upper 2 Figure 32 Brush pivot 2 Figure 3...

Page 29: ...once per second 4 Continue to hold both buttons until the LED begins blinking about twice per second 5 Release the buttons 6 Press and hold the OFF SET LEFT button The LED will blink about twice per...

Page 30: ...he handheld remote 5 Replace the cover and secure it with the 6 screws removed previously Figure 39 and torque them to 1 5 to 1 7 N m 13 to 15 in lb Note Do not over tighten the screws Storage 1 Thoro...

Page 31: ...brush shaft If they are excessively hot check the bearings for damage Foreign materials are wrapped around brush Replace any damaged bearings Clean off any foreign objects The diagnostic light on the...

Page 32: ...e then the flash sequences will repeat Code LED Flash Pattern Behavior Details Machine Specific Faults Connector not plugged in locate the loose or disconnected harness connector and connect it Someth...

Page 33: ...once per second Exiting Diagnostic Mode 1 Turn the key to the RUN position 2 Disconnect the power by separating the vehicle harness from the sweeper harness 3 Disconnect the diagnostic shunt connecto...

Page 34: ...Notes 34...

Page 35: ...3766 3636 Jean Heybroek b v Netherlands 31 30 639 4611 Victus Emak Poland 48 61 823 8369 European Privacy Notice The Information Toro Collects Toro Warranty Company Toro respects your privacy In order...

Page 36: ...ot limited to damage to seats due to wear or abrasion worn painted surfaces scratched decals or windows etc Parts Parts scheduled for replacement as required maintenance are warranted for the period o...

Reviews: