g012628
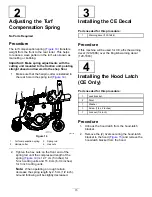
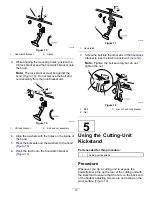
Figure 15
1.
Hood-latch bracket
2.
Rivets
3.
While aligning the mounting holes, position the
CE lock bracket and the hood-latch bracket onto
the hood.
Note:
The lock bracket must be against the
hood (
). Do not remove the bolt and
nut assembly from the lock-bracket arm.
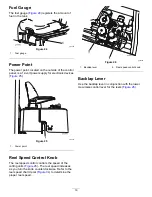
g012629
Figure 16
1.
CE lock bracket
2.
Bolt and nut assembly
4.
Align the washers with the holes on the inside of
the hood.
5.
Rivet the brackets and the washers to the hood
(
).
6.
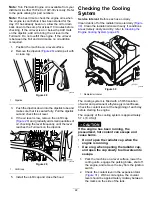
Hook the latch onto the hood-latch bracket
(
).
g012630
Figure 17
1.
Hood latch
7.
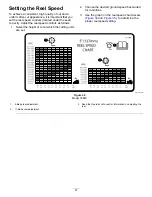
Screw the bolt into the other arm of the hood-lock
bracket to lock the latch in position (
).
Note:
Tighten the bolt securely but do not
tighten the nut.
g012631
Figure 18
1.
Bolt
3.
Arm of hood-lock bracket
2.
Nut
5
Using the Cutting-Unit
Kickstand
Parts needed for this procedure:
1
Cutting-unit kickstand
Procedure
Whenever you tip a cutting unit to expose the
bedknife/reel, prop up the rear of the cutting unit with
the kickstand to ensure that the nuts on the back end
of the bedbar adjusting screws are not resting on the
work surface (
16
Summary of Contents for 03820
Page 53: ...Notes ...
Page 54: ...Notes ...

