background image

14

  TORIN ONE YEAR LIMITED WARRANTY

Torin Inc.® has been producing quality automotive repair and maintenance products since 1968. All products

sold are felt to be of the highest quality and are covered by the following warranty:

With proof of purchase for a period of one year from the date of that purchase, the manufacturer will repair or

replace, at its discretion, without charge, any of its products or parts thereof which fail due to a defect in

material or workmanship. This warranty does not cover damage or defects caused by improper use, careless

use or abuse of the equipment. This warranty does not cover parts normally considered to wear out or be

consumed in the normal operation of the equipment. Except where such limitations and exclusions are

specifically prohibited by applicable law, (1) the CONSUMERS SOLE AND EXCLUSIVE REMEDY SHALL BE

THE REPAIR OR REPLACEMENT OF DEFECTIVE PRODUCTS AS DESCRIBED

ABOVE, and (2) THE MANUFACTURER SHALL NOT BE LIABLE FOR ANY CONSEQUENTIAL OR

INCIDENTAL DAMAGE OR LOSS WHATSOEVER, and (3) THE DURATION OF ANY AND ALL

EXPRESSED AND IMPLIED WARRANTIES, INCLUDING, WITHOUT LIMITATION, ANY WARRANTIES OF

MERCHANTABILITY AND FITNESS FOR A PARTICULAR PURPOSE, IS LIMITED TO A PERIOD OF ONE

YEAR FROM DATE OF PURCHASE. Product alteration in any manner by anyone other than us, with the sole

exception of alterations made pursuant to product instructions and in a workman like manner. You

acknowledge and agree that any use of the product for any purpose other than the specified use(s) stated in

the product instructions is at Your own risk.

Always check for damaged or worn out parts before using any product. Broken parts will affect the equipment

operation. Replace or repair damaged or worn parts immediately. Do not modify the product in any way.

Unauthorized modification may impair the function and/or safety and could affect the life of the equipment.

There are specific applications for which products are designed and tested during production. Manufacturer

provided warranted items are not authorized to be repaired by anyone other than the manufacturer or

manufacture approved repair person. Distributor does not have authorization to amend these statements. You

acknowledge and agree that any modification of the product for any purpose other than manufacturer

completed repairs is at your own risk. Before using this product, read the owner's manual completely and

familiarize yourself thoroughly with the product and the hazards associated with its improper use.

IMPORTANT: BEFORE FIRST USE on any Lift verify that a daily inspection has been completed and that all

components are in the proper working order.

This limited warranty gives you specific legal rights, and you also may have other rights, which vary from

state to state. Some states do not allow limitations or exclusions on implied warranties or incidental or

consequential damages, so the above limitations may not apply to You. This limited warranty is governed by

the laws of the State of California, without regard to rules pertaining to conflicts of law. The state courts

located in San Bernardino County, California shall have exclusive jurisdiction for any disputes relating to this

warranty.

Manufacturer reserves the rights to make design changes and or improvements to this product lines and

manual without notice. We at Torin have taken every effort to ensure complete and accurate instructions have

been included in this manual. However, possible product updates, revisions and or changes may have

occurred since this printing. Torin Inc. reserves the right to change specifications without incurring any

obligation for equipment previously or subsequently sold. Not responsible for typographical errors.

Alternately Customer Service can be reached through www.torin-usa.com or via email at

[email protected].

Not all equipment components are available for replacement, but are illustrated as a convenient reference of

location and position in the assembly sequence. Contact Customer Service for equivalent component. When

you contact us, please have your Product’s Model number, Serial Number and Description ready so that we

may help you efficiently. This information can be found on a sticker on the product.

For any warranty support or if your Torin® equipment is not functioning properly contact

Torin® Customer Service directly by telephone at 1-888-44-TORIN (1-888-448-6746)

8:00am – 5:00pm Pacific Time, Monday – Friday

www.torin-usa.com                                                                                                                      Made in China

Summary of Contents for TR9010

Page 1: ... 1 888 44 TORIN 1 888 448 6746 8 a m 5 p m PST Monday Friday Read carefully and understand all ASSEMBLY AND OPERATION INSTRUCTIONS before operating Failure to follow the safety rules and other basic safety precautions may result in serious personal injury Version 20180314 REGISTER YOUR PRODUCT http www torin usa com customer support register a product html SCAN CODE ...

Page 2: ...s negligence will make the product unsafe for use and will void the warranty Carefully inspect the product on a regular basis and perform all maintenance as required Store these instructions in a protected dry location Keep all decals on the product clean and visible Do not modify and or use for any application other than that for which this product was designed If you have any questions relative ...

Page 3: ...the block the load chain should be kept vertically straight without any twist to prevent it from tangling 4 During operation the operator should stand in the plane of the hand wheel 9 To lift the load pull the hand chain 15 to rotate the hand wheel in clockwise direction When pulling the hand chain in the reverse direction the hand wheel will be separated from the brake seat 10 the ratchet disc 14...

Page 4: ...s that may occur It must be understood by the operator that common sense and caution are factors which cannot be built into this product but must be supplied by the operator 1 The supporting structure the hoist is mounted to including trolley monorail or crane must be designed to withstand the loads and forces imposed by the hoist for the rated load 2 Install in location that allows the operator t...

Page 5: ...the hoist is mounted to including trolley monorail or crane must be designed to withstand the loads and forces imposed by the hoist for the rated load 2 Properly seat the suspension hook on the supporting structure at its intended load bearing point see the left side diagram of Figure A Do not allow the hook hitch to support any part of the load Do not apply the load to the point of the hook shown...

Page 6: ...the safety and operating instructions portion of this manual 2 WARNING TO PREVENT SERIOUS INJURY FROM HOIST FAILURE Do not use damaged equipment If adjustments or repairs are necessary or any defects are known have the problem corrected before further use 3 Do not operate a hoist with an out of order sign 4 Only a qualified technician should perform maintenance to the hoist 5 Do not use the chain ...

Page 7: ...ngage in any activity which will divert the operator s attention while operating the hoist 2 Respond to signals from a designated person only However always obey a stop signal no matter who gives it 3 Do not lift or lower a load with the hoist until the operator and all other personnel are clear of the load 4 Make sure the load and hoist will clear all obstacles before moving or rotating the load ...

Page 8: ...othly into and away from the sprockets b If the chain binds jumps or is noisy first see that it is clean and properly lubricated If the trouble persists inspect the chain and mating parts for wear distortion or other damage c Examine visually for gouges nicks weld spatter corrosion and distorted links Slacken the chain and move the adjacent links to one side to inspect for wear at the contact poin...

Page 9: ... for a period of a month or more but less than a year must be inspected before being placed in service according to the Frequent Inspection requirements 3 A hoist that is used in infrequent service which has been idle for a period of a year or more must be inspected before being placed in service according to the Periodic Inspection requirements 4 Equipment should be stored in an area where they w...

Page 10: ...pment with equal or a larger load capacity to lower the load safely to the ground After unbinding clean lubricate and test that equipment is working properly Rusty components dirt or worn parts can be causes of binding Clean and lubricate the equipment as indicated in the lubrication section Test the equipment by lifting without a load If the binding continues contact Customer Service IF YOUR EQUI...

Page 11: ...11 ASSEMBLY DIAGRAM ...

Page 12: ... 15 Bolt 3 16 Snap ring 1 17 Right side plate 1 18 Pinion shaft 2 19 Splined gear 1 20 Nut 1 21 Disk gear 2 22 Driving shaft 1 23 Bent plate 1 24 Sheet cover 1 25 Guide roller 1 26 Cotter pin 2 27 Chain shaft 1 28 Stripper assembly 1 29 Screw 1 30 Load chain 1 31 Ldle sheave 1 32 Hook holder 1 33 Snap ring 4 34 Shaft 1 35 Suspension plate assembly 1 36 Self locking nut 1 37 Chain sprocket assembly...

Page 13: ...r and specific details regarding your question Not all equipment components are available for replacement illustrations provided are a convenient reference of location and position in the assembly sequence The manufacturer reserves the rights to make design changes and or improvements to product lines and manuals without notice WARRANTY NOTICE We want to know If you have any concerns with our prod...

Page 14: ...on Distributor does not have authorization to amend these statements You acknowledge and agree that any modification of the product for any purpose other than manufacturer completed repairs is at your own risk Before using this product read the owner s manual completely and familiarize yourself thoroughly with the product and the hazards associated with its improper use IMPORTANT BEFORE FIRST USE ...

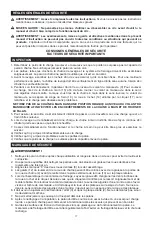
Page 15: ...manquantes Avant de retourner voir votre fournisseur appelez notre service à la clientèle au 1 888 44 TORIN 1 888 448 6746 entre 8 heures et 17 heures HNP du lundi au vendredi Lisez attentivement et comprenez toutes les DIRECTIVES DE MONTAGE ET DE FONCTIONNEMENT avant l utilisation Vous pouvez subir des blessures graves si vous ne vous conformez pas à ces règles et autres précautions de sécurité A...

Page 16: ...____ NE PAS UTILISER OU RÉPARER CE PRODUIT SANS AVOIR LU LE PRÉSENT MANUEL Lisez et suivez les directives de sécurité Conservez ces directives à la disponibilité des opérateurs Assu rez vous que tous les opérateurs sont bien formés et savent comment utiliser le produit correctement et en toute sécurité En continuant vous convenez que vous comprenez complètement le contenu du présent ma nuel Le pro...

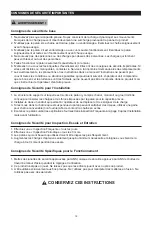
Page 17: ...tées et les roulements une fois par an 3 Alignez les marques 0 des deux roues dentées 8 lors de l assemblage 4 Les galets 12 du roulement de la roue de chaîne peuvent être coincés avec de la graisse à la portée de la roue de chaîne 4 avant de rentrer dans la piste extérieure de la roue 13 sur la plaque latérale 5 Lors de l assemblage du mécanisme de freinage soyez soigneux afin d engrener les dent...

Page 18: ... doit comprendre que le bon sens et la prudence sont des facteurs qui ne peuvent pas être incorporés dans ce produit mais que c est le rôle de l opérateur d en faire preuve 1 La structure de support sur laquelle est montée le palan y compris chariot monorail ou grue doit être conçue pour résister les charges et les forces imposées par le palan pour la capacité prévue 2 Installez le dans un endroit...

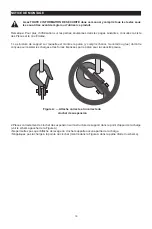
Page 19: ...an y compris chariot monorail ou grue doit être conçue pour résister les charges et les forces imposées par le palan pour la capacité prévue 2 Placez correctement le crochet de suspension sur la structure de support dans le point d appui de la charge voir le schéma gauche de la Figure A Ne permettez pas que l attache de levage du crochet supporte aucune partie de la charge N appliquez pas la charg...

Page 20: ...tions ou s il y a quelque défaut corrigez le problème avant de continuer à l utiliser 3 Ne faites pas fonctionner un palan qui a un écriteau qui dit hors service 4 L entretien du palan doit être fait seulement par un technicien qualifié 5 N utilisez pas la chaîne ou le câble comme terre pour soudage 6 Ne laissez pas que la chaîne ou le câble soient touchés par une électrode de soudage 7 Ne faites ...

Page 21: ...it distraire l opérateur pendant le fonctionnement du palan 2 Répondez aux signes d une seule personne désignée Cependant respectez toujours les signes d arrêt qui que soit celui qui est en train de les faire 3 Ne soulevez ni n abaissez une charge avec le palan jusqu à ce que l opérateur et tout autre personnel soient loin de la charge 4 Assurez vous que la charge et le palan se déplaceront sans h...

Page 22: ...ince saute ou est bruyante vérifiez d abord si elle est propre et bien lubrifiée Si le problème continue examinez la chaîne et les pièces adjacentes afin de vérifier s il y a de l usure des distorsions ou d autres dommages c Faites une inspection visuelle pour déterminer s il y a des blessures des coupures des projections de soudure de la corrosion et des maillons déformés Détendez la chaîne et dé...

Page 23: ...le dans un endroit sec plutôt à l intérieur 2 Un palan qui est utilisé peu fréquemment qui n a pas été utilisé pendant une période d un mois ou plus mais moins d une année doit être inspecté avant d être mis en service selon les exigences d Inspection Fréquente 3 Un palan qui est utilisé peu fréquemment qui n a pas été utilisé pendant une période d une année ou plus doit être inspecté avant d être...

Page 24: ...er la charge en toute sécurité sur le sol Après l avoir décoincé nettoyez le lubrifiez le et vérifiez que l équipement fonctionne correctement Les parties rouillées la saleté ou les pièces usées peuvent provoquer le coincement Nettoyez et lubrifiez l équipement suivant les instructions de la section lubrification Testez l équipement sans charge Si le coincement continue contactez le Service à la C...

Page 25: ...25 VUE ÉCLATÉE ...

Page 26: ...lon 3 16 Jonc d arrêt 1 17 Plaque droite 1 18 Arbre de pignon 2 19 Roue cannelée 1 20 Écrou 1 21 Engrenage 2 22 Arbre de commande 1 23 Cornière en tôle pliée 1 24 Couverture 1 25 Galet de guidage 1 26 Clavette 2 27 Axe de la chaîne 1 28 Assemblage du séparateur 1 29 Vis 1 30 Chaîne de levage 1 31 Poulie de retour 1 32 Support du crochet 1 33 Jonc d arrêt 4 34 Axe 1 35 Assemblage de la plaque de su...

Page 27: ...ails spécifiques de votre question Pas tous les composants de l équipement ne sont disponibles pour le remplacement Les illustrations fournies sont une référence convenable de l emplacement et de la position dans la séquence d assemblage Le fabricant se réserve le droit d apporter des modifications de conception et ou d améliorer les gammes de produits et ses manuels sans préavis AVIS DE GARANTIE ...

Page 28: ...ez que toute modification du produit dans un but autre que les réparations effectuées par le fabricant se fait à vos propres risques Avant d utiliser ce produit lisez entièrement le manuel du propriétaire et familiarisez vous complètement avec le produit et les dangers qui se rapportent à son utilisation inappropriée IMPORTANT AVANT LA PREMIÈRE UTILISATION sur tout appareil de levage vérifiez si l...

Page 29: ...ezas Antes de recurrir a su distribuidor llame a nuestro departamento de atención al cliente al 1 888 44 TORIN 1 888 448 6746 de lunes a viernes de 8 a m a 5 p m hora del Pacífico Lea atentamente y entienda todas las INSTRUCCIONES DE ENSAMBLAJE Y OPERACIÓN antes de utilizar el producto Si no respeta las normas de seguridad y otras precauciones básicas de seguridad pueden producirse lesiones person...

Page 30: ...__________________ NO UTILICE NI REPARE EL PRODUCTO SIN HABER LEÍDO ESTE MANUAL Lea y siga las instrucciones de seguridad Ponga las instrucciones a disposición inmediata de los operadores Asegúrese de que todos los operadores reciban el entrenamiento correspondiente y de que entiendan cómo utilizar el producto de forma segura y correcta Al proceder usted acepta que ha entendido y ha comprendido co...

Page 31: ... polipasto de cadena después del uso y guárdelo en un lugar seco para evitar su oxidación y corrosión 2 Limpie las piezas con queroseno y haga que una persona experta lubrique los engranes y cojinetes con grasa una vez al año 3 Alinee las marcas 0 de los dos engranes 8 durante el montaje 4 Los rodillos 12 del cojinete de la rueda de la cadena pueden estar pegados con grasa al muñón de la rueda de ...

Page 32: ...ructura de soporte en la que está montado el elevador incluyendo el carrito el monorriel o la grúa debe estar diseñada para resistir las cargas y las fuerzas impuestas por el elevador de acuerdo a su carga nominal 2 Instálelo en una ubicación que le permita al operador moverse y mantenerse alejado de la carga 3 Cuando la cadena suelta que cuelga del elevador pueda generar un peligro use un contene...

Page 33: ...ncluyendo el carrito el monorriel o la grúa debe estar diseñada para resistir las cargas y las fuerzas impuestas por el elevador de acuerdo a su carga nominal 1 Asiente correctamente el gancho de suspensión en la estructura de soporte en su punto de sostén de carga previsto vea el diagrama del lado izquierdo de la Figura A No permita que el acoplamiento del gancho soporte ninguna parte de la carga...

Page 34: ...sitaran hacer ajustes o reparaciones o si supiera de algún defecto solucione el problema antes de volver a ponerlo en funcionamiento 3 No opere un elevador que tenga un aviso de Fuera de servicio 4 Solo un técnico calificado podrá realizar el mantenimiento del elevador 5 No use la cadena ni la cuerda como tierra para soldaduras 6 No toque un electrodo de soldadura con la cadena o la cuerda 7 Solo ...

Page 35: ... al equilibrio y al amarre o a la suspensión de la carga para evitar el deslizamiento de la carga 1 No realice ninguna actividad que desvíe la atención del operador mientras opera el elevador 2 Responda a las señales de una única persona designada Sin embargo obedezca siempre una señal de alto sin importar quién se la dé 3 No levante ni baje una carga con el elevador hasta que el operador y el res...

Page 36: ...de acoplamiento para detectar desgaste distorsión u otros daños c Examine visualmente si hay desportilladuras mellas salpicaduras de soldadura corrosión y eslabones distorsionados Afloje la cadena y mueva los eslabones adyacentes a un lado para inspeccionar el desgaste en los puntos de contacto Si se observa desgaste o si se sospecha estiramiento la cadena deberá medirse de la siguiente manera I S...

Page 37: ...faltantes 1 Almacenar en un sitio seco se recomienda en un ambiente interior 2 Un elevador que se usa para servicios de manera infrecuente que ha estado inactivo por un período de un mes o más pero por menos de un año debe ser inspeccionado antes de ser puesto en servicio de acuerdo con los Requerimientos de Inspección para uso Frecuente 3 Un elevador que se usa para servicios de manera infrecuent...

Page 38: ...carga use equipos con una capacidad de carga igual o mayor para bajar la carga de forma segura hasta el suelo Después de desatascarlo limpie lubrique y pruebe que el equipo esté funcionando correctamente Los componentes oxidados la suciedad o las piezas desgastadas pueden ser causas de atascamiento Limpie y lubrique el equipo como se indica en la sección de lubricación Pruebe el equipo sin una car...

Page 39: ...39 DIAGRAMA DE ENSAMBLAJE ...

Page 40: ... 15 Perno 3 16 Anillo elástico 1 17 Placa lateral derecha 1 18 Eje del piñón 2 19 Engrane acanalado 1 20 Tuerca 1 21 Engrane de disco 2 22 Eje motriz 1 23 Placa doblada 1 24 Cobertura de lámina 1 25 Rodillo de guía 1 26 Pasador de chaveta 2 27 Eje de la cadena 1 28 Ensamblaje del devanador 1 29 Tornillo 1 30 Cadena de carga 1 31 Rodillo de la polea 1 32 Soporte del gancho 1 33 Anillo elástico 4 34...

Page 41: ...ionados con su pregunta No todos los componentes del equipo están disponibles para su reemplazo las ilustraciones proporcionadas son una referencia conveniente de ubicación y posición en la secuencia de ensamblaje El fabricante se reserva el derecho de realizar cambios de diseño y o mejoras en las líneas de productos y manuales sin previo aviso AVISO DE GARANTÍA Queremos saber si tiene alguna inqu...

Page 42: ...e estabilice la carga por levantar de forma segura Nunca coloque ninguna parte del cuerpo debajo de una carga levantada sin haber calzado y apoyado la carga correctamente Nunca utilice el gato en parachoques tubulares o curvados Ya que el vehículo podría resbalarse del gato y caer y causar lesiones graves o la muerte Utilice un elevador de parachoques para levantar la mayoría de vehículos con para...

Page 43: ...in au 1 888 44 TORIN 1 888 448 6746 De 8 heures à 17 heures heure du Pacifique du lundi au vendredi Comuníquese conel Servicio de Atención al Cliente de Torin directamente por teléfono al 1 888 44 TORIN 1 888 448 6746 De lunes a viernes de 8 00 a m a 5 p m hora del Pacífico Torin Inc 4355 E Brickell Street Ontario CA USA www torin usa com Made in China Fabriqué en Chine Hecho en China ...

Reviews: