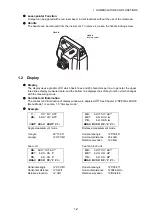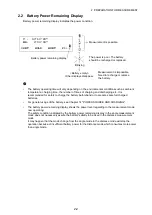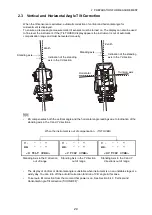
1-7
1 NOMENCLATURE AND FUNCTIONS
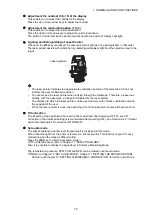
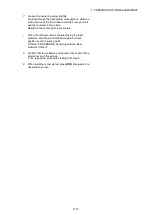
Adjustment the contrast (0 to 15) of the display
This enable you to adjust the contrast of the display.
Press the up or down arrow keys to adjust the contrast.
Adjustment the reticle illumination (1 to 5)
This enable you to adjust the reticle illumination.
Press the right or left arrow keys to adjust the reticle illumination.
The switch of reticle illumination will be interlocked with the switch of display backlight.
Lighting and Extinguishing of Laser Pointer
Whenever the
{F3}
key is pressed, the laser pointer will light up or be extinguished, in that order.
The laser pointer assists with collimation by radiating visible laser light from the objective lens to the
target.
•
The laser pointer indicates the approximate collimation position of the telescope. It does not
indicate the exact collimation position.
•
You cannot see the laser pointer when looking through the telescope. Therefore, please look
directly, with the naked eye, at the point indicated by the laser pointer.
•
The distance to which the laser pointer can be used will vary with climatic conditions and with
the eyesight of the user.
•
When the laser pointer is used, the operating time of internal power source will become short.
Tilt correction
The tilt setting mode performed here will not be memorized after powering OFF. To set TILT
correction in the initialized setting (it is memorized after powering OFF), see Section 6.4.3 “Vertical
and Horizontal Angle Tilt correction (Tilt ON/OFF)”.
Set audio mode
The light acceptance quantity level (Signal level) is displayed in this mode.
When reflected light from the prism is received, a buzzer sounds. This function is good for easy
collimation when the target is difficult to find.
Press the
{F4}
key to view the set audio screen.
To stop the buzzer, refer to Chapter 17 “SELECTING MODE”.
Also, it is possible to display the signal level in Distance Measuring Mode.
The temperature, pressure, PPM, PSM and NPM can be viewed in set audio mode.
Refer to Chapter 10 “SET AUDIO MODE”, Chapter 11 “SETTING THE PRISM CONSTANT
VALUE” and Chapter 12 “SETTING ATMOSPHERIC CORRECTION”, for further instructions.
Laser aperture


