background image

IMPORTANT BUILDING NOTES

• There are two types of screws used in this kit:

Sheet metal screws are designated by a number
and a length.

For example #6 x 3/4" long [19mm]

This is a number six screw that is 3/4" [19mm] long.

Machine screws are designated by a number,
threads per inch, and a length.

For example 4-40 x 3/4" long [19mm]

This is a number four screw that is 3/4" [19.1mm]
long with forty threads per inch.

• When you see the term test fit in the instructions,

it means that you should first position the part on
the assembly without using any glue, then
slightly modify or

custom fit the part as necessary

for the best fit.

• Whenever the term glue is written you should rely

upon your experience to decide what type of glue
to use. When a specific type of adhesive works
best for that step, the instructions will tell you what
glue is recommended.

• Whenever just epoxy is specified, you may use

either 30-minute (or 45-minute) epoxy or 6-minute
epoxy. When 30-minute epoxy is specified, it is
highly recommended that you use only 30-minute
(or 45-minute) epoxy because you will need the
working time and/or the additional strength.

• Photos and  sketches are placed before the 

step they refer to. Frequently you can study photos in
following steps to get another view of the same parts.

ASSEMBLE THE WING

Hinge the Flaps 

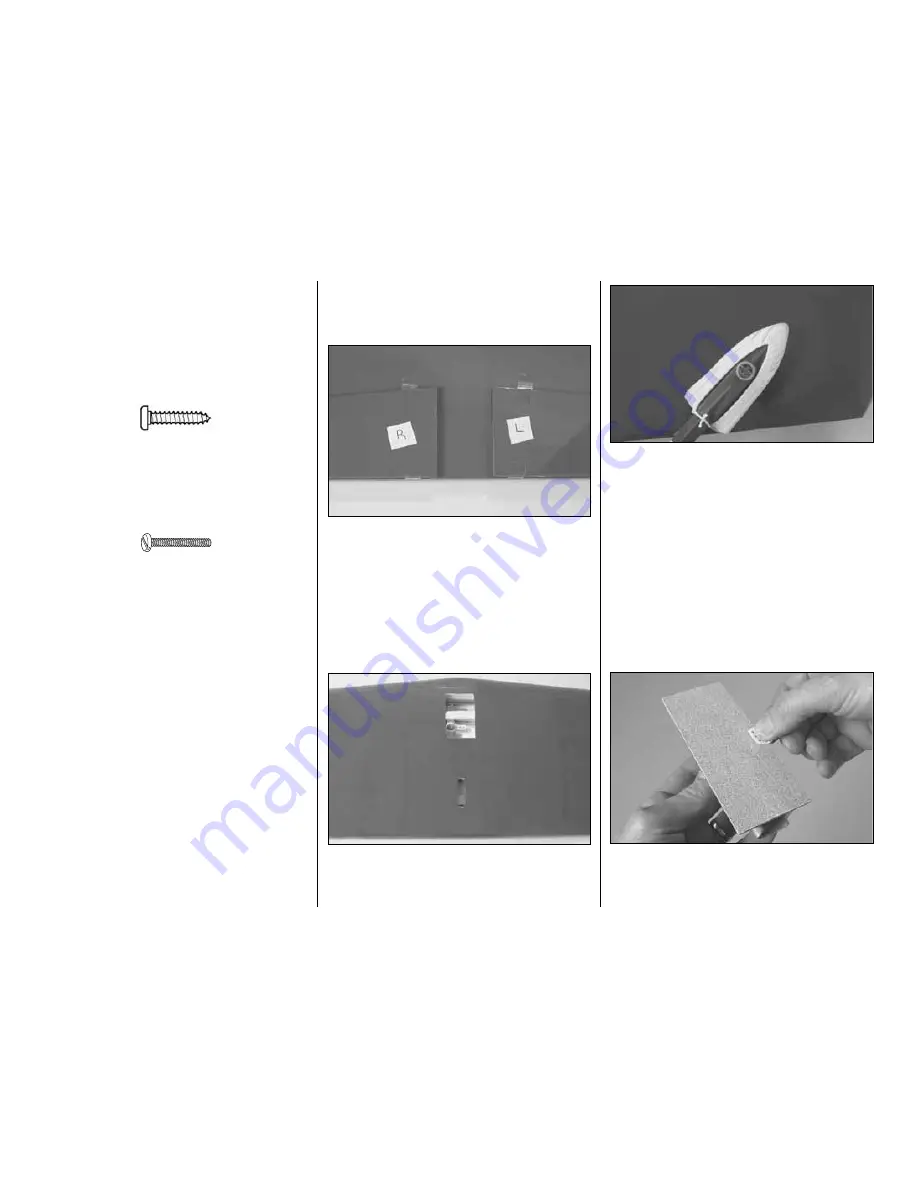
1. Mark the flaps as “right” and “left” before

removing them from the wing (the right flap is about
3/4" [20mm] shorter than the left flap).

2. Separate the flaps from the wing by peeling off

the tape. Any glue left from the tape can be removed
with naphtha lighter fluid or denatured alcohol.

3. Cut and remove the covering from the top of the

wing over the bellcrank opening and the pushrod
exit. Also cut the covering from the opening in the
bottom of the wing directly under the bellcrank screw.

4. Use a covering iron with a covering sock to

remove any wrinkles in the covering on the wing and
flaps. The best way is to glide the iron over the
covering until the wrinkles disappear, and then go
over the area again pushing down to bond the
covering to the wood. If the wrinkles don’t go away,
the balsa in that area may be bending inward. If this
is happening, do not press down on the iron in that
area. Simply let the heat of the iron shrink the
covering. If the wrinkles momentarily disappear, then
immediately reappear, the iron may be too hot, thus
causing air bubbles. Lower the temperature of the
iron or use a sharp #11 blade to puncture several
holes in the covering, then reheat. The suggested
iron temperature is around 360 degrees F.

5. Using a bar sander or a sanding block with

medium-grit sandpaper, remove any raised molding
imperfections and roughen the gluing surface of all
the hinges so glue will adhere.

- 6 -

Summary of Contents for NOBLER ARF

Page 1: ...product By the act of using the user assembled product the user accepts all resulting liability If the buyer is not prepared to accept the liability associated with the use of this product the buyer...

Page 2: ...stunters And if you plan to just dabble in control line the Nobler ARF has the perfect blend of maneuverability and stability to get you into the air with minimal assistance from an experienced flyer...

Page 3: ...5mm Aluminum spinner GPMQ4551 and appropriate adapter GPMQ4581 for O S MAX LA and other engines with 1 4 28 crankshaft thread 1 4 6mm White striping tape GPMQ1610 1 16 2mm White striping tape GPMQ1580...

Page 4: ...re missing or are not of acceptable quality or if you need assistance with assembly contact Product Support When reporting defective or missing parts use the part names exactly as they are written in...

Page 5: ...m Socket Head Cap Screws engine mounting 6 4 40 Blind Nuts 2 wing mounting 4 engine mounting 6 4 Flat Washers 2 wing mounting 4 engine mounting 4 4 Lock Washers engine mounting 2 4 40 Nuts for pushrod...

Page 6: ...same parts ASSEMBLE THE WING Hinge the Flaps 1 Mark the flaps as right and left before removing them from the wing the right flap is about 3 4 20mm shorter than the left flap 2 Separate the flaps fro...

Page 7: ...een the slits you cut over each hinge slot in the wing 10 Without using any glue temporarily rejoin the flaps to the wing with the hinges There should be little or no hinge gap and the flaps should mo...

Page 8: ...the joiner wire View the trailing edges of the flaps from the end of the wing See if the flaps are parallel with each other have the same up and down If necessary tweak the joiner wire to align the f...

Page 9: ...urb the wing until the epoxy hardens 7 After the epoxy on the first flap has hardened glue the other flap to the wing the same way Allow the epoxy on both flaps to fully harden for at least a few hour...

Page 10: ...e covering Then peel off the covering 6 Center the 1 x 1 1 2 26 x 38mm plywood wing bolt plate over the holes on the bottom of the wing Glue the plate into position Using the holes in the top of the w...

Page 11: ...s of the fuselage This will keep the trailing edge of the stab centered 8 Insert a pin through the top center of the fuselage over the firewall Tie a loop in one end of a 36 1m piece of non elastic st...

Page 12: ...ol movement When the elevators move up the flaps should move down It s best to install the fuel tank before permanently mounting the wing so let s do that first Mount the Fuel Tank 1 Use epoxy thinned...

Page 13: ...hole Apply 30 minute epoxy to the stab and fuselage where they join Then slide the stabilizer into position Use your paper towel squares dampened with denatured alcohol to clean off any excess epoxy T...

Page 14: ...n both sides Add a drop of oil to both sides of the wheels so they spin freely 3 Install the main landing gear wires in the landing gear rail Using the screw holes in the nylon straps as a guide drill...

Page 15: ...hole should be about 5 16 8mm from the aft edge of the cowl placing it about 1 4 behind the front edge of the fuselage side Screw in a 2 x 1 4 6mm screw just enough to hold the cowl but do not tighte...

Page 16: ...included with this kit uses a three line system As shown in the sketch to the left one line is the fuel pickup which goes to the carburetor or to the remote needle as in the case of the O S LA engine...

Page 17: ...n though the decals have a sticky back and are not the water transfer type submersing them in soap water allows accurate positioning and reduces air bubbles underneath 3 Position the decal on the mode...

Page 18: ...30g of lead weight to the right wing tip This can be temporarily attached to the bottom of the wing with the self adhesive foam tape attached to the weight After the final amount of weight required h...

Page 19: ...by having been previously successfully flight tested 3 Where established I will abide by the safety rules for the flying site I use and I will not willfully and deliberately fly my models in a careles...

Page 20: ...the wind will be behind the model when it is released for takeoff For the first half circle during the brief period when the pilot has the least control before the model is up to speed the wind will p...

Page 21: ...lot s signal the assistant may release the model never push the model forward as doing so may result in a crash The pilot should be ready especially during takeoff to briefly step back to maintain lin...

Page 22: ...flies and you are ready to begin performing stunts seek the assistance of an experienced stunt pilot before attempting to learn new maneuvers on your own Almost any control line stunt maneuvers are st...

Page 23: ...s Refer to the AMA Rule Book for full descriptions Takeoff Reverse Wingovers Consecutive Inside Loops Inverted Flight Consecutive Outside Loops Consecutive Inside Square Loops Consecutive Outside Squa...

Page 24: ...FLAP PUSHROD TEMPLATE FLIGHT LOG DATE COMMENTS Started Construction Finished Construction First Flight First Loop First Inverted Flight First Wingover...

Reviews: