Make the Elevator Pushrod
❏
1. Make the elevator pushrod by cutting a 4-40 x
17-1/2" [445mm] threaded one-end pushrod to a
length of 13" [330mm]. Read the following
Hot Tip
about soldering. Then, solder a clevis onto the
un-threaded end of the pushrod (this will be the aft
end of the pushrod).
❏
2. Thread a 4-40 nut and a clevis onto the
threaded end of the pushrod (this will be the front of
the pushrod and is the end that connects to the
control horn on the flap joiner wire). Slip a silicone
clevis retainer over both clevises on the pushrod.
❏
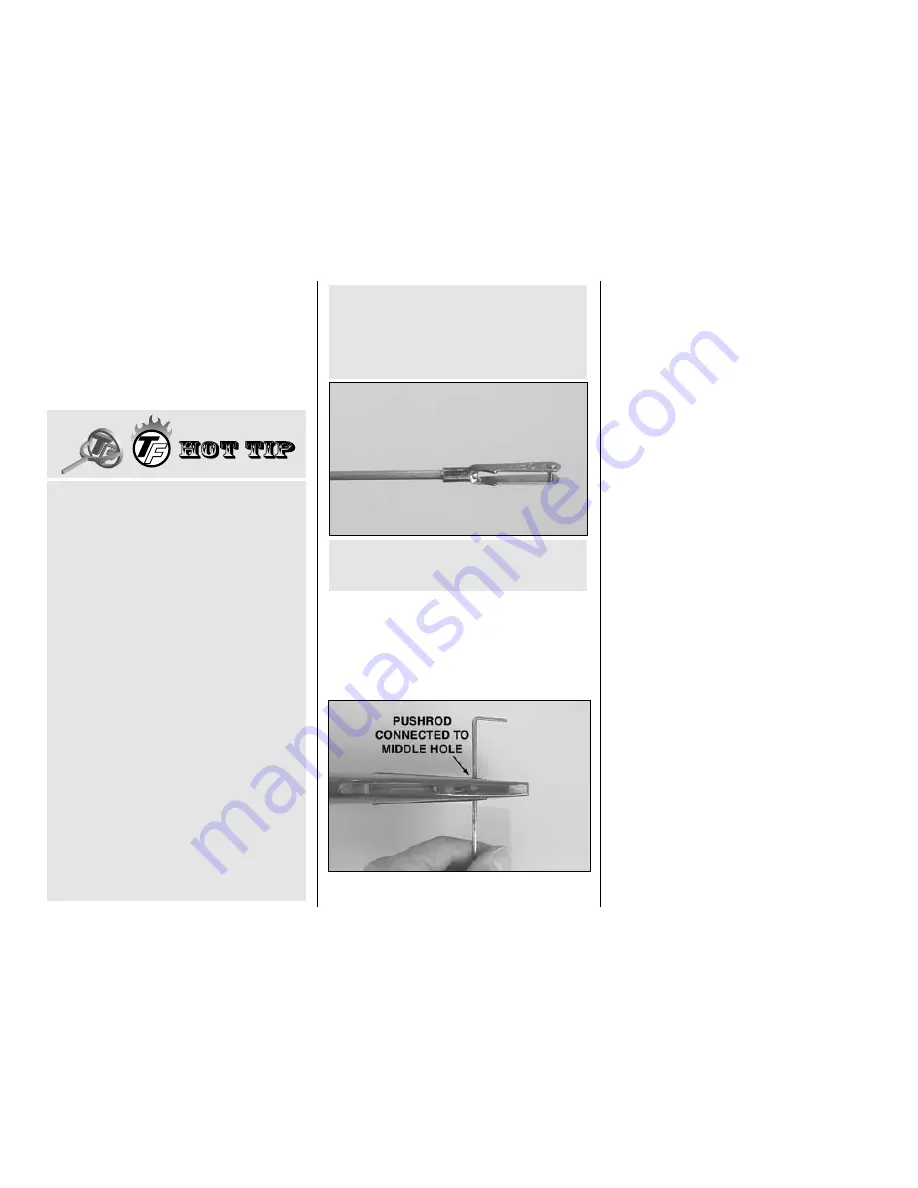
3. Fit the elevator control horn into the slot in the
fuselage for the stabilizer. Then, guide the pushrod
down through the fuselage. Connect the clevis on the
pushrod to the middle hole in the flap control horn.
❏
4. Bolt the wing to the fuselage. Working through
the cockpit, use hemostats or needle-nose pliers to
connect the clevis on the elevator pushrod to the
middle hole in the flap control horn.
❏
5. Slide the stabilizer into the fuselage. Temporarily
join the elevators to the stab and joiner wire with the
hinges. Make certain the stab is pushed all the way
forward. The elevators must be centered when the
flaps are centered. If necessary, adjust the clevis on
the front of the elevator pushrod to center the
elevators with the flaps. This can be done by
disconnecting the clevis on the front of the pushrod,
removing the stab, and then feeding the pushrod
forward to access the clevis. Screw the clevis in or
out as necessary to lengthen or shorten the pushrod.
❏
6. While the stab is in position and the pushrod is
connected, operate the flaps and elevators by pulling
on the leadouts. Make any adjustments necessary to
achieve smooth control movement. (When the
elevators move up, the flaps should move down.)
It’s best to install the fuel tank before
permanently
mounting the wing, so let’s do that first.
Mount the Fuel Tank
❏
1. Use epoxy thinned with denatured alcohol,
epoxy or fuelproof paint to fuelproof the fuel tank
compartment and the main landing gear rail.
This is what a properly soldered clevis looks like;
shiny solder with good flow, no blobs, flux
removed.
4. Immediately after the solder has solidified, but
while it is still hot, carefully use a cloth to quickly
wipe off the flux before it hardens. Important:
After the joint cools, coat with oil to prevent rust.
Note: Do not use the acid flux that comes with
silver solder for electrical soldering.
HOW TO SOLDER
1. Use denatured alcohol or other solvent to
thoroughly clean the pushrod. Use coarse
sandpaper to roughen the end of the pushrod
where it is to be soldered.
2. Apply a few drops of soldering flux to the end
of the pushrod, and then use a soldering iron or
a torch to heat it. “Tin” the heated area with silver
solder (GPMR8070) by applying the solder to
the end. The heat of the pushrod should melt the
solder–not the flame of the torch or soldering
iron–thus allowing the solder to flow. The end of
the wire should be coated with solder all the way
around.
3. Place the clevis on the end of the pushrod. Add
another drop of flux. Then, simultaneously heat
the clevis and pushrod. Slide the clevis the rest of
the way onto the pushrod as the solder melts.
Apply another small amount of solder while the
pushrod and clevis are still hot. The same as
before, the heat of the parts being soldered
should melt the solder, thus allowing it to flow.
Allow the joint to cool naturally without disturbing.
Avoid excess blobs, but make certain the joint is
thoroughly soldered. The solder should be shiny,
not rough. If necessary, reheat the joint and allow
to cool.
- 12 -


