11
SERVICING
HYDRA X
2.2
REPLACING THE BELT
Before replacing the belt on your unit, make
sure you have performed the “Pressure Relief
Procedure” as illustrated in the Operation section
of this manual. DO NOT attempt this repair while
the unit is running.
PINCH HAZARD. Make sure your fingers remain
clear of the contact area between the belt and
pulley.
BURN HAZARD. Make sure the gas engine has
had time to sufficiently cool before touching it.
It is recommended that this procedure be done
by two people.
REMOVAL
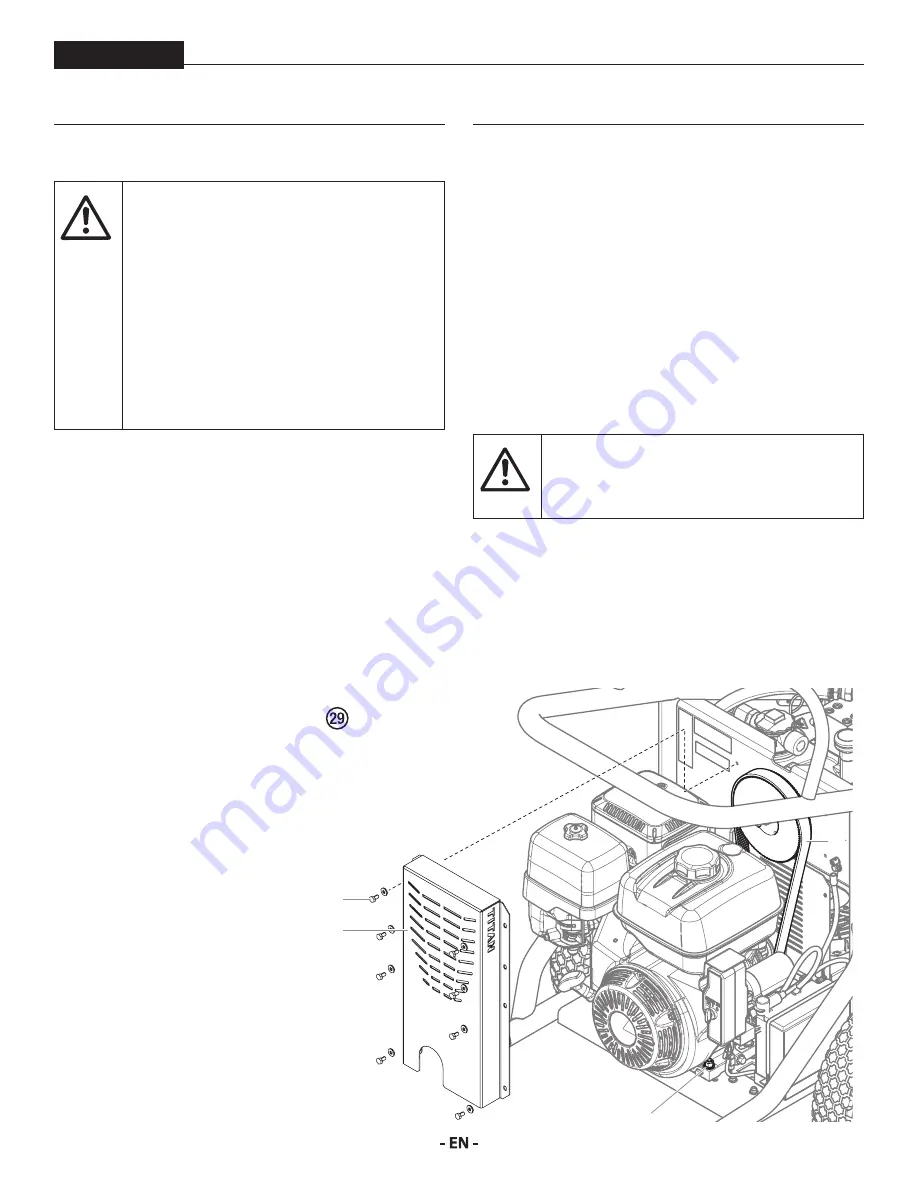
1. Remove the eight screws (fig. 29, item 1) that secure the
belt guard (2) to the cart frame. Remove the guard.
2. Loosen but do not remove the four hex nuts/bolts (3) that
secure the engine to the engine plate.
3. With the nuts/bolts loosened, carefully tilt the engine
backwards to remove the tension in the belt (4).
4. While the belt is loose, it can now be removed by the
second person.
REINSTALLATION
1. While the belt is removed, slide the engine to the right (as
looking at it from the rear of the sprayer) as far as it will go.
2. Loop the the new belt over the upper pulley until the belt
engages the pulley cogs. Allow the belt to hang from
the top pulley. With your hand, hold the belt in place
in approximately the 3:00 position on the lower pulley
groove.
3. Use your other hand to manually turn the upper pulley
clockwise. Allow the hand holding the belt on the lower
pulley to follow the motion. The motion of the pulley and
the placement of your hand over the belt on the lower
pulley will allow the the belt to slide into place on the
lower pulley.
Attention
Make sure the belt is not pinched or twisted in
any way.
4. Carefully slide the engine to the left (as looking at it from
the rear of the sprayer) as far as the belt tension will allow
it to go.
5. Tighten the nuts/bolts (3) that secure the engine to the
engine plate. Torque to 245-255 in.-lbs.
6. Replace the belt guard (2) and secure with the six screws
(1). Torque screws to 165-175 in.-lbs.
1
2
3
4


