background image

2-1

KRF

2. Safety Precautions

2-2


Safety precautions

This section describes important precautions that you must observe.


„

General


While this product is operating or operable, do not enter the working area of any 
moving part.

Otherwise, it may cause you to touch the moving part and injure you.


While the motor or sensor is energized, do not move or install this product.

Otherwise, it may cause electric shocks, or cause malfunction that could lead to injury.


„

Installation and operation


If any moving part may fall by its own weight in vertical application or the like, provide 
a safeguard for preventing the part from falling.

If any moving part falls, it may cause injury or damage.


While this product is operating, do not touch any moving part or rotating part.

Otherwise, it may cause your hand to be caught and injured.


„

Maintenance


Turn off the machine (turning power off) before conducting any maintenance.

Otherwise, it may cause electric shocks, or cause malfunction that could lead to injury.


If two or more people are involved in the operation, confirm the procedures such 
as sequences, signs, and abnormalities in advance, and appoint another person for 
monitoring the operation.

Failure to do so may cause an unexpected accident.

Warning

2-1


Warning indications on safety

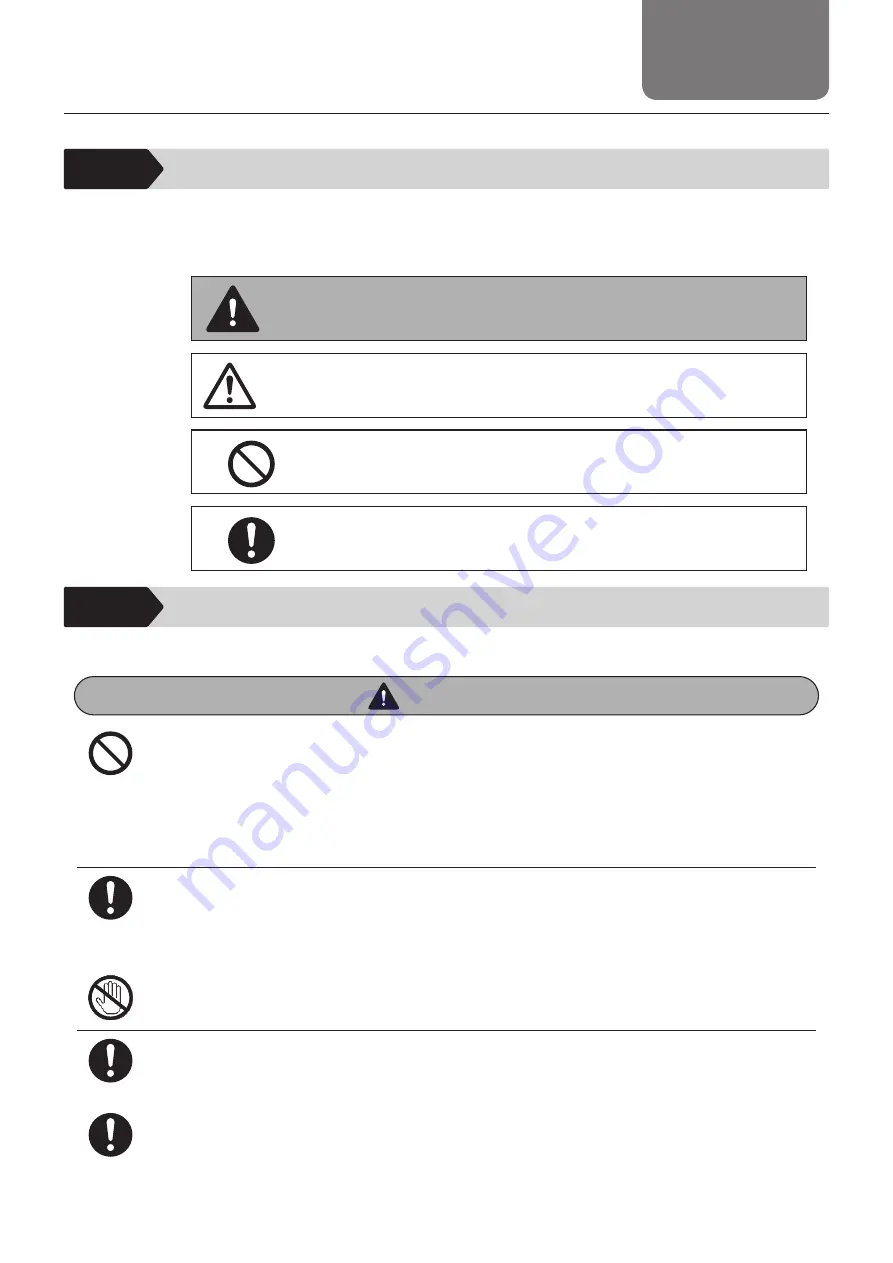
This manual uses the following warning indications according to safety matters. The descriptions 
next to warning indications on safety are important messages. Be sure to observe those 
descriptions.

Warning

"Erroneous handling may cause death or serious injury 
to a person"


Caution

"Erroneous handling may cause injury to a person or 
property damage only"

      "Prohibitions (don't)"

      "Obligations (do)"

2. 

Safety Precautions

Summary of Contents for KRF

Page 1: ...INSTRUCTION MANUAL THK Electrical Actuator Compact Series KRF No 2040 2 0 E...

Page 2: ...4 1 Basic specification 4 1 4 2 Speed and load capacity characteristic diagram 4 2 5 Structure and Model Numbers 5 1 5 1 Structure and part names 5 1 5 2 Model configuration 5 2 6 Storage and Transpo...

Page 3: ...eplace the strip seal 8 21 8 8 Belt replacement method for motor return type 8 33 8 9 Free warranty period 8 37 8 10 Usage conditions range 8 37 8 11 Warranty scope 8 37 8 12 Exclusion of warranty lia...

Page 4: ...oduct in the ways that are not described in this manual Do not reproduce reprint or lend the whole contents or a part of this manual without permission Please note that the description in this manual...

Page 5: ...e driver controller is TSC TLC or THC Please note that driver controllers other than the above cannot be used 1 4 About product support We have made all possible efforts to make the content of this ma...

Page 6: ...g part or rotating part Otherwise it may cause your hand to be caught and injured Maintenance z z Turn off the machine turning power off before conducting any maintenance Otherwise it may cause electr...

Page 7: ...les Division Transportation z z Do not drop or hit this product Otherwise it may cause injury or fracture or a functional loss z z When transporting this product do not hold any moving part or the cov...

Page 8: ...ns instruction labels This product is affixed with precautions instruction labels Identify them when unpacking the product Fig 1 shows the affixing position Caution Getting caught Review the manual Re...

Page 9: ...meplates Display 3 1 Nameplates display and serial number Fig 2 shows the nameplate format of the Compact Series KRF TYPE No Actuator model SERIAL No Serial number 3 Nameplates Display Fig 2 KRF Namep...

Page 10: ...5 500 440 380 330 290 260 1 This assumes a speed at the rated motor revolution 3 000min 1 2 The maximum load capacity assumes the capacity at the rated speed under 0 5 G for horizontal and wall mounts...

Page 11: ...tions Use the product within the range of following characteristic diagram KRF3 28P Stepper driver controller TSC Lead 6 mm Horizontal wall mount Speed mm s Load capacity kg 0 0 5 1 1 5 2 2 5 3 3 5 0...

Page 12: ...unt Speed mm s Load capacity kg 0 1 2 3 4 5 6 7 8 0 50 100 150 200 250 300 350 6 5 Wall mount Speed mm s Load capacity kg 0 1 2 3 4 5 6 7 8 0 50 100 150 200 250 300 350 Vertical mount Speed mm s Load...

Page 13: ...ity kg 0 5 10 15 20 25 0 50 100 150 200 250 300 350 400 450 500 550 8 Wall mount Speed mm s Load capacity kg 0 2 4 6 8 10 12 14 16 18 0 50 100 150 200 250 300 350 400 450 500 550 14 5 Vertical mount S...

Page 14: ...20 25 0 50 100 150 200 250 300 350 400 450 500 550 Wall mount Speed mm s Load capacity kg 0 2 4 6 8 10 12 14 16 18 0 50 100 150 200 250 300 350 400 450 500 550 5 Vertical mount Speed mm s Load capacit...

Page 15: ...ead 6 mm Horizontal mount Speed mm s Load capacity kg 0 1 2 3 4 5 6 7 0 100 50 200 250 350 150 300 400 Wall mount Speed mm s Load capacity kg 0 1 2 3 4 5 6 0 100 50 200 250 150 300 350 400 5 5 Vertica...

Page 16: ...TLC Lead 6 mm Horizontal mount 0 5 10 15 20 25 0 50 100 150 200 250 300 350 Speed mm s Load capacity kg 19 14 Wall mount 0 5 10 15 20 25 0 50 100 150 200 250 300 350 Speed mm s Load capacity kg Vertic...

Page 17: ...orizontal mount 0 5 10 15 20 25 0 100 200 300 400 500 600 Speed mm s Load capacity kg Wall mount 0 5 10 15 20 25 0 100 200 300 400 500 600 Speed mm s Load capacity kg 12 5 Vertical mount 0 1 2 3 4 0 1...

Page 18: ...HC Lead 6 mm Horizontal mount Speed mm s Load capacity kg Wall mount Speed mm s Load capacity kg Vertical mount Speed mm s Load capacity kg 0 10 20 30 40 0 50 100 150 200 250 300 350 0 5 10 15 20 25 3...

Page 19: ...Horizontal mount 0 10 20 30 40 0 100 200 300 400 500 600 Speed mm s Load capacity kg Wall mount 0 5 10 15 20 25 0 100 200 300 400 500 600 Speed mm s Load capacity kg 22 Vertical mount 0 1 2 3 4 5 6 0...

Page 20: ...Housing B cover Table cover Table Strip seal Cover return Base Motor Side cover Motor mounting plate Return Motor end cover Table TSC specifications Housing B cover Motor cover Table cover Strip seal...

Page 21: ...r 0 Without motor 1 With motor Prepared by THK When selecting 0 a coupling is not provided For return configuration timing pulley and timing belt are provided When selecting 1 the motor you specify wi...

Page 22: ...28 28PB Stepper motor 28 with brake 35P Stepper motor 35 35PB Stepper motor 35 with brake 42P Stepper motor 42 42PB Stepper motor 42 with brake M05 AC servo motor 50 W M05B AC servo motor 50 W with br...

Page 23: ...or cause fault or fracture z z When transporting this product do not hold the motor the sensor or the cable Otherwise it may cause the product to fall leading to injury or cause fault or fracture z z...

Page 24: ...r condensation With the product unpacked A place with non corrosive gas nor flammable gas A place with little dust salt or metallic powder A place with no exposure to water oil or chemicals A place wh...

Page 25: ...z z Firmly secure this product before operating it Failure to do so may cause abnormal operation that could cause injury fault or fracture z z If anomaly occurs immediately stop the machine Failure t...

Page 26: ...terial enter the product take a dustproof measure that matches the service atmosphere z z The mounting surface for this product must be a machined plane or have the accuracy equivalent to the machined...

Page 27: ...sed note that the detection distance is shorter than that of an iron dog For details see the catalog issued by the sensor manufacturer Sensor GX F12A GX F12B Panasonic Industrial Devices SUNX Co Ltd z...

Page 28: ...r models Coupling models L dimensions mm D mm Clamping bolt Tightening torque N mm KRF3 SGMMV A2A YaskawaElectricCorporation SFC 005DA2 3B x 5B Miki Pulley Co Ltd 8 16 M2 40 to 50 KRF4 TS4602 Tamagawa...

Page 29: ...RF3 SGMMV A2A Yaskawa Electric Corporation M2 6 8L 68 KRF4 TS4602 Tamagawa Seiki Co Ltd M4 12L 329 KRF5 TS4602 Tamagawa Seiki Co Ltd M4 12L 329 KRF6 TS4603 Tamagawa Seiki Co Ltd M4 10L 329 Bolt type H...

Page 30: ...the bolts used are shown in the following table Mounting bolt Model number Intermediate flange type Bolt size Tightening torque N cm KRF6 P Q T U M3 8L 125 Bolt type Hexagonal socket head type bolt A...

Page 31: ...tallation and Operation 7 Installation and Operation 7 Mount the housing A cover Mounting bolt Model number Bolt size Tightening torque N cm KRF3 M2 6 4L 30 KRF4 M2 6 4L 30 KRF5 M3 5L 76 KRF6 M2 6 5L...

Page 32: ...e the return cover KRF4R 5R KRF6R Model number Bolt size KRF4R M2 6 4L KRF5R M2 6 4L KRF6R M3 x 5L Bolt type Thin head FH type head screws 2 Mount the motor mounting plate on the motor Mount the motor...

Page 33: ...d M4 x 10L 329 Bolt type Hexagonal socket head type bolt Note The motor mounting plate orientation Check that the mounting bolt is not protruded beyond the motor mounting plate 3 Temporarily fasten th...

Page 34: ...5R 1 5 KRF6R 2 For tightening type D Be sure to set a hexagonal socket head setscrew to the D cut face of motor shaft Model number Hexagonal socket head setscrew Tightening torque N cm KRF4R M3 3L 50...

Page 35: ...2 M2 5 Retighten the mounting bolts evenly in diagonal order And then tighten all the bolts evenly using a torque wrench according to the recommended tightening torque until it comes to a stop Do not...

Page 36: ...agon socket head cap screw Pull it toward the arrow direction to adjust the tension Adjust the belt tension to meet the values as shown in the table below using the sonic tensimeter U 507 by Gates Uni...

Page 37: ...screw using the specified tightening torque plain washer 4 holes Please measure it by the tensimeter once again after fastening the bolt Model number Intermediate flange type Bolt size Tightening tor...

Page 38: ...rn and cover Fasten the bolt by the designated tightening torque Model number Bolt size Tightening torque N cm Number of bolts KRF4R M2 6 4L 30 8 KRF5R M2 6 4L 30 8 KRF6R M3 5L 76 6 Bolt type Thin hea...

Page 39: ...mounting KRF3 4 5 tap specification Fit length Bolts for securing base Mounting surface Fig 5 Drawing for mounting KRF6 Tap specification Model number KRF3 KRF4 KRF5 KRF6 Screw size M3 M3 M4 M6 Materi...

Page 40: ...ze M4 M4 M4 M5 Material of screw Steel SUS Steel SUS Steel SUS Steel SUS Tensile strength rank 10 9 A2 70 10 9 A2 70 10 9 A2 70 10 9 A2 70 Slider base thickness mm 6 6 6 7 5 Tightening torque N cm Mat...

Page 41: ...the table Model number KRF3 KRF4 KRF5 KRF6 Screw size M3 M3 M4 M5 Material of screw Steel SUS Steel SUS Steel SUS Steel SUS Tensile strength rank 10 9 A2 70 10 9 A2 70 10 9 A2 70 10 9 A2 70 Table tap...

Page 42: ...Positioning pin length on the table side Model number KRF3 KRF4 KRF5 KRF6 Table hole diameter 2H7 2H7 2H7 3H7 Table hole depth mm 5 5 5 5 Positioning pin length mm 4 4 4 4 Table 4 Table positioning pi...

Page 43: ...not expose grease to a flame spark or high temperature object Otherwise it may ignite the grease which could cause fire For other information on handling grease see the precautions indicated on the g...

Page 44: ...belt tension See installation of motor If you use the product with the belt tension low it may adversely affect the performance Check whether the timing belt contacts the flange part of the pulley If...

Page 45: ...re 1 Move the table to the motor mounting side place it on the stopper and then move it back by 50 mm to the reverse motor side Place it on the stopper Motor side Move it back by about 50 mm 2 Remove...

Page 46: ...seal holder on the motor side Strip seal holder Model number Bolt size KRF3 M2 6 4L Thin head FH type head screws 5 Remove the strip seal holder on the reverse motor side Strip seal holder Model numbe...

Page 47: ...al guide from the main unit 7 Remove the side cover Mounting bolt Model number Bolt size KRF3 M2 6 4L Thin head FH type head screws Remove them on the both side 8 Supply grease using a grease gun as i...

Page 48: ...grease at once the grease may not go around all the corners Ball screw lubrication Grease gun 1 Mount the P type nozzle to the grease gun 2 Supply grease directly to the raceway of the ball screw 3 S...

Page 49: ...in head FH type head screws 10 Place the strip seal guide and strip seal on the table Table Mount the strip seal holder adjusting the table and strip seal so that they do not touch over the entire str...

Page 50: ...8 Maintenance 8 8 KRF 8 Maintenance 11 Attach the springs 2 pcs 12 Mount the table cover Model number Bolt size Tightening torque N cm KRF3 M2 6 4L 9 Thin head FH type head screws...

Page 51: ...sted on the back of the table cover Please contact THK for details Shim Jig bottom face Jig top face Procedure 1 Move the table to the motor mounting side place it on the stopper and then move it back...

Page 52: ...8 Maintenance 8 10 KRF 8 Maintenance 3 Remove the strip seal holder Strip seal holder Model number Bolt size KRF3 M2 6 4L KRF4 M2 6 4L KRF5 M3 5L KRF6 M3 5L Thin head FH type head screws...

Page 53: ...etic fields attached at the two areas for sucking up the strip seal Be careful handling it because magnetic bodies may stick to the magnets It also has a belt like magnet mounted to prevent the strip...

Page 54: ...cover Mounting bolt Model number Bolt size KRF4 M2 6 4L KRF5 M3 5L KRF6 M2 6 5L Thin head FH type head screws Remove them from both side 6 Supply grease using a grease gun as indicated in the figure...

Page 55: ...ase may not go around all the corners Ball screw lubrication Grease gun 1 Mount the P type nozzle to the grease gun 2 Supply grease directly to the raceway of the ball screw 3 Stroke the table to appl...

Page 56: ...ize Tightening torque N cm KRF4 M2 6 4L 30 KRF5 M3 5L 76 KRF6 M2 6 5L 30 Thin head FH type head screws 8 Temporary mount a strip seal and adjust the strip seal position 9 Adjust the strip seal positio...

Page 57: ...in place Loosen the thin head screw by one turn Strip seal holder 11 Move the table back and forth for one round to make sure that the strip seal will not contact the strip seal guide in the entire s...

Page 58: ...ousing A side will not slide Strip seal holder 13 Move the table back and forth for one round to make sure that the strip seal will not contact the strip seal guide in the entire stroke If they contac...

Page 59: ...nt jig Strip seal adjustment jig Model number Bolt size Tightening torque N cm KRF4 M2 6 4L 9 KRF5 M3 5L 17 KRF6 M3 5L 17 Thin head FH type head screws 15 Move the table back and forth for three round...

Page 60: ...Maintenance 8 18 KRF 8 Maintenance 16 Fully fasten the strip seal Note Never pull the strip seal toward the stroke direction when you fully fasten the strip seal 17 Remove the strip seal adjustment ji...

Page 61: ...s located lower than the table cover mounting surface If the strip seal is higher than the table cover mounting surface re adjust the strip seal from the temporary assembly process Example of appropri...

Page 62: ...8 Maintenance 8 20 KRF 8 Maintenance 19 Mount the table cover Model number Bolt size Tightening torque N cm KRF4 M2 6 4L 9 KRF5 M3 5L 17 KRF6 M3 5L 17 Thin head FH type head screws...

Page 63: ...able cover Table cover Model number Bolt size KRF3 M2 6 4L Thin head FH type head screws 2 Remove the springs 2 pcs Spring Be careful not to lose the springs 3 Remove the strip seal holder on the moto...

Page 64: ...Thin head FH type head screws 5 Remove the strip seal and the strip seal guide from the main unit and replace it with the new one 6 Place the strip seal guide and strip seal on the table Table Mount...

Page 65: ...e Model number Bolt size Tightening torque N cm KRF3 M2 6 4L 30 Thin head FH type head screws 7 Attach the springs 2 pcs 8 Mount the table cover Model number Bolt size Tightening torque N cm KRF3 M2 6...

Page 66: ...l need the strip seal adjustment jig with the 1 mm shim pasted on the back of the table cover Please contact THK for details Jig bottom face Jig top face Shim 1 Remove the table cover Table cover Mode...

Page 67: ...Thin head FH type head screws 3 Remove the strip seal from the main unit Precautions The KRF table has magnets with strong magnetic fields attached at the two areas for sucking up the strip seal Be ca...

Page 68: ...KRF 8 Maintenance from lifting Area to mount the magnet for preventing strip seals from lifting Area to mount the magnet for sucking the strip seal 4 Temporary mount a new strip seal and adjust the s...

Page 69: ...e strip seal position at the center of the strip seal guide and even out the clearances Even out the clearances Even out the clearances 6 Tighten it until the strip seal holder stays in place Loosen t...

Page 70: ...p seal position once again Move the table back and forth for one round 8 Tighten it until the strip seal holder on the housing A side will not slide Strip seal holder 9 Move the table back and forth f...

Page 71: ...nt jig Strip seal adjustment jig Model number Bolt size Tightening torque N cm KRF4 M2 6 4L 9 KRF5 M3 5L 17 KRF6 M3 5L 17 Thin head FH type head screws 11 Move the table back and forth for three round...

Page 72: ...Maintenance 8 30 KRF 8 Maintenance 12 Fully fasten the strip seal Note Never pull the strip seal toward the stroke direction when you fully fasten the strip seal 13 Remove the strip seal adjustment ji...

Page 73: ...s located lower than the table cover mounting surface If the strip seal is higher than the table cover mounting surface re adjust the strip seal from the temporary assembly process Example of appropri...

Page 74: ...8 Maintenance 8 32 KRF 8 Maintenance 15 Mount the table cover Model number Bolt size Tightening torque N cm KRF4 M2 6 4L 9 KRF5 M3 5L 17 KRF6 M3 5L 17 Thin head FH type head screws...

Page 75: ...ounting bolt and remove the return cover KRF4R 5R KRF6R Model number Bolt size KRF4R M2 6 4L KRF5R M2 6 4L KRF6R M3 5L Bolt type Thin head FH type head screws 2 Loosen the mounting bolt of the motor m...

Page 76: ...cap screw M3 and remove the timing belt Belt to be used Gates Unitta Asia Housing C KRF6R Tension adjusting bolt Model number Bolt used KRF4R M3 8 KRF5R M3 8 KRF6R M3 10 Bolt type Hexagonal socket hea...

Page 77: ...cket head type bolt 5 Adjust the belt tension For the method to adjust the belt see Motor mounting method 6 Tighten the mounting bolt of the motor mounting plate After tightening measure the tension a...

Page 78: ...6 KRF 8 Maintenance 7 Mount the pulley cover KRF4R 5R KRF6R Model number Bolt size Tightening torque N cm Number of bolts KRF4R M2 6 4L 30 8 KRF5R M2 6 4L 30 8 KRF6R M3 5L 76 6 Bolt type Thin head FH...

Page 79: ...iagnosis Please inform THK of the trouble description content and model and serial number indicated on the product label Then we will perform the initial diagnosis of the product failure When we recog...

Page 80: ...time of free repair work In case of any paid repair work the warranty period of the repaired section shall be six months from the repair work regardless of the warranty period of the product itself R...

Page 81: ...ue N m KRF3 0 154 KRF4 0 355 KRF5 0 671 KRF6 1 035 Table 9 Permissible input torque 9 3 Static permissible moment z z Static permissible moment is shown in Table 10 For the direction of the moment see...

Page 82: ...aximum load permissible under the static condition 9 5 Permissible rotational speed Model number Lead mm Permissible rotation speed at each stroke min 1 Stroke to 300 350 to 500 550 600 650 700 750 80...

Page 83: ...tive characteristics Allows the greasing interval to be extended due to excellent wear resistance in micro vibrations z z Representative properties Test items Representative property values Consistenc...

Page 84: ...ally check the remaining amount of grease Since grease is contained in a 70 g bellows cartridge you can replace the nozzle without soiling your hand Table 11 shows the specifications of the grease gun...

Page 85: ...zzles and attachment for the grease gun used for lubrication It allows you to supply grease to a part difficult to lubricate by dropping grease onto the raceway by using the P type attachment Dedicate...

Page 86: ...Appendix Revision history The instruction manual No is described on the back cover Date of issue Instruction manual No Details November 2014 No 2040 2 0 E First edition...

Page 87: ...KRF INSTRUCTION MANUAL No 2040 2 0 E 201501 THK Electric Actuator Compact Series...

Reviews: