Inspection and Reconditioning (Rev 1/97)
42
Checking Block Distortion
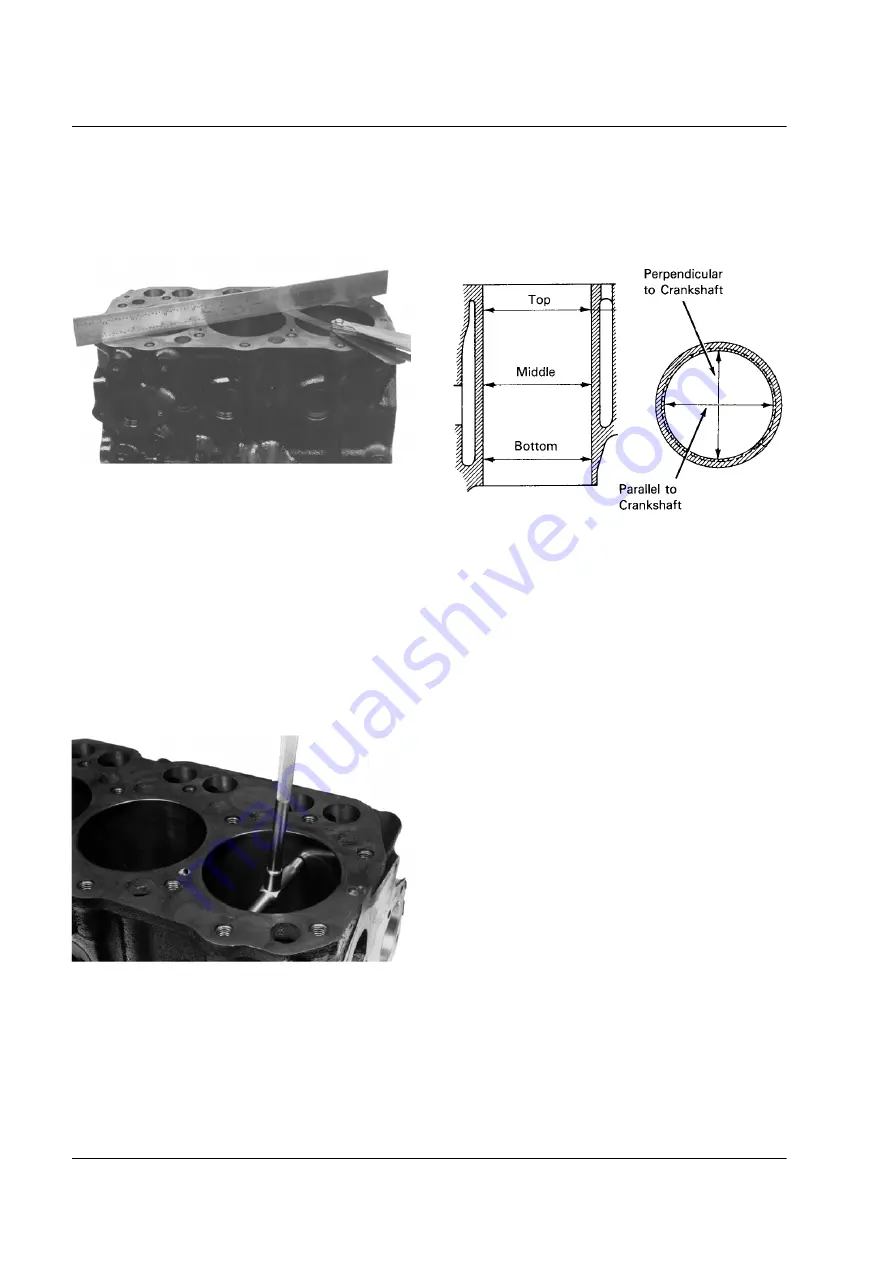
2. Check each cylinder for out of round, taper, pocketing,
or any other damage that would require boring the cyl-
inders. Measure each cylinder both parallel and perpen-
dicular to the crankshaft, at the top, the middle, and the
bottom of the cylinder bore. The cylinder out of round-
ness should not exceed the wear limit (refer to Specifi-
cations), and should not be tapered more than .0030 in.
(0.076 mm). If the cylinders are in good condition,
deglaze the cylinders with a glaze breaker.
Measuring Cylinder Diameter
aea228
aea229
Cylinder Measuring Positions
3. If the cylinders must be bored, determine which over-
size pistons should be used. Pistons are available in
.010 and .020 in. (0.25 and 0.50 mm) oversizes.
NOTE: If the .020 in. (0.50 mm) oversize is not large
enough to clean up the cylinders, cylinder sleeves and
standard pistons must be installed. Use the following
procedure to install cylinder sleeves:
a.
Bore and hone the cylinder block to accept the cyl-
inder sleeves. The recommended interference fit
for the cylinder sleeves is .0029-.0041 in. (0.075-
0.105 mm).
Measure each cylinder sleeve and subtract .0035
in. (0.090 mm). Bore and hone each cylinder to
match this dimension. The roughness average of
the final surface finish should be less than 248
micro inches (6.3 microns).
b. Press the cylinder sleeves into the cylinder block
using a hydraulic press and a pressing tool.
aea230


