


Network Management
Use the Network menu to make network configuration settings as well as service
support settings.
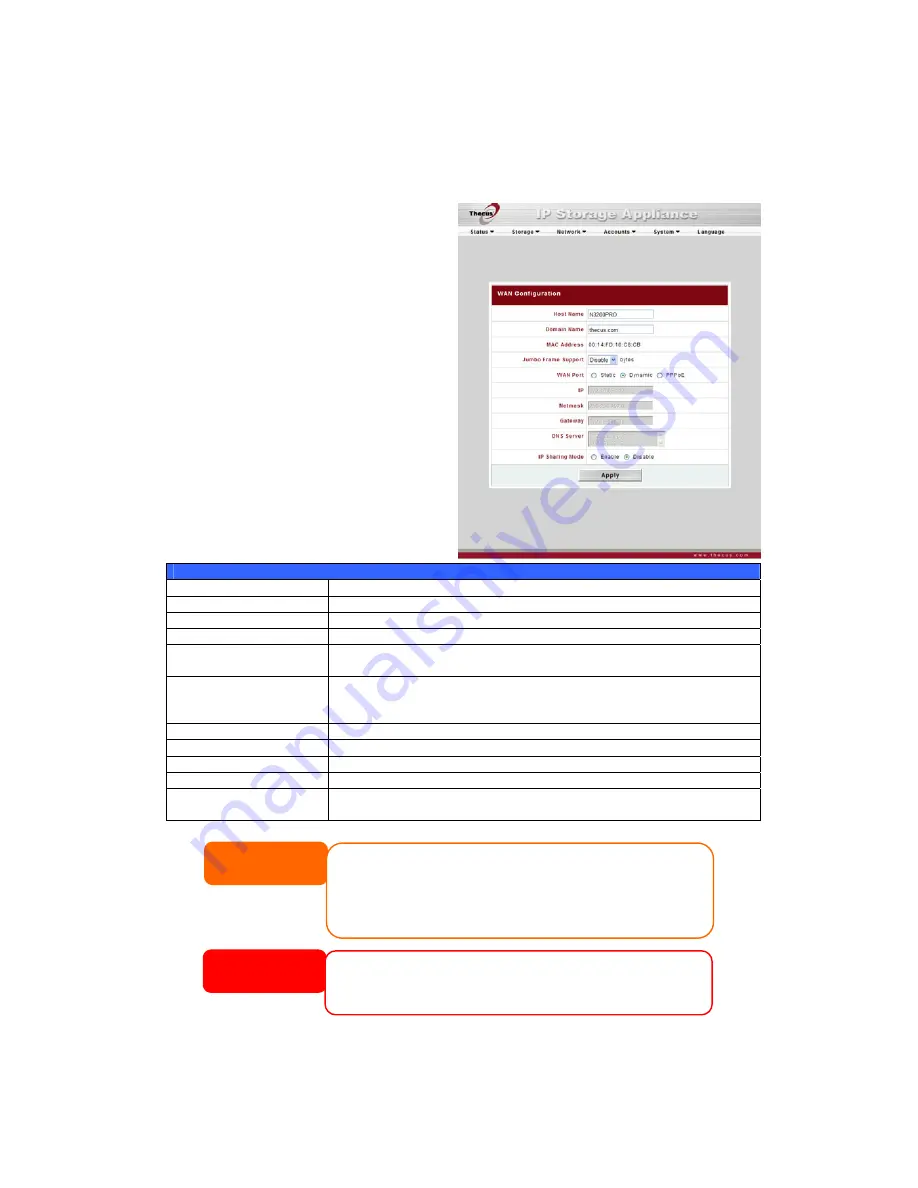
WAN Configuration
From the Network menu, choose
WAN, and the WAN Configuration
screen appears. This screen displays
the network parameters of the WAN
connection. You may change any of
these items and press Apply to
confirm your settings. See a
description of each item in the
following table:
WAN Configuration
Item Description
Host name
Host name that identifies the N3200PRO on the network.
Domain name
Specifies the domain name of the N3200PRO.
MAC Address
MAC address of the network interface.
Jumbo Frame Support
Enable or disable Jumbo Frame Support of the WAN interface on
your N3200PRO.
WAN Port
Enable or disable the N3200PRO from obtaining in IP address via
DHCP server. If you require a static IP, disable this feature and
input your network configuration.
IP
IP address of the WAN interface.
Netmask
Network mask, which is generally:
255.255.255.0
Gateway
Default Gateway IP address.
DNS Server
Domain Name Service (DNS) server IP address.
IP Sharing Mode
When enabled, PCs connected to the LAN port will be able to
access the WAN. Default is Enabled.
NOTE
• A correct DNS setting is vital to networks services, such as SMTP and NTP.
WARNING
Most Fast Ethernet (10/100) Switches/Routers do not support Jumbo Frame and
you will not be able to connect to your N3200PRO after Jumbo Frame is turned on.
If this happens, turn off the N3200PRO. Then, power on the N3200PRO and
immediately press and hold the Reset button on the back of the unit for 5 seconds.
This will reset your network settings, password, and turn off Jumbo Frame Support.
• If you are only using the WAN port, we suggest that you disable IP Sharing
Mode. This will result in higher throughput.
• Only use Jumbo Frame settings when operating in a Gigabit environment where
all other clients have Jumbo Frame Setting enabled.
• Enabling DHCP automatically turns on UPnP—see the Service Support Screen.
31


