


swru197e
19/23
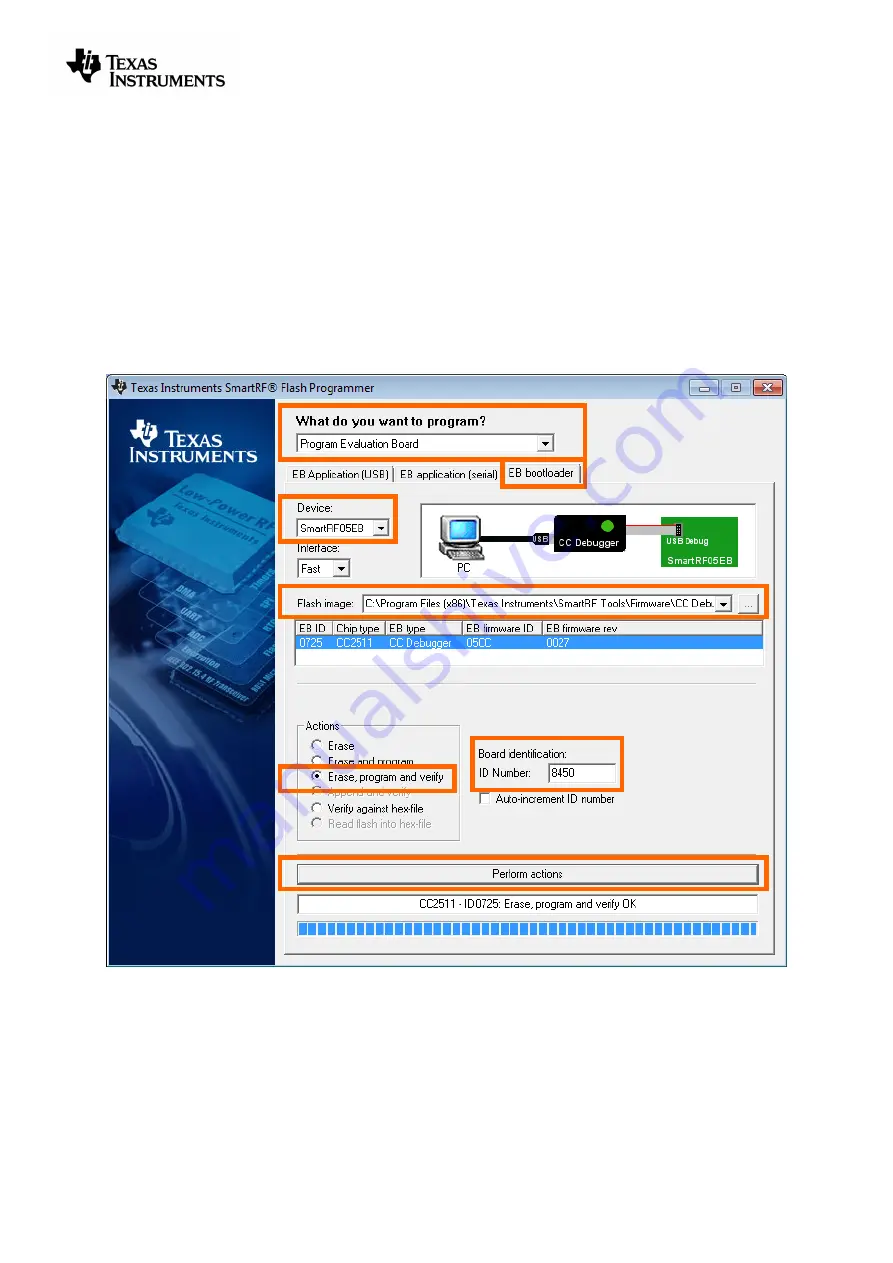
1. After starting the application,
first select “Program Evaluation Board” in the “What do you want
to program?” drop down box, then select the “EB Bootloader” tab.
2. In the upper left corner, select device: Use SmartRF05EB regardless of the device being used
to program the debugger. I.e. select SmartRF05EB both when you are using a CC Debugger
and when you are using a SmartRF05EB for the resurrection.
3. Next, select which flash image to program. The bootloader image is included when installing
the flash programmer and it is usually located at “C:\Program Files (x86)\Texas
Instruments\SmartRF Tools\Firmware\CC Debugger
”.
4. It is also necessary to give the debugger a unique ID number
– any 4 digit number will work.
This number is used by the driver on the PC to uniquely identify devices if more than one
debugger is connected at the same time.
5.
Select “Erase, program and verify”
6.
Press the “Perform Actions” buttons. The firmware upgrade takes a few seconds.
Figure 18 - SmartRF Flash Programmer - Updating the bootloader
Once the bootloader is programmed, you might be asked to install a USB driver on the PC. Just follow
the same procedure as when the debugger was connected to the PC the first time (see chapter 5).
The RED LED on the debugger should now be blinking, indicating that the bootloader is running but
that no application has been loaded. If the RED LED is off, there is probably something wrong with the
hardware. The debugger firmware can now be programmed directly over USB by following the
procedure in either chapter 8.1 or 8.2.
1
1
2
4
5
6
3
Summary of Contents for SWRU197E
Page 1: ...CC Debugger User s Guide SWRU197E ...
Page 23: ......


