4.
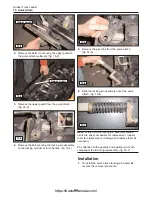
Flip the valve over, then tighten the nut to increase
the pressure setting (CW) or loosen it to decrease
the pressure setting (CCW).
Assembly & Test
1.
Retighten the locking set screw and reinstall by
reversing the disassembly procedure. Retest the
pressure through the affected relief to check for
proper adjustment. If it is still not correct, repeat
the adjustment procedure until correct.
Drive Pump
(Posi-Power Relief Valve)
Removal
Note:
The posi-power relief valve is usually a remove
and replace item. However, If adjustment is required,
please see the posi-power relief valve adjustment pro-
cedure in section 17 of this manual.
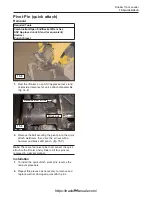
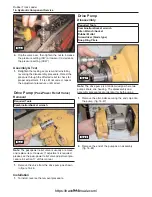
1.
Remove the valve from the drive pump as shown
in figure 16-46.
Installation
1.
To install, reverse the removal procedure.
Drive Pump
Disassembly
Note:
The drive pump is a tandem design where two
pumps share one housing. The disassembly and
assembly procedures are identical for both pumps.
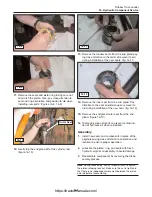
1.
Remove the allen bolts securing the end cap onto
the pump. (fig. 16-47)
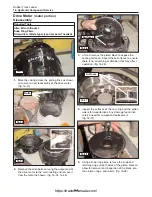
2.
Remove the end of the pump as an assembly
(fig. 16-48)
16-10
Rubber Track Loader
16. Hydraulic Component Service
16-45
Required Tools
Combination/Socket wrench
16-46
Required Tools
Combination/Socket wrench
Allen Wrench/Socket
Rubber Mallot
Screwdriver (blade type)
Snap RIng Pliers
16-47
16-48
https://tractormanualz.com/
Summary of Contents for ASV SR70
Page 5: ...IV https tractormanualz com...
Page 11: ...1 6 https tractormanualz com...
Page 41: ...4 20 https tractormanualz com...
Page 87: ...12 8 https tractormanualz com...
Page 105: ...14 6 https tractormanualz com...
Page 109: ...15 4 https tractormanualz com...
Page 125: ...16 16 https tractormanualz com...
Page 133: ...17 8 https tractormanualz com...
Page 137: ...18 4 https tractormanualz com...
Page 139: ...19 2 https tractormanualz com...


