background image

USER INTERFACE

17

menu bar

 of drop-down menus lets you access set up dialogs and 

other functions. All functionality can be accessed through either the menu 

bar or other shortcuts. 
If an action can be “undone” (such as recalling a setup), a small 

Undo 

button

 appears at the far right of the menu bar. Click this to return to the 

previous oscilloscope display. 
The 

grid area

 displays the waveform traces. You can adjust many grid 

settings on the Display Setup dialog. 

Trigger level

 and 

trigger position 

indicators appear on the grid when a 

trigger is set, color-coded to match the source.

Cursors

 show where measurement points have been set. Touch-and-

drag cursor indicators to quickly reposition the measurement point. 
Channel (C1-C4), Zoom (Z1-Z4), Math, Memory (M1-M4), and Digital 

(Digital1-Digital2, with mixed signal options) 

descriptor boxes

 appear 

along the bottom of the grid area and summarize current settings for 

each open trace. Touch the descriptor box to open the set up dialog.

Timebase and Trigger

 descriptor boxes appear at the right of the display. 

Timebase and Trigger settings only apply to channel traces. Touch the 

descriptor box to open the corresponding set up dialog.

Dialogs

 appear at the bottom of the display for entering set up data. The 

top dialog will be the main entry point for the selected function.  
For convenience, related dialogs appear as a series of tabs behind the 

main dialog. Touch the tab to open the dialog.

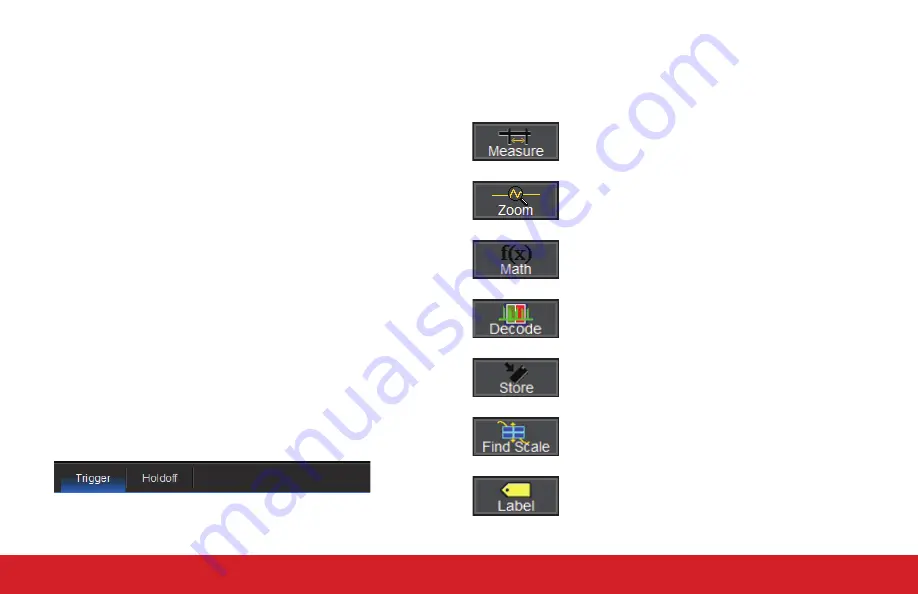
toolbar

 on the Channel, Math, and Memory dialogs offers shortcuts to 

common actions so you don’t have to leave the underlying dialog. Actions 

always apply to the active (highlighted) trace.

Apply measurement parameters.

Display a zoom of the trace.

Apply a math function to the trace.

Open the Serial Decode dialog (when serial decoders 

are installed).

Copy the active trace to the corresponding internal 

memory (e.g., C2 to M2).

Scale the waveform to fit the grid.

Apply a custom label to the trace.

Summary of Contents for WaveSurfer 10

Page 1: ...WaveSurfer 10 Oscilloscopes Getting Started Guide...

Page 2: ......

Page 3: ...distribute and duplicate Teledyne LeCroy documentation for their own internal educational purposes WaveSurfer and Teledyne LeCroy are trademarks of Teledyne LeCroy Inc Windows is a registered trademar...

Page 4: ...cilloscope 8 The Side of Your Oscilloscope 10 The Back of Your Oscilloscope 10 Carrying 11 Powering On Off 11 Connecting 11 Signal Inputs 12 Language Selection 12 Software Activation 13 Firmware Updat...

Page 5: ...INTRODUCTION WaveSurfer 10 Oscilloscopes...

Page 6: ...ions quickly WaveScan Search and Find WaveScan Search and Find allows you to search a single acquisition using more than 20 different criteria Or set up a scan condition and scan for an event over hou...

Page 7: ...ed analysis on long captures with 10x oversampling The Advanced Debug Toolkit features are standard on WaveSurfer 10M oscilloscopes Sequence Mode Acquisition In Sequence Mode the complete waveform con...

Page 8: ...ed with this instrument and certified for the country of use Maintain ground This product is grounded through the power cord grounding conductor To avoid electric shock connect only to a grounded mati...

Page 9: ...micals or abrasive elements Under no circumstances submerge the instrument or allow moisture to penetrate it Avoid electric shock by unplugging the power cord from the AC outlet before cleaning CAUTIO...

Page 10: ...INTRODUCTION 6...

Page 11: ...WaveSurfer 10 Oscilloscopes SET UP...

Page 12: ...of Your Oscilloscope Touch Screen Display Front Panel Built in Stylus Holder USB Port Power Button BNC Inputs for C1 C4 and External Trigger Ground and Calibration Terminals Tilting Feet A B C D E F G...

Page 13: ...wing The touch screen display is the principal viewing and control center of the oscilloscope See Touch Screen Display for an overview of its components The front panel houses buttons and knobs that c...

Page 14: ...N connection Host USB Ports 4 L BUS connector VGA connector for external monitor Built in Carrying Handle Aux Out connector to send pass fail device trigger enabled or trigger out signal to another de...

Page 15: ...CAUTION Do not place the instrument so that it is difficult to reach the power cord in case you need to disconnect from power We recommend unplugging the instrument if it will remain unused for a long...

Page 16: ...dialogs to configure the device address Go to Utilities Preference Setup Email to configure email settings Other Auxiliary Device Connect a BNC cable from Aux Out on the back of the instrument to the...

Page 17: ...oad and install the update 1 From the oscilloscope desktop File Exit or a remote PC launch the browser and visit the software download page at the URL above 2 Click the link to Oscilloscope Downloads...

Page 18: ...SET UP 14...

Page 19: ...USER INTERFACE WaveSurfer 10 Oscilloscopes...

Page 20: ...ormation also work as buttons to access other functions If you have a mouse installed you can click anywhere you can touch to activate a control in fact you can alternate between clicking and touching...

Page 21: ...he grid area and summarize current settings for each open trace Touch the descriptor box to open the set up dialog Timebase and Trigger descriptor boxes appear at the right of the display Timebase and...

Page 22: ...l not work for this trace Changing the Display To modify the grid style choose Display Display Setup from the menu bar and make your selections from the Display dialog By default the oscilloscope has...

Page 23: ...n analog oscilloscope WaveStream is most helpful in viewing signals that have signal jitter or signal anomalies or for applying a visual check before creating an advanced trigger or WaveScan setup to...

Page 24: ...on pop up menus In other cases data entry fields appear highlighted on the display When a data entry field is highlighted as shown above it is active and can be modified by using the front panel Adjus...

Page 25: ...SB drive create LabNotebook entry etc The Intensity knob controls the Trace Intensity Pushing the knob toggles between WaveStream display mode and regular intensity In WaveStream mode the knob control...

Page 26: ...o configure how the oscilloscope handles the Print command Note To make Print create a new Notebook Entry go to File LabNotebook Preferences and select Create Entry when Hardcopy Pressed Sending Data...

Page 27: ...REFERENCE 23 BASICS WaveSurfer 10 Oscilloscopes...

Page 28: ...ouch any control to change the value Use the Up Down buttons to change Vertical Scale or Offset B C B Press to turn on activate analog trace Turn to raise or lower Vertical Offset Push to return to ze...

Page 29: ...button to Set To Zero Turn to raise or lower trigger Delay Push to return Delay to zero Turn to raise or lower Horizontal Scale Time div Push to adjust scale with more precision on math memory or zoom...

Page 30: ...p acquisition Turn to raise or lower trigger voltage Level Push to find a level READY lights when trigger armed TRIG D lights when trigger fired Trigger Source Trigger Status Trigger Type Trigger Slop...

Page 31: ...From the Display Choose Cursor Cursor Setup to open the Cursor dialog Touch to choose Cursor Type Touch and drag cursor line to reposition cursor Vertical Cursor readout appears on descriptor boxes H...

Page 32: ...em to a specific portion of the trace or add statistical measurements to the readout Press front panel Measure button or choose Measure Measure Setup to open the Measure dialog Readout of parameter va...

Page 33: ...the result of math is always another waveform trace whereas the result of measurement is a number Press front panel Math button or choose Math Math Setup or to open Math dialog Choose Single or Dual...

Page 34: ...om descriptor to open the Zoom dialog and rescale the zoom Zoom Zooms display a magnification of another trace You can create up to four zooms Z1 Z4 from any other type of trace From the Front Panel P...

Page 35: ...scilloscope is rebooted To store memories indefinitely save them to an external file by choosing File Save Waveform The file can then be recalled into one of the four internal memories for viewing by...

Page 36: ...howing all your Notebook Entries where they can be further annotated and exported into different report formats Create Notebook Entry from dialog menu bar or Print button Notebook Entries appear in li...

Page 37: ...me stamped tabulated and can be selected for individual viewing Choose Analysis WaveScan to turn on WaveScan Choose scan Mode event to find and Source waveform to search Refine scan settings Select di...

Page 38: ...n math and measurement capabilities of a WaveSurfer 10 oscilloscope History Mode and Sequence Mode functions are also added This option is included with the WaveSurfer 10M Power Analysis Option WS10 P...

Page 39: ...BASICS 35 REFERENCE WaveSurfer 10 Oscilloscopes...

Page 40: ...ining The RMA Name and address of the owner Product model and serial number Description of failure or requisite service 4 Pack the product case in a cardboard shipping box with adequate padding to avo...

Page 41: ...om europe Sales and Service Ph 41 22 719 2228 2323 2277 FAX 41 22 719 2233 contact sa teledynelecroy com Support applications indirect teledynelecroy com China LeCroy Corporation Beijing Rm 2001 Unit...

Page 42: ...cycles 4 5 1 To ensure compliance with all applicable standards use high quality shielded interface cables 2 Emissions which exceed the levels required by this standard may occur when the oscilloscop...

Page 43: ...ding wiring U S NATIONALLY RECOGNIZED AGENCY CERTIFICATION The oscilloscope has been certified by Underwriters Laboratories UL to conform to the following safety standard and bears UL Listing Mark UL...

Page 44: ...yne LeCroy shall not be responsible for any defect damage or failure caused by any of the following a attempted repairs or installations by personnel other than Teledyne LeCroy representatives or b im...

Page 45: ......

Page 46: ...2015 Teledyne LeCroy Inc All rights reserved 926066 00 July 2015...

Reviews: