background image

OneStream Programming Guide 


30

CLI 

Set to “On” to present the CLI (default). 
Set to “Off” to restrict the CLI. 


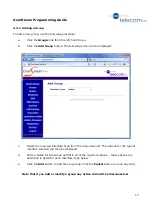
Hunting 

Select the hunting type required – this controls in which order interfaces are selected to send calls 

to. Options are: 


d.


Sequential (Low First) 
Calls are sent to the lowest available interface. 

e.


Sequential (High First) 
Calls are sent to the highest available interface. 

f.


Cyclic 
Calls are sent to interfaces in turn (i.e. A “Round Robin” setup).

Summary of Contents for OneStream BRI

Page 1: ...OneStream Programming Guide Version 9 ...

Page 2: ...d with the faulty unit TelecomFM shall accept no liability for any error or damages of any kind resulting from the use of this document or the equipment it relates to No responsibility is assumed by TelecomFM for the use or reliability of the OneStream when used in a situation or with other equipment not supplied or specified by TelecomFM The wording in this document may change from time to time P...

Page 3: ...PTT OneStream FX GFX only 25 4 3 4 4 ISDN TE OneStream BRI GBRI only 27 4 3 4 5 ISDN NT OneStream BRI GBRI only 29 4 3 4 6 SIP Network 31 4 3 4 7 SIP Extension 34 4 3 4 8 H 323 36 4 3 4 9 DISA Direct Inward System Access 37 4 4 ROUTES 38 4 4 1 Adding a Route 39 4 4 2 Editing An Existing Route 44 4 4 3 Deleting A Route 45 4 5 ADVANCED 46 4 5 1 Audio Settings 47 4 5 2 SIP Settings 47 4 5 3 STUN Sett...

Page 4: ...DATE FIRMWARE 68 4 12 1 Local Update 68 4 12 2 Remote Update 69 4 13 DIAGNOSTICS 70 4 13 1 Current Logs 71 4 13 2 Log Options 71 4 13 3 Save Log Files 72 4 13 4 Send Logs Config to TelecomFM 72 4 13 5 Record Audio 73 4 13 6 Ping Host 73 4 14 RESTART 74 4 15 LOGOUT 75 5 ADDITIONAL FEATURES 76 5 1 VIRTUAL EXTENSIONS 76 ...

Page 5: ...y standard web browser on your PC No special software needs to be installed on the PC to access the Web Configuration Utility however a OneStream Scanner utility is available to assist in finding the IP Addresses of any OneStream units installed on your Local Area Network Refer to the following sections for more information 2 Network Settings The Network settings for the OneStream Unit can be conf...

Page 6: ... be found using the OneStream Scanner application which is available to download from the Support section of the TelecomFM website www telecomfm co uk 3 1 Installing the OneStream Scanner Application a Double click the OneStream Scanner Setup exe The following dialog box will be displayed b Click the Setup button After the files have been extracted the following will be displayed c Click the OK bu...

Page 7: ...Icon of a computer The following dialog will be displayed e Click the Continue button to start the installation When the installation has finished the following dialog will be displayed f Click the OK button to exit the installer The OneStream Scanner is now installed and ready to use ...

Page 8: ... the default program options click the Start Search button This will scan the Class C network subnet that the PC is in For example if the IP Address of the PC was 192 168 100 32 then the application would scan from 192 168 100 1 to 192 168 100 254 A progress bar will be displayed Any OneStream units found in the network will be listed at the top of the application The IP Address and MAC Address of...

Page 9: ...ddress of the unit you wish to configure and the Web Configuration Utility will be launched d Using Advanced Options To search an alternative range of IP Addresses to the default subnet click the Advanced button The following dialog will be displayed ...

Page 10: ...e range For example to scan the range 192 168 50 10 192 168 51 80 the dialog would look as follows Click the OK button to return to the Main program window and then click the Start Search button to scan the new range of IP Addresses To return to the Automatic Search option click the Advanced button again Select the Automatic option and click OK ...

Page 11: ... above for instructions on finding the address 4 1 Starting the Web Interface a From any PC connected to the same network subnet as the OneStream unit open the Internet Explorer web browser b In the Address Bar of the Internet Explorer window type the IP Address of the OneStream unit and press the Enter key You will be presented with the Login screen for the OneStream unit Address Bar c Enter the ...

Page 12: ...curity Options including GSM Locks and change the Web Interface Password LAN Settings Configure the Network Interface and select between Automatic DHCP and Static configurations Time Date Set the Time and Date select the current Timezone and configure automatic Time and Date Updates NTP Load Save Config Backup and Restore the unit s configuration or restore the Factory Default configuration Can al...

Page 13: ...OneStream Programming Guide 13 4 2 Home Status Page Shows the basic system configuration and the status of the operational interfaces ...

Page 14: ... whether the unit has registered successfully or whether there is a problem that is preventing registration such as the wrong password being entered in the Group or if a firewall is blocking the port being used for registration Note that only SIP groups where the Registration Required checkbox has been checked will be shown on this page 4 2 4 SIP Extensions The SIP Extensions section will list all...

Page 15: ...o the GSM network Analogue FXS PBX OneStream FX GFX only Group containing any number of FXS PBX ports These ports are connected to the Trunk ports of a PBX or directly to analogue phones Analogue FXO PTT OneStream FX GFX only Group containing any number of FXO PTT ports These ports are connected to the Extension ports of a PBX or to PTT lines SIP Network All OneStream versions Group used for conne...

Page 16: ...nected to Network Termination equipment or the S0 extension ports of a PBX ISDN TE OneStream BRI GBRI only Group containing Basic Rate ISDN ports These ports are connected to Terminal Equipment such as ISDN phones or the S0 Trunk ports of a PBX DISA Direct Inward System Access All OneStream versions Group used to allow incoming calls to be answered and a secondary dialtone to be offered allowing t...

Page 17: ...t the required Interface Type from the drop down list The options for the type of interface selected will then be displayed d Enter a Name for the Group and fill in all of the required options these options are described in detail for each Interface Type below e Click the Add button to add the new group Click the Cancel button to undo any entry Note that if you add or modify a group any active cal...

Page 18: ...e Edit icon next to the Group that you wish to modify The following screen will be displayed c Make any changes that are required the options are described for each interface below d Click the Save button to apply the changes to the Group Click the Cancel button to undo any changes made to the Group Note that if you add or modify a group any active calls will be disconnected ...

Page 19: ...lowing procedure a Click the Groups link from the left hand menu b Click the Delete icon next to the Group that you wish to remove The following screen will be displayed c To delete the Group click the Delete button To return to the Groups page without deleting the Group click the Cancel button ...

Page 20: ...ide 20 4 3 4 Group Options The following are the Group options available for each of the different interface types 4 3 4 1 GSM OneStream G GFX GBRI only Note To display the Advanced options click the Show Advanced Options link ...

Page 21: ...e GSM modules to log on to other networks Hunting Select the hunting type required this controls in which order interfaces are selected to send calls to Options are a Sequential Low First Calls are sent to the lowest available interface b Sequential High First Calls are sent to the highest available interface c Cyclic Calls are sent to interfaces in turn i e A Round Robin setup d Load Balance Call...

Page 22: ... this month This can be the same as the Minutes Month The Remaining Time will be decreased automatically as calls are made The remaining time can be entered as minutes or as minutes seconds e g 20 for 20 minutes or 20 30 for 20 minutes and 30 seconds Day Of Month Select the day of the month that the Inclusive Minutes should be Reset At the start of this day 00 00 the Remaining Time will automatica...

Page 23: ... Guide 23 4 3 4 2 Analogue FXS PBX OneStream FX GFX only Note To display the Advanced options click the Show Advanced Options link Name Enter a unique name to identify this group You cannot have 2 groups with the same name ...

Page 24: ...Reversal On Connect Disconnect Provides a Loop Current Reversal when the outgoing call is connected and when the call is disconnected c Loop Current Drop On Disconnect Provides a Loop Current Drop when the outgoing call is disconnected Incoming Options Select the Supervision options for Incoming calls from the following a No Supervision This is the default option and provides no supervision b Loop...

Page 25: ...d options click the Show Advanced Options link Name Enter a unique name to identify this group You cannot have 2 groups with the same name Select Interfaces Place a tick in the checkbox next to each of the interfaces you wish to be used by this group Note that each interface can only be selected in 1 Group ...

Page 26: ...he highest available interface c Cyclic Calls are sent to interfaces in turn i e A Round Robin setup Hangup on Busy Detect Select whether the FXO line should be cleared when a busy signal is detected Connect Options Select the Supervision options for calls from the following a No Supervision This assumes that the call is connected after dialling b Loop Current Reversal On Connect Uses the loop cur...

Page 27: ...ces Place a tick in the checkbox next to each of the interfaces you wish to be used by this group Note that each interface can only be selected in 1 Group Mode Auto the mode PTP or PTMP will be automatically detected from the connected device PTP Point to Point select this mode when the connected device is configured to use PTP mode PTMP Point to MultiPoint select this mode when all devices connec...

Page 28: ...e hunting type required this controls in which order interfaces are selected to send calls to Options are a Sequential Low First Calls are sent to the lowest available interface b Sequential High First Calls are sent to the highest available interface c Cyclic Calls are sent to interfaces in turn i e A Round Robin setup ...

Page 29: ...aces Place a tick in the checkbox next to each of the interfaces you wish to be used by this group Note that each interface can only be selected in 1 Group Mode Auto the mode PTP or PTMP will be automatically detected from the connected line PTP Point to Point select this mode when the connected device is configured to use PTP mode PTMP Point to MultiPoint select this mode when all devices connect...

Page 30: ...e hunting type required this controls in which order interfaces are selected to send calls to Options are d Sequential Low First Calls are sent to the lowest available interface e Sequential High First Calls are sent to the highest available interface f Cyclic Calls are sent to interfaces in turn i e A Round Robin setup ...

Page 31: ...am Programming Guide 31 4 3 4 6 SIP Network Note To display the Advanced options click the Show Advanced Options link Name Enter a unique name to identify this group You cannot have 2 groups with the same name ...

Page 32: ...istered user and domain e g 1234 sip somedomain com Registration Required Place a tick in this checkbox if the SIP Registrar Proxy PBX requires that the OneStream register and login Username Optional Enter the Username required by the SIP Registrar Proxy PBX Auth Username Optional Enter the Authorisation Username required to register to the SIP Registrar PBX This is only required if it is differen...

Page 33: ... PBX every 60 seconds to confirm that the Server PBX is available Default is No DTMF Mode Sets the format that DTMFs will be sent during a SIP call Options are RFC 2833 Default send DTMFs out of band as RTP payload according to RFC 2833 SIP INFO send DTMFs out of band as SIP INFO packets Inband send DTMFs in band within the audio of the phone conversation Audio Codecs Select the available audio co...

Page 34: ...m Programming Guide 34 4 3 4 7 SIP Extension Note To display the Advanced options click the Show Advanced Options link Name Enter a unique name to identify this group You cannot have 2 groups with the same name ...

Page 35: ...ons are required then the New Extension button can be clicked to add additional extensions Fill in as many Username Password entries as required DTMF Mode Sets the format that DTMFs will be sent during a SIP call Options are RFC 2833 Default send DTMFs out of band as RTP payload according to RFC 2833 SIP INFO send DTMFs out of band as SIP INFO packets Inband send DTMFs in band within the audio of ...

Page 36: ... have 2 groups with the same name H 323 IP Address Enter the IP Address of the H 323 PBX Provider Device that the calls should be routed to Port Enter the Port that is used by the H 323 PBX Provider Device The default is 1720 Account Name Optional Enter the Account Name required by the H 323 PBX Provider ...

Page 37: ...word entered is incorrect then the caller will hear an interrupted unavailable tone If the password is left blank then the caller does not need to enter a password In this case it is recommended that the Originating Address field is used to restrict access to known callers Name Enter a unique name to identify this group You cannot have 2 groups with the same name Password Enter the Password that c...

Page 38: ...OneStream Programming Guide 38 4 4 Routes The Routes Page allows you to configure how the OneStream routes calls between Groups See Section 3 above for instructions on setting up Groups ...

Page 39: ...eam Programming Guide 39 4 4 1 Adding a Route To add a new Route use the following procedure a Click the Routes link from the left hand menu b Click the Add Route button The following screen will be displayed ...

Page 40: ...er 1 destination address on each line A question mark is used to match any digits An s is used to match when there is no destination address e g an incoming call from GSM or FXO Some examples Destination Address Result s Match when no destination address Match any destination address 07 Match any destination address starting 07 01753 Match any destination address starting 01753 01753745000 Match o...

Page 41: ...will be allowed to ring until either the caller hangs up or the destination terminates the call Use CallBack Enable the CallBack feature for this route CallBack works as follows 1 When a call arrives and is matched to this route the call will be rejected 2 The destination specified in the To section is then dialled 3 When the destination answers they will hear please wait while the call is connect...

Page 42: ... 123 and the mobile phone will then ring the call will be connected to whoever answers first Failover Add Failover button Failover routing allows the call to be passed to an alternate destination if the original destination specified in the To section is busy or unavailable Press the Add Failover button and enter the details for the new destination as described under To Section above For example t...

Page 43: ...example A route could ring 3 extensions on an IPPBX simultaneously If no extensions answer within the time set in the timeout option then the call could be passed to a mobile phone If there is no answer on this mobile phone then the call could be dialled to another mobile phone via GSM and a fixed line number via ISDN simultaneously ...

Page 44: ...u b Click the Edit icon next to the Route that you wish to modify The following screen will be displayed c Make any changes that are required to the Route see the section on Adding a Route above for a description of all of the available options d Click the Save button to apply the changes to the Route Click the Cancel button to undo any changes made to the Route ...

Page 45: ...lowing procedure a Click the Routes link from the left hand menu b Click the Delete icon next to the Route that you wish to remove The following screen will be displayed c To delete the Route click the Delete button To return to the Routes page without deleting the Route click the Cancel button ...

Page 46: ...OneStream Programming Guide 46 4 5 Advanced ...

Page 47: ...minimum length of time in ms that no DTMF frequencies should be detected for before it is considered to be a new DTMF tone Save Audio Settings click the button to apply the audio settings 4 5 2 SIP Settings RTP Timeout A SIP call will be terminated if there is no RTP activity for the set number of seconds and the call is not on hold Default is 10 seconds A setting of 0 indicates no timeout Hold Ti...

Page 48: ...ble STUN set this option to Yes STUN Server Enter the IP Address or Fully Qualified Domain Name of the STUN Server to use STUN Port Enter the port to use for communication with the STUN Server The default port is 3478 Local Networks List any local networks which should be excluded from NAT Communication with clients servers on these networks will use the OneStream s private IP Address Format is ne...

Page 49: ...ansfer and DISA The default is 6 seconds An entry of 0 will wait indefinitely for the first digit to be dialled Inter Digit Timeout Sets the number of seconds that the OneStream will wait for more digits to be dialled during Call Transfer and DISA before attempting to connect the call The default is 6 seconds Save Digit Timeouts click the button to apply the call transfer settings ...

Page 50: ...Connect Message Set whether the OneStream will send its current system date in Layer 3 ISDN connect messages Save ISDN Settings click the button to apply the ISDN settings 4 5 6 Other Advanced Settings Emergency Numbers Specify any numbers that are used to dial to emergency services If these numbers are routed to GSM then the call will be attempted even if there is a GSM lock or call barring in pl...

Page 51: ...e It is possible to access the SMS page directly by logging into the web interface with the SMS Password The default SMS password is sms1234 When this password is entered the user will have access only to send and receive SMS messages they will not have access to the OneStream configuration settings The SMS password can be changed via the SMS Options page ...

Page 52: ... Inbox The Inbox will display all of the received messages It will show the date and time the message was received the number that sent the message and the message text if the message is long only the first few characters are displayed click the View button to read the whole message The following options are available for each message View click to display the message in the message area at the to...

Page 53: ...View button to read the whole message The following options are available for each message View click to display the message in the message area at the top of the page Forward click to start a new message in the message area at the top of the page the message text will be filled in automatically it can be edited Delete click to delete the message The message will be displayed in the message area a...

Page 54: ...OneStream Programming Guide 54 4 7 SMS Options The SMS Options page sets all of the options that relate to the sending and receiving of SMS messages and SMS functions ...

Page 55: ...t message to the called party with a message and the extension of the caller Set this option to On to enable the Missed Call SMS feature Example Extension 123 on an IP PBX connected to OneStream calls 07900123456 and the call is not answered The OneStream will then send an SMS Message to 07900123456 with the message You had a missed call from 123 Missed Call SMS Text When the Missed Call SMS featu...

Page 56: ...g Guide 56 4 8 Security The Security Page allows you to change the password required to access the web interface and to control SIM and Phone locking for the two GSM Modules OneStream G GFX GBRI only Options are as follows ...

Page 57: ...for Module 1 is already turned on and you now wish to turn on SIM Lock for Module 2 there is no need to select the Module 1 SIM Lock again Click the Cancel button at any time to clear any changes that have been made After the Save button has been clicked the results of any locking will be shown at the top of the screen SIM Lock OneStream G GFX GBRI only When SIM Lock is turned ON you will be requi...

Page 58: ... Lock OFF Select the Off option and enter the current SIM PIN in the Enter SIM PIN box as shown below the actual PIN will not be displayed on screen The SIM Lock will be turned Off when the Save button is clicked if the entered PIN is correct ...

Page 59: ...IM PIN in the Enter Old PIN box Enter the required New SIM PIN must be between 4 and 8 digits in both the Enter New PIN and Re Enter New PIN boxes as shown below the PINs will not be displayed on screen The SIM PIN will be changed when the Save button is clicked if the Old PIN that was entered is correct ...

Page 60: ...ou will be first required to enter the Phone Lock Code until the Code is entered no calls will be allowed on this module a Turn Phone Lock ON Select the On option and enter the Phone Lock Code in the Enter Phone Lock Code box as shown below the actual Code will not be displayed on screen The default Phone Lock Code is 12345678 The Phone Lock will be turned On when the Save button is clicked if the...

Page 61: ...option and enter the Phone Lock Code in the Enter Phone Lock Code box as shown below the actual Code will not be displayed on screen The default Phone Lock Code is 12345678 The Phone Lock will be turned Off when the Save button is clicked if the entered Code is correct ...

Page 62: ... Lock Code box the default code is 12345678 Enter the required New Phone Lock Code must be between 4 and 8 digits in both the Enter New Phone Lock Code and Re Enter New Phone Lock Code boxes as shown below the Codes will not be displayed on screen The Phone Lock Code will be changed when the Save button is clicked if the Old Code that was entered is correct ...

Page 63: ...r information needs to be entered on the Network Page This is the default option b Static Select this option when no DHCP server is available on the network that the OneStream is connected to When this option is selected the static network options must also be entered IP Address Static Address Type only Enter the IP Address that the OneStream should use Ensure that this IP Address is not currently...

Page 64: ...al Enter the IP Address of the Secondary DNS Server for the network Domain Static Address Type only Enter the default Domain for the network Hostname Static Address Type only Enter the Hostname that should be used by the OneStream unit on the network When you have finished configuring the Network Settings click the Save button The OneStream unit must be restarted to apply the new settings To cance...

Page 65: ...TP server is available on the Local Network then its address can be entered in the NTP Server box To enable the automatic update place a tick in the Auto set Date Time checkbox When you have finished configuring the Date and Time Settings click the Set Date Time button The new date and time settings will be applied immediately 4 10 2Set Timezone The Timezone that the unit is located in can be set ...

Page 66: ...e the unit to a Factory Default configuration 4 11 1Load To Load a previously saved configuration a Click the Browse button b Select the tfm configuration file and click the Open button c Click the Load Config button to load the configuration Warning This will replace the current configuration in the OneStream unit d When the Load has finished restart the unit to use the new configuration ...

Page 67: ...ose button The configuration has now been saved 4 11 3Factory Reset To restore the OneStream unit to a Factory Default configuration click the Factory Reset button You will be asked to confirm that you wish to do so After restoring the configuration the unit will need to restart WARNING Running a Factory Reset will lose all Groups Routes and other configuration options set on the OneStream unit It...

Page 68: ...e page allows you to update the system software in the OneStream Unit 4 12 1 Local Update This will update the main system firmware of the OneStream unit from a file a Click the Browse button b Select the firmware file that has been provided to you c Click the Open button ...

Page 69: ... When the update reaches 100 complete restart the OneStream unit 4 12 2 Remote Update This will update the main system firmware of the OneStream unit remotely a Enter the update server location that has been provided to b Click the Remote Update button c When the update completes restart the OneStream unit ...

Page 70: ...OneStream Programming Guide 70 4 13 Diagnostics The Diagnostics page can be used to troubleshoot any problems that are being experienced ...

Page 71: ...rent Logs display update automatically enter how often the display should refresh in seconds and click the Start button To stop the display from updating automatically click the Stop button 4 13 2 Log Options Set the options for trace collection as follows System GSM FXS FXO ISDN Trace Levels adjusts the amount of trace generated for each of the different interface types Note that generating too m...

Page 72: ...s To save any of the log files to your computers hard disk select the file to save and click the Save File button 4 13 4Send Logs Config to TelecomFM Clicking this button will send all of the current log files and a copy of the configuration to the TelecomFM FTP Server ...

Page 73: ...between the 2 ports would then be recorded When the Start Recording button is clicked the OneStream will record from the selected ports for 60 seconds and then automatically transfer the recording to the TelecomFM FTP Server 4 13 6 Ping Host To test LAN functionality or DNS it is possible to ping a remote host and view the response Enter an IP Address or a Fully Qualified Domain Name in the Host b...

Page 74: ...will be returned to the Home page after 60 seconds If the Home Page does not reappear after 60 seconds click the Refresh button on your Internet Browser Note that if the IP Address of the OneStream unit has been changed the new IP Address must be entered in the Address Bar of the Internet Browser WARNING Any Active Calls will be disconnected while the OneStream is restarting ...

Page 75: ...OneStream Programming Guide 75 4 15 Logout When all configuration options have been set click the Logout link to exit from the Web Configuration Utility ...

Page 76: ...while the original call is on hold this will connect a second call If the user then hangs up then the original caller will be connected to the second call Refer to the following example for more information Example A OneStream G is registered to an IP PBX using a SIP Network group There are 3 people in the office Bob Fred and Mary who have extension phones on the IP PBX as follows Bob extension 20...

Page 77: ...nsion phone on his desk This will now dial out over GSM to 07900123456 Fred is out of the office and his mobile phone 07900123456 now rings He answers the mobile and now Fred is talking to Bob Fred now dials on his mobile to put Bob on hold Bob hears On Hold Music and Fred now hears a dialtone Fred dials 202 that will ring Mary s phone in the office She answers her phone and now Fred is talking to...

Page 78: ...re are 3 more routes required as follows The Fred to DISA route will send all calls received from Fred s mobile phone into DISA The DISA to IP PBX route will allow any calls dialled from DISA starting with a 2 to the IP PBX The IP PBX Transfer route will allow a DISA call that has been answered on the IP PBX to dial any extension starting with a 2 ...

Page 79: ... DISA Fred now hears a secondary dialtone Fred dials 202 on his mobile Mary s extension phone now rings Mary answers her phone and now Fred is talking to Mary Mary now dials on her extension phone to put Fred on hold Fred hears On Hold Music and Mary now hears a dialtone Mary dials 200 Bob s phone in the office now rings He answers his phone and now Bob is talking to Mary Mary hangs up her phone N...

Reviews: