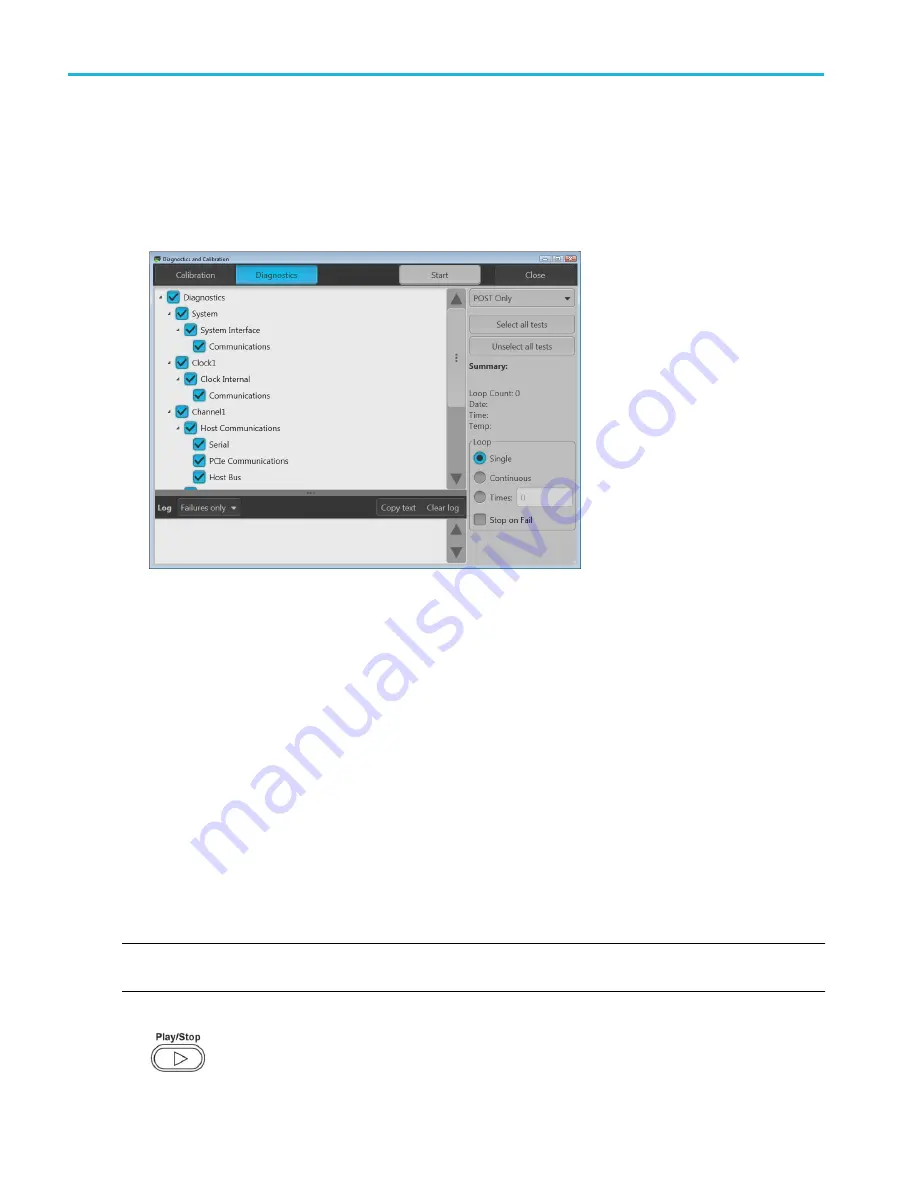
3. In the Diagnostics and Calibration screen, click Diagnostics.
4. Choose the set of diagnostics you want to run.
■
POST Only: Offers a set of tests that automatically run at power on (Power On Self Test). These diagnostic selections
verify such things as internal device communications, system memory, and real-time clock.
■
Full diagnostics: Provides access to all diagnostic self tests the instrument is able to run.
5. Select and deselect each test individually or use the Select all tests and Unselect all tests buttons.
6. Select the desired Loop function.
■
Single makes one pass through the selected tests.
■
Continuous continually runs through the selected tests until aborted.
■
Times lets you define how many times to run the selected tests.
■
Stop on Fail stops the diagnostics if a selected test fails, regardless of the Loop selection.
7. Click Start to run the diagnostics. The Start button changes to Abort while tests are actively running.
Verify that the instrument passes all tests. If diagnostic failures occur, contact your local Tektronix service personnel.
Self calibration
The self calibration uses internal calibration routines that adjust the internal calibration constants as necessary.
If the instrument detects an internal temperature difference of more than 5 °C from its previous calibration, a message is
displayed in the status area (at the bottom of the screen), recommending a self calibration. You can perform the self calibration at
anytime.
NOTE. Always power on the instrument for at least 20 minutes before performing a self calibration. See
on page 7.
1. Confirm that there is no output signal. The front-panel Play/Stop button indicator is off.
2. Click Utilities from the workspace tabs, then click Diag & Cal.
Install the instrument
10
AWG70000B Series Installation and Safety Instructions
Summary of Contents for AWG70001B
Page 2: ......
Page 6: ......
Page 12: ...Important safety information vi AWG70000B Series Installation and Safety Instructions ...
Page 16: ...Compliance Information x AWG70000B Series Installation and Safety Instructions ...
Page 32: ...Install the instrument 16 AWG70000B Series Installation and Safety Instructions ...


