RADIO INSTALLATION
4 0
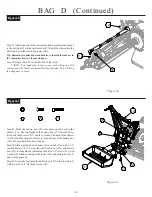
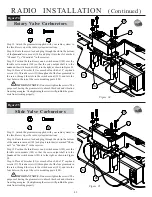
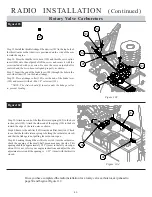
Figure 90
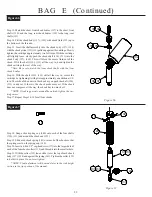
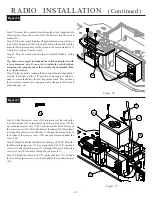
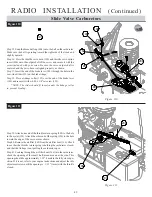
Figure 91
Figure 90
Figure 91
182
29
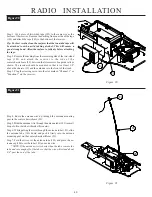
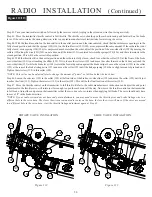
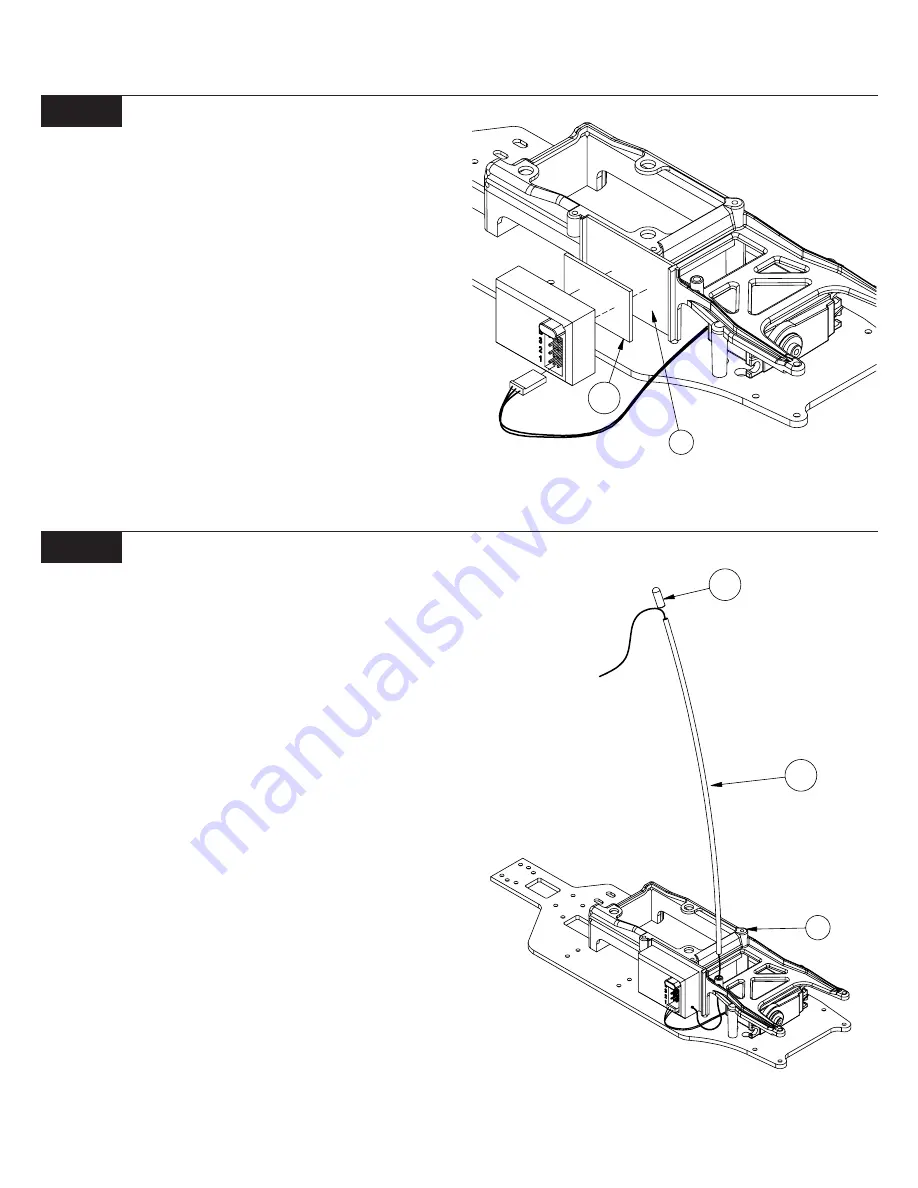
Step 1. Cut a piece of two-sided tape (182) to the same size as the
bottom of the receiver. Remove the backing from one side of the tape
(182) and attach the tape (182) to the bottom of the receiver.
Tip: For best results clean the surfaces that the two-sided tape will
be attached to with a mild rubbing alcohol. This will ensure a
good, strong bond. Allow the surface to fully dry before attaching
the tape.
Step 2. Remove the backing from the remaining side of the two-sided
tape (182) and attach the receiver to the side of the
center chassis brace (29), between the two receiver box guide rails as
shown. The receiver should be mounted so that it is at least 1/8"
above the chassis (19) and the antenna is to the front of the truck.
Step 3. Plug the steering servo into the slot marked "Channel 1" or
"Function 1" on the receiver.
183
184
29
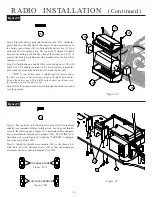
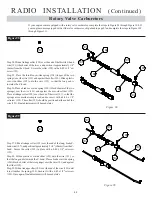
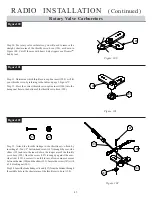
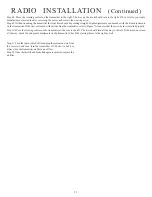
Step 4. Route the antenna wire up, through the antenna mounting
post in the center chassis brace (29).
Step 5. Slide the antenna wire through the antenna tube (183) (a small
drop of oil in the tube will make this easier).
Step 6. While pulling the wire through the antenna tube (183), slide
the antenna tube (183) down and push it firmly into the antenna
mounting post on the center chassis stiffener (29).
Step 7. Fold the wire over the antenna tube (183) and place the an-
tenna cap (184) over the tube (183) and extra wire.
*NOTE: If the antenna wire is shorter than the tube, remove the
tube and cut enough off of the tube so that the wire will extend about
3/4" past the end of the tube.

