R
2800 LAURA LANE • MIDDLETON, WI 53562 • (800) 288-9383 • FAX (608) 836-9044 • www.tcsbasys.com
10
In general, the SEQ100 calculates electric meter con-
sumption and demand as follows:
Demand = (CTValue*MtrConst*MtrMult)
(PPRValue*PulseTimeDiff)
Consumption = (PulseCount*CTValue*MtrConst*MtrMult)
PPRValue
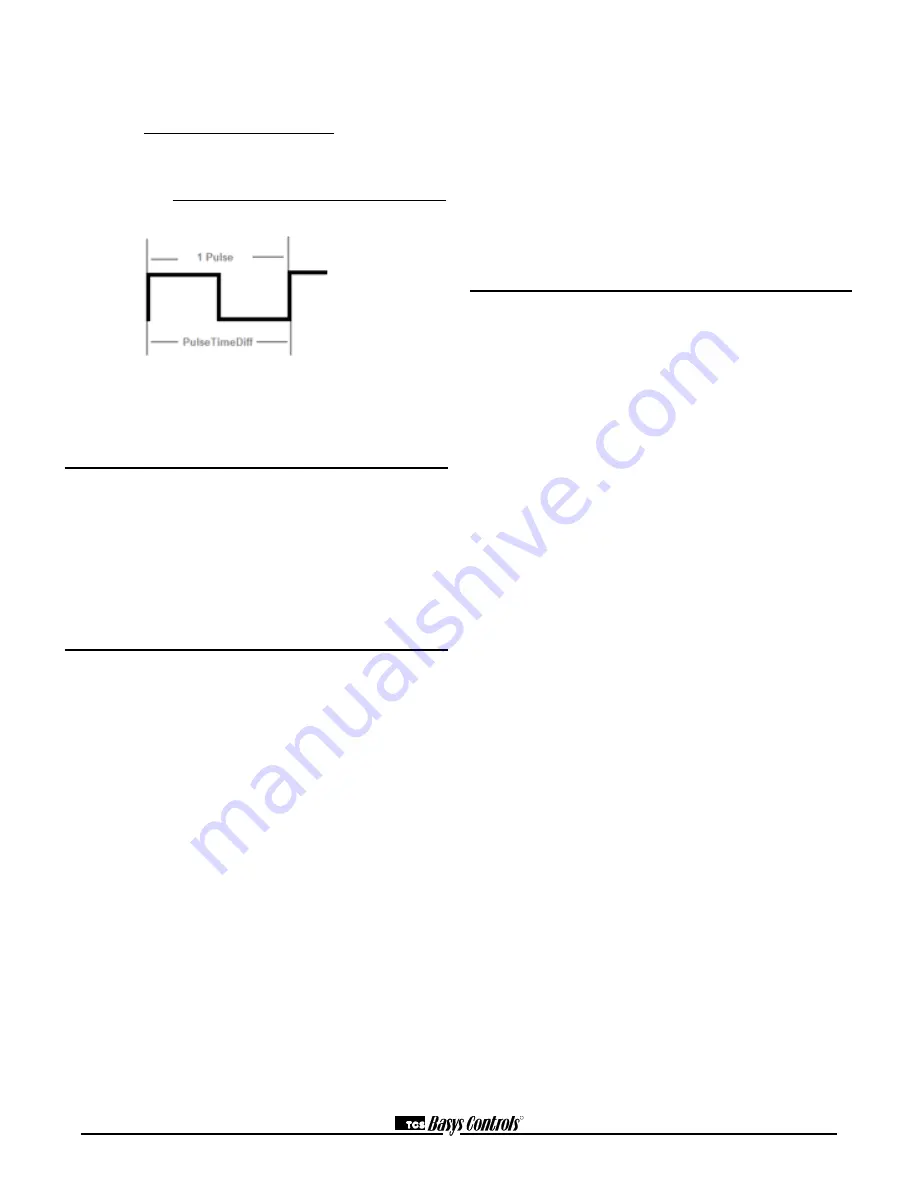
The above diagram depicts how a single pulse and the
pulse time difference are represented on a pulse wave-
form input into the SEQ100.
TCS ZigBee Wireless Network
The QWL 3.1 Rev 2 can be bundled with a QW1010 TCS
ZigBee wireless gateway to manage the TCS ZigBee
wireless network. Be sure to plug the USB cable into one
of the QWL 3.1 Rev 2 USB ports and configure it for the
TCS protocol before initiating the wireless controllers.
The QW1010 will also need to be properly setup before
the wireless network will communicate (Please refer to
the QW1010 Product Manual).
LED Display and Push Buttons
Fourteen LEDs on the QWL 3.1 Rev 2 series panel allow
the user to view the current operating status of the QWL
3.1 Rev 2 series panel.
DIGITAL OUTPUTS: Along the Left hand side there are
Eight LEDs and Push button
•
The LEDs will be lit when the corresponding relay
output is occupied, or physically on no matter if the
channel is selected to be NO or NC.
•
The push buttons correspond to each of the channels
for the timed override function.
DATA: Along the Right hand side towards the
bottom, there are three LEDs
•
The RX LED indicated that the SEQ100 and SLQ218
are in Receive mode.
•
The TX LED indicated that the SEQ100 and SLQ218
are in transmit mode.
•
The Wireless LED- NOT USED
ALARM: This LED indicates that a local alarm is
active
POWER: This LED indicated that the QWL 3.1 Rev 2
series panel has power applied
•
The reset button in the lower right hand corner is
used to “reboot” the entire QWL 3.1 Rev 2 series
panel. This is accomplished by pushing and holding
the button for 5-7 seconds.
Note: During a reboot, the lights associated with
the Lighting Module of this product could go out, it is
recommended that you open the panel and place the
Hand-Off-Auto switch for the corresponding channel in
the Hand position to ensure that the lights that should be
on remain on.
CPU: This LED indicates that the CPU or QD2040 portion
of the panel is active and running.
Checkout & Troubleshooting
QWL 3.1 Rev 2 series panel
• Be sure to check and verify all wiring before
powering up the QWL 3.1 Rev 2 series panel
• The QWL 3.1 Rev 2 series panel is designed to
contain 24 VAC devices and wiring ONLY. No line
voltage (120 VAC or greater) is to be installed
within this panel.
• If you created metal shavings, ensure they are
cleaned up and not in a position to allow for
shorting before powering up.
Lighting Module - SLQ218
• Verify all wiring before powering up the QWL 3.1
Rev 2 series panel and the SLQ218.
• Place the Hand-Off-Auto switches in the off
position
• Place the appropriate (Normally Open) NO or
(Normally Closed) NC jumpers (both included)
in position-RED wires = NO-ON=Closed and
BLACK wires=NC-On=Open
Utility Meter Pulse Transducer Module - SEQ100
• Verify all wiring prior to powering the QWL 3.1
Rev 2 series panel and SEQ100.
• Take note of the current readings for all meters.
Since the SEQ100 is used for only monitoring,
and is the reading appear to be correct, you are
done.
• If a value does not appears to be correct, verify
on the programming page the value programmed
in is correct.
• If a value is shown as 0 (Zero) the SEQ100 is not
receiving a pulse signal.
Site Communications Center - QD2040
• Be sure to verify all wiring and programming
information before hooking up to Network
• If the CPU LED does not light up, verify that the
power supply nodule (included with the QWL 3.1
Rev 2 series panel) is plugged in to an outlet that
has power.


