Finalizing your installation
If you have a multimeter handy, make a quick test if Vbatt and GND do not short. You do this with the “sound”
or “Ohm” setting on your multimeter, and then probing on the 2 pins inside the XT60 connector. If there is no
short (no beep and not reading 0.00 Ohm), connect a battery and a receiver. If you have a CORE PRO, you can
now simply turn on your FPV display or goggles and run the calibration wizard. After this, all your channels
are mapped correctly. If you are not using the CORE PRO, you will need to ensure that the channels are
correctly mapped using the CleanFlight Configurator software and your R/C.
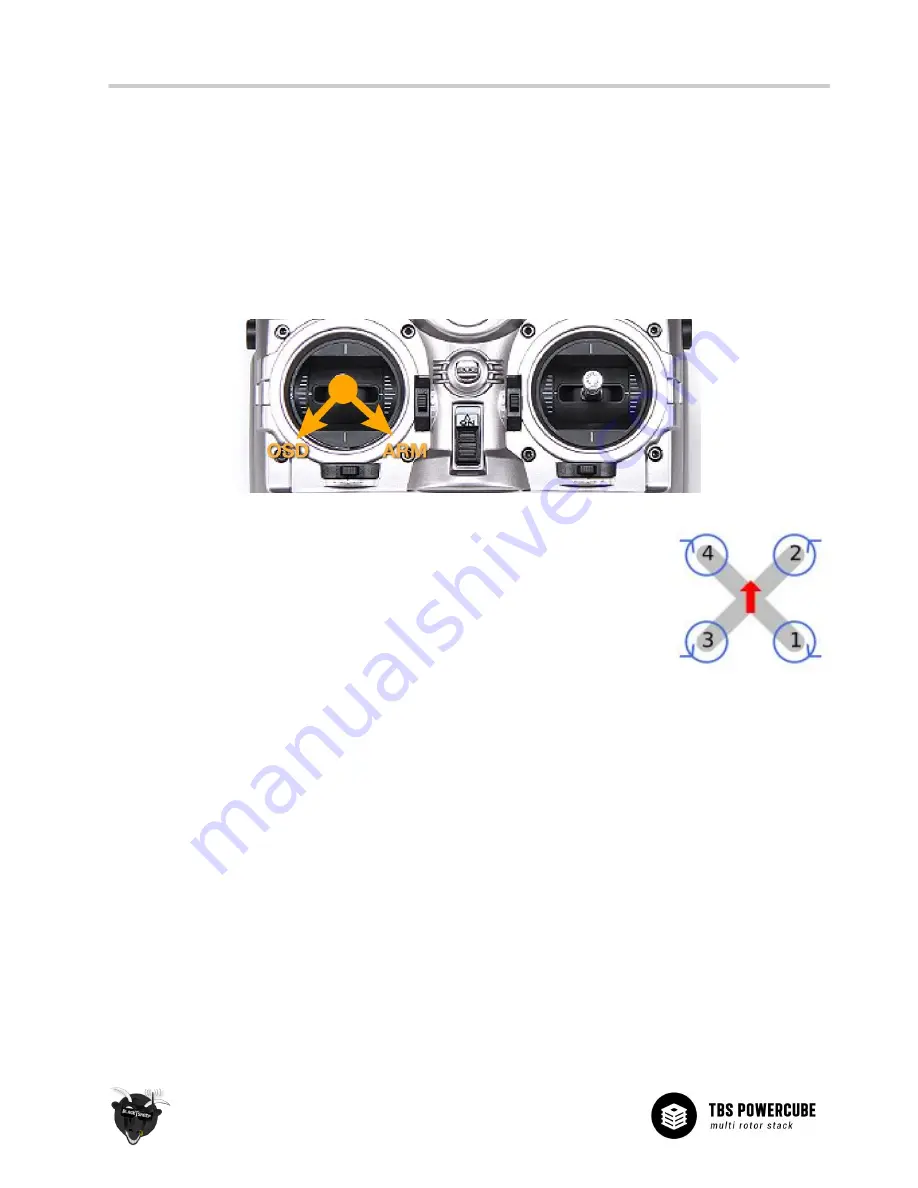
Then, start your motors and ensure they are spinning in the right direction. The arm
command is yaw-right, throttle at zero. The motors will spin in idle. Verify that the
motor directions matches the right diagram. If they do not match, you may need to
flip two of the three connector cables. Also, now is a good time to double-and-triple
check that motor 1, 2, 3 and 4 are wired up to the correct layer in the TBS
POWERCUBE stack.
The first flight
When preparing for the first flight, there are a couple of things to consider.
1) Do not move the model while plugging in the battery and during the first 4 to 5 seconds after
powering up. During initialization the gyro must remain idle, otherwise the self-calibration will be
wrong. If you have installed LEDs or a Buzzer, they will indicate when the model is ready to take off by
3 distinct beeps and solid LED color on all LEDs using the “Warnings” LED setting.
2) If the model immediately flips or rolls during take-off, verify that the TBS POWERCUBE flight
controller is oriented in the correct way and that all motors are plugged into the correct position of
the TBS PowerCube stack. The arrow on the board must face flight forward. Also, verify that the
motor spin directions are correct.
10


