background image

English

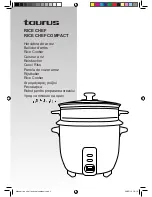
Rice Cooker

Rice Chef/ rice chef compact

Dear customer,

Many thanks for choosing to purchase a TAURUS brand product.

Thanks to its technology, design and operation and the fact that it exceeds the 

strictest quality standards, a fully satisfactory use and long product life can be 

assured.

Description

A Lid Handle

B Lid

C Cooking pot

D Body

E Handles

F Cooking switch button

G Cooking light indicator (Pilot light red)

H Warm light indicator (Pilot light green)

I Spatula

J Measuring cup

K Steam tray

L Power cord

- Read these instructions carefully before switching on the appliance and keep 

them for future reference. Failure to follow and observe these instructions may 

result in an accident.

- Clean all the parts of the product that will be in contact with food, as indicated 

in the cleaning section, before use.

 Safety advice and warnings

- This appliance is only for domestic 

use, not for industrial or professional 

use. It is not intended to be used by 

guests in hospitality environments such 

as bed and breakfast, hotels, motels, 

and other types of residential environ-

ments, even in farm houses, areas of 

the kitchen staff in shops, offices and 

other work environments.

- This appliance can be used by people 

unused to its handling, disabled people 

if they have been given supervision 

or instruction concerning use of the 

appliance in a safe way and unders-

tand the hazards involved.

- This appliance can be used by people 

unused to its handling, disabled people 

or children aged from 8 years and abo-

ve if they have been given supervision 

or instruction concerning use of the 

appliance in a safe way and unders-

tand the hazards involved.

- Cleaning and user maintenance shall 

not be made by children unless they 

are older than 8 and supervised

- Keep the appliance and its cable out 

of reach of children under the age of 

eight.

- This appliance is not a toy. Children 

should be supervised to ensure that 

they do not play with the appliance.

- Do not submerge the appliance in 

water or any other liquid, or place it 

under a running tap.

- If the connection is damaged it must 

be replaced. Take the appliance to 

an authorised Technical Assistance 

Service. Do not try to dismantle or 

repair without assistance, as this may 

be dangerous. 

- Ensure that the voltage indicated on the nameplate matches the mains 

voltage before plugging in the appliance.

- Connect the appliance to a base with an earth socket withstanding a minimum 

of 10 amperes.

- The appliance’s plug must fit into the mains socket properly. Do not alter the 

plug. Do not use plug adaptors.

- Never use the electric wire to lift up, carry or unplug the appliance.

- Check the condition of the electrical connection cable. Damaged or tangled 

cables increase the risk of electric shock.

- Do not touch the plug with wet hands.

- Do not use the appliance if the cable or plug is damaged.

- If any of the appliance casings breaks, immediately disconnect the appliance 

from the mains to prevent the possibility of an electric shock.

- Do not use the appliance if it has fallen on the floor, if there are visible signs of 

damage or if it has a leak.

- Keep the working area clean and well lit. Cluttered and dark areas invite 

accidents.

- Do not place the appliance on hot surfaces, such as cooking plates, gas 

burners, ovens or similar.

- Do not use the appliance, in the case persons insensitive to heat (the applian-

ce has heated surfaces).

Use and care:

- Fully unroll the appliance’s power cable before each use.

- Do not use the appliance if its accessories are not properly fitted.

Do not use the appliance when empty.

Do not switch the appliance on without water.

- Do not use the appliance if the on/off switch does not work.

- Do not move the appliance while in use.

- Use the appliance handle/s, to catch it or move it.

- Do not use the appliance if it is tipped up and do not turn it over.

- To keep the non-stick treatment in good condition, do not use metal or pointed 

utensils on it.

- Respect the MAX and MIN levels (Fig. 1)

- Disconnect the appliance from the mains when not in use and before under-

taking any cleaning task.

- This appliance should be stored out of reach of children and/or the disabled.

- Do not store or transport the appliance if it is still hot.

Take care when handling recipients containing liquids heated in this appliance 

as they may boil fiercely.

- Only use utensils which can withstand high temperatures.

Manual rice chef / rice chef compact.indb   8

26/05/14   18:10

Summary of Contents for RICE CHEF

Page 1: ...COMPACT Hervidora de arroz Bullidor d arr s Rice Cooker Cuiseur riz Reiskocher Cuoci Riso Panela de cozer arroz Rijstkoker Rice Cooker Robot pentru prepararea orezului Manual rice chef rice chef comp...

Page 2: ...Manual rice chef rice chef compact indb 2 26 05 14 18 10...

Page 3: ...E E A B C D F H G K L J I Fig 1 Manual rice chef rice chef compact indb 3 26 05 14 18 10...

Page 4: ...enestarbajovigilancia paraasegurarquenojueguenconel aparato Nosumergirelaparatoenaguauotro l quido niponerlobajoelgrifo Silaconexi nredest da ada debe sersubstituida llevarelaparatoaun ServiciodeAsist...

Page 5: ...agua La cantidad de agua variar dependiendo del tipo de alimentos y la cantidad Colocar la bandeja vaporizadora en el canto de la olla de cocci n Colocar los alimentos que deben cocinarse en la bandej...

Page 6: ...st malme sa s hadesubstituir Porteul aparell aunServeid Assist nciaT cnica autoritzat Abans de connectar l aparell a la xarxa verifiqueu que el voltatge que s indica a la placa de caracter stiques coi...

Page 7: ...l interruptor de cocci El pilot vermell de cocci s il luminar No obriu la tapa durant el proc s de cocci Un cop finalitzada la cocci l interruptor tornar a la posici inicial El pilot vermell s apagar...

Page 8: ...thoutassistance asthismay bedangerous Ensure that the voltage indicated on the nameplate matches the mains voltage before plugging in the appliance Connect the appliance to a base with an earth socket...

Page 9: ...lot light red comes on Do not open the lid during the cooking process When the cooking has completed the switch will pop up The pilot light red will turn off and the pilot light green comes on indicat...

Page 10: ...lance d unepersonneresponsableouapr s avoirre ulaformationn cessairesur lefonctionnements rdel appareil etencomprenantlesdangersqu il comporte Lesenfantsnedevrontpasr aliser lenettoyageoulamaintenance...

Page 11: ...itiale Le t moin lumineux rouge s teindra Le t moin lumineux vert s allumera en indiquant que la fonction automatique de maintien au chaud s est activ e en gardant ainsi une temp rature entre 60 et 70...

Page 12: ...sichtigt oderbeiderBedienungangeleitet werdenunddiem glichenGefahren verstehen Personen denenesanWissenim UmgangmitdemGer tmangelt geis tigbehindertePersonenoderKinder ab8Jahrend rfendasGer tnurunter...

Page 13: ...r Drehen Sie den Topf dabei leicht um sicherzugehen dass er direkt auf der Heizplatte aufsitzt Setzen Sie den Deckel auf Bet tigen Sie den Einstellschalter Die rote Betriebsleuchte leuchtet auf W hren...

Page 14: ...dibambiniminoridi8anni Questoapparecchionon ungio cattolo Assicurarsicheibambininon giochinoconl apparecchio Nonimmergerel apparecchioin acquaoaltriliquidi n lavarlocon acquacorrente Incasodiguasto ri...

Page 15: ...minuti fino a quando il riso non sia completamente cotto Funzione vaporizzazione Questa funzione pu essere utilizzata solamente con il vassoio per la cottura al vapore Riempire d acqua il recipiente d...

Page 16: ...msobsupervis ooutenham recebidoforma osobreautiliza o seguradoaparelhoecompreendam osperigosqueestecomporta Ascrian asn odevemrealizarope ra esdelimpezaoumanuten odo aparelho amenosquesejammaio resde8...

Page 17: ...elha apagar se A luz piloto verde iluminar se indicando que a fun o de conserva o autom tica do calor foi activada para manter um intervalo de 60 70 Manter a tampa fechada durante 10 minutos at o arro...

Page 18: ...aterofeenanderevloeistofenhoud hetnietonderdekraan Alshetnetsnoerbeschadigdis moet hetwordenvervangen Brenghet apparaatnaareenerkendeTechnis chebijstandsdienst Voordat u het apparaat op het stroomnet...

Page 19: ...n Plaats het te stomen voedsel op het stoomrooster Doe het deksel op de pan Druk op de drukknopschakelaar voor koken het rode lichtje gaat nu aan Open het deksel niet gedurende het kookproces Als het...

Page 20: ...iada napi ciu sieci Pod czy urz dzenie do gniazdka z uziemieniem o nat eniu co najmniej 10 amperow Wtyczka urz dzenia powinna by zgodna z podstaw elektryczn gniazdka Nie zmienia nigdy wtyczki Nie u yw...

Page 21: ...o y pokrywk Wcisn prze cznik gotowania Za wieci si czerwony wska nik Nie podnosi pokrywki w trakcie procesu gotowania Po zako czeniu gotowania wska nik b dzie miga Wska nik czerwony zga nie i za wieci...

Page 22: ...Rice Chef rice chef compact TAURUS A B C D E F G H I J K L 8 8 8 10 N Manual rice chef rice chef compact indb 22 26 05 14 18 10...

Page 23: ...1 10 1 0 2 1 60 70 10 60 70 ph 2006 95 EC 2004 108 EC 2011 65 Manual rice chef rice chef compact indb 23 26 05 14 18 10...

Page 24: ...Rice Chef rice chef compact TAURUS A B C D E F G H I J K L bedandbreakfast 8 8 8 10 Manual rice chef rice chef compact indb 24 26 05 14 18 10...

Page 25: ...MAX MIN 1 10 1 0 2 1 1 60 70 10 60 70 RAEE 2006 95 EC 2004 108 EC 2011 65 EC 2009 125 EC Manual rice chef rice chef compact indb 25 26 05 14 18 10...

Page 26: ...tul nap saualt lichid inu lpune isubjetdeap Incazulaparitieiunoranomaliila cabluldealimentare nuincercatisa schimbaticablul arputefipericulos Ducetiaparatullaunserviceautorizat nainte de a conecta apa...

Page 27: ...e marginea vasului de g tit Pune i alimentele care trebuie s fie preparate pe tava aburi Pune i capacul Ap sa i ntrerup torul de g tit Becul ro u de g tit se aprinde Nu ridica i capacul n timpul proce...

Page 28: ...Rice Chef rice chef compact TAURUS A p B C D E F G H I J K L 8 8 8 10 c a c 1 Manual rice chef rice chef compact indb 28 26 05 14 18 10...

Page 29: ...10 1 0 2 e a 1 c e c 60 70 10 c c 60 70 pH 2006 95 EC 2004 108 EC 2011 65 EC 2009 125 EC Manual rice chef rice chef compact indb 29 26 05 14 18 10...

Page 30: ...Manual rice chef rice chef compact indb 30 26 05 14 18 10...

Page 31: ...Manual rice chef rice chef compact indb 31 26 05 14 18 10...

Page 32: ...Manual rice chef rice chef compact indb 32 26 05 14 18 10...

Page 33: ...Manual rice chef rice chef compact indb 33 26 05 14 18 10...

Page 34: ...Manual rice chef rice chef compact indb 34 26 05 14 18 10...

Page 35: ...Manual rice chef rice chef compact indb 35 26 05 14 18 10...

Page 36: ...n E 25790 Oliana Spain Rice Chef Net weight 2 325 Kg Aprox Gross weight 2 680 Kg Aprox Rice Chef Compact Net weight 1 400Kg Aprox Gross weight 1 650 Kg Aprox Manual rice chef rice chef compact indb 3...

Reviews: