background image

d

 If an object is a label or background, only image0 is necessary. 

e

 Visible characters: if the size of the image is less than 30x30 pixels, no caption will be visible on 

the image, neither will the delegate name be visible in 

Seat Arrangement

f

 Transparency: if the initialized background color is set to transparent, the transparent area of the 

object is transparentized; otherwise, the transparent area is substituted by the initialized 
background color. 

When the object group is set to transparent, the transparent area of each state image of the object 
group shall be identical, or the desired effects won’t be seen. 
About the transparent area: the area is a collection of elements with the same color as the element 
in the lower left corner of an image. Generally, the transparent area can be set by specifying the 
color in the corner to the same as the desired area through drawing tools (such as Windows Paint, 
etc); whereas if no transparent effects are needed, just set the color of the corner element to the 
color different from any colors in the image. 


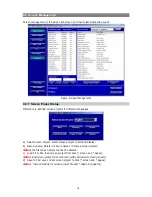
(3) Add object 
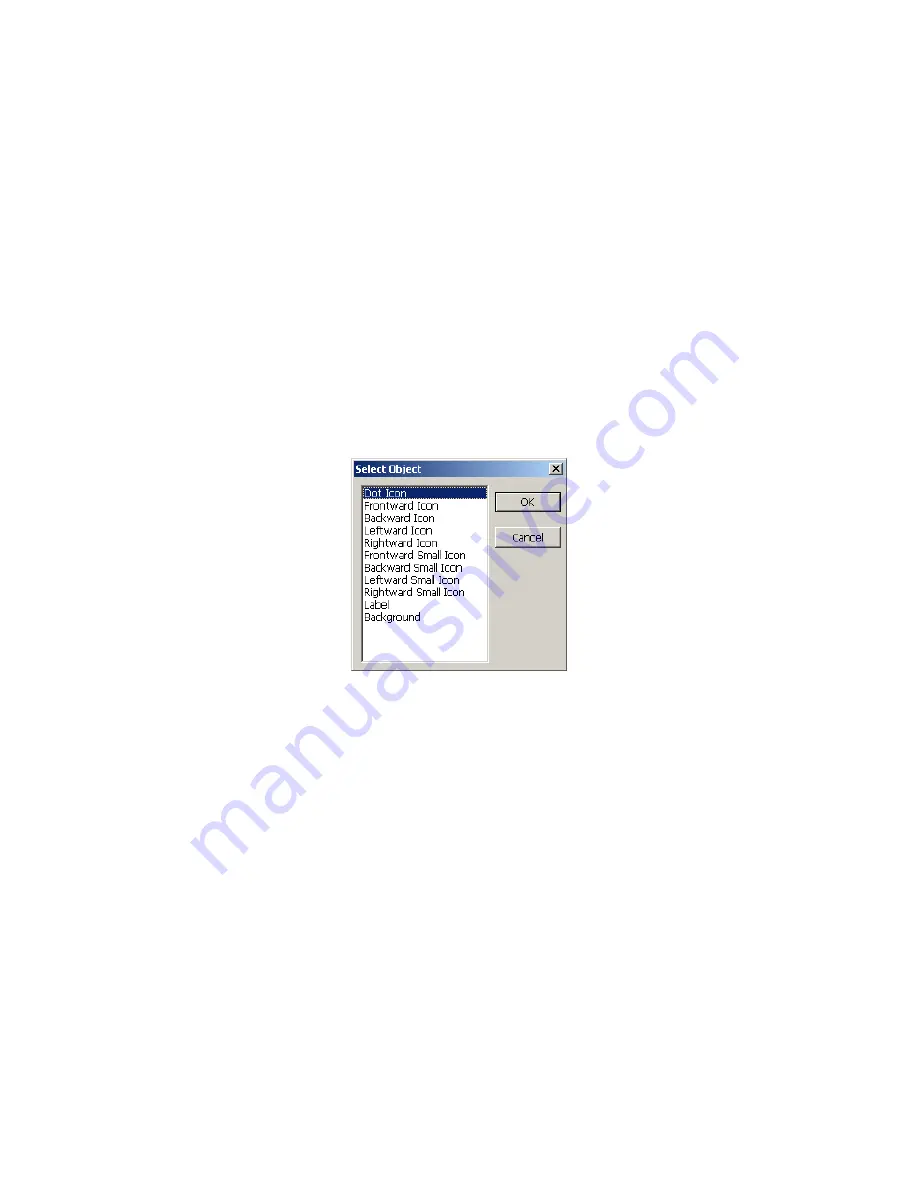
After defining the object, it will be available in the 

Select Object

 dialog box list (figure below). Click 

Add Object in the toolbar to open the dialog box. 


The operator is now able to choose the object and to add it into the CVF. 


(4) Object properties 
Select an object in the current CVF, and its properties are filled in the 

Object Properties

 dialog box 

(Click 

Object Properties

 button to open); meanwhile, user can change values in the dialog box. 

Make sure to click “OK” button or to press 

Enter

 key to apply these changes. 

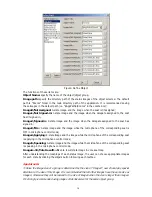
Here are some explanations of these properties: 
Object ID: It is the unique identification in seat arrangement for the unit. The default name is 
"1Row$NUM$": “1Row” shall be replaced by an intelligible symbol according to the actual 
requirement, such as numbers (1, 2, 3…), letters (A, a, B…) and strings (front, back, and so on), 
etc. “$NUM$” is the index mark decided by start index, count and increment of the object group. In 
the figure below, the group’s start index is 1, count is 10, and increment is 1; therefore the 
“$NUM$” of the first unit in the group is 1, while the second is 2 (1+1), and so on. 
Another two options - “$0NUM$” and “$00NUM$” - which stand for “0” or “00” to be prefixed to the 
“$NUM$”; under this choice, if the start index is “1”, the actual result will be “01” or “001” 
respectively (The “1”, “01” and “001” aren’t the same but stand for three different object IDs). 

Note:

 if the object group is used as background, labels, and illustrations, etc, the object ID should 

remain null. 
 

15 

Summary of Contents for HCS-5300

Page 1: ...HCS 5300 Digital Infra red Wireless Conference System Excellent solutions for conferences Conference Management System Software Installation and Operating Manual V 4 2 6...

Page 2: ...hout prior announcement All technical specifications are guideline data and not guaranteed features We are not responsible for any damage caused by improper use of this manual This product is conform...

Page 3: ...d Pages 19 4 3 3 Screen Event 20 4 3 4 Alias 21 4 4 Video Tracking 22 4 4 1 Video Matrix 22 4 4 2 Predefine Position 23 4 4 3 Panorama Control 25 4 5 Simultaneous Interpretation S I 26 4 5 1 Simultane...

Page 4: ...r 7 Report system 71 7 1 Conference Information 72 7 2 Proposal List 73 7 3 Delegate Information 73 7 4 Seat Sign in Report 74 7 5 Voting Result Report 74 7 6 Summarizing Voting Result 76 7 7 More Rep...

Page 5: ...gin dialog is shown z Meeting Type The default meeting type is Base user can define its own meeting type different meeting types can have different configurations including database system parameters...

Page 6: ...to be done before a conference including Select Meeting Conference Information Proposal Information Agenda Information Delegate Information Participator Seat Arrangement Infrared Units Management z C...

Page 7: ...he same type of database according to the selection from the left side list Operation Create Meeting Type Select importing style and input meeting type name and click Save Delete Meeting Type Select a...

Page 8: ...ss indication and operation buttons Operation 1 Select delegate type 2 Click Browse to select the delegate information file 3 Click Browse to select a directory containing delegate photos 4 Click Setu...

Page 9: ...delegate data and just import new delegate data or update original delegate data from excel or text file Note photo format supported including bmp jpg jpeg gif png tif tiff Excel format of delegate d...

Page 10: ...ata from the database into a folder or to restore conference data from a folder into the database Figure Back and Restore z Backup And Restore Type data type to backup restore including database file...

Page 11: ...arameters Figure System Setup 4 1 Connect to CMU Figure Connect To CMU Figure Looking for CMU by Broadcast The system software connects to and communicates with the CMU The IP address of the CMU shoul...

Page 12: ...rry out venue design the advanced edition provides all capabilities of the normal edition plus additional powerful and convenient functions It is especially suitable for the design of large medium con...

Page 13: ...c are available Click OK to create the new CVF Parameters can be changed later through the Configuration menu on the toolbar Or right click on the venue and select Configuration in the pop up menu or...

Page 14: ...pop up dialog box Then click OK to save and exit Special hint The CVF shall be saved in the Rooms folder in the main install directory of the application to make it available for creating new conferen...

Page 15: ...nue file Open open an existing CVF Save save a CVF Save as save current CVF as another Save as image save current CVF as an image Print print conference venue image Configuration reconfigure current C...

Page 16: ...he object Font Name the font of caption Font Size the font size of caption Status select the initialized status of the group 6 states available Radian set the radian of the group Start Index set the s...

Page 17: ...ject After the creation of a new CVF the user can add objects and modify the properties of the objects in the Define object dialog box as in the figure below The Venue designer has also some customize...

Page 18: ...seat is OFF in microphone control mode Image4 Applying 4 state image and the image while the microphone of the corresponding seat is applying in the microphone control mode Image5 Speaking 5 state im...

Page 19: ...below Click Add Object in the toolbar to open the dialog box The operator is now able to choose the object and to add it into the CVF 4 Object properties Select an object in the current CVF and its p...

Page 20: ...facility as shown in the right figure click Check to start if there are duplicate IDs the duplicate IDs are listed in the dialog box then double click object belong to to localize the object If there...

Page 21: ...ave button Select path and input filename in the pop up dialog box if it is the first time to save a new CVF and then click OK to save and exit Special hint The CVF should be saved in the Rooms folder...

Page 22: ...ct select screen project to edit and display b New Rename Delete create rename or delete a screen project Notes the first screen project cannot be deleted c Load From File load screen project from dis...

Page 23: ...click Delete button z Edit Page select one page from the predefined pages click the Edit button or just double click the page that you want to edit directly and then design the content of a screen pa...

Page 24: ...a dynamic chart object to the page dynamic chart is to display the voting result in histogram or pie Seat Map add a seat map object to page seat map type include Seat Sign in Entry Sign in Vote Map Ed...

Page 25: ...as for convenience Figure Screen alias editor interface Modify select a screen in the list and input screen alias click Modify button Visible select this item the screen content will be displayed imme...

Page 26: ...ideo signal to VGA signal one 4x1 VGA matrix and one 6x1 audio matrix The video input equipment includes dome camera fixed camera computer and another video input device The camera cannot be assigned...

Page 27: ...ng on the crosspoint of input and output 4 Assign audio output channel 5 Click Save and Send To CMU button to save current video matrix 4 4 2 Predefine Position If the conference system is equipped wi...

Page 28: ...ction buttons and click zoom in out button to adjust the size of the video image 7 Click save button to save the current predefined position if the adjustment is done 8 Repeat steps 2 7 to set the pre...

Page 29: ...saved respectively 4 4 3 Panorama Control Preset the panorama of the conference venue as in the figure below Figure Panorama control interface Operation select proper camera and predefine position num...

Page 30: ...nterlock Override Distribute Floor to Used SI CH select whether to distribute floor to used SI channel automatically or not when the SI channel is not operated Interpretation Units Sampling Rate setup...

Page 31: ...should set the outgoing A channel and whether outgoing B and C channel is needed If the outgoing C channel is checked the outgoing language of B channel should be set All settings shall be configured...

Page 32: ...ort Message List existing short messages z Edit edit short message z Preview preview short message z Font set up short message font and format z Control create save and delete short message z Send sen...

Page 33: ...rt authorize all units go to authorization status press the Mic On Off button to authorize authorized units will be added in the left side list 2 When all needed units are authorized click Stop author...

Page 34: ...tus Delete delete the unit of the selected ID Export export list to text file 4 7 2 Unit Arrangement Unit Arrangement is used to arrange the contribution units connected with the CMU Conference Main U...

Page 35: ...ration procedure 1 Select a conference room in the drop down room list box 2 Copy copy the arranged CUs from another meeting room available only when the other meeting room has the same CUs 3 Update L...

Page 36: ...tribution units here is only for checking and isn t interchangeable with the microphone control facility in the conference management module Right click on the arranged seat and the relative CU is poi...

Page 37: ...ew user finally click Save button Delete User select a user in the User manage list on the lower left side click Delete User button 4 9 IP Management License authorizing clients to connect to server O...

Page 38: ...oom 2 Topic And Voting z Publish voting result to unit LCD the vote result will be sent to the LCD of delegate units when the vote is ended z Print result after end of voting z Save voting result to c...

Page 39: ...ly once the button released the former state is restored Ring Mode turn on off all ring tones of the conference units when applying to speak Reduce HP Vol When Mic Active select whether reduce headpho...

Page 40: ...cluding Select Meeting Conference Information Proposal Information Agenda Information Delegate Information Participator Seat Arrangement Infrared Unit Figure Conference preparation 5 1 Select Meeting...

Page 41: ...nce information and meeting information Each conference consists of several meetings with different names contents meeting rooms and start times etc Figure Conference Information The relevant function...

Page 42: ...number of the delegates present does not reach the quorum the vote cannot start Locked lock a conference or a meeting When a meeting is convoked it can be locked to protect meeting data A locked meet...

Page 43: ...save the current proposal into the database The voted proposal cannot be modified Delete delete a proposal Generally the proposals are associated with the specified meeting therefore user should selec...

Page 44: ...ess valid Voting weight voting weight can be set for nominative voting Import topic Click Import button and the import topic interface is shown as in the following figure This interface enables the us...

Page 45: ...sub process and its sequence to achieve a better operability and control of the whole meeting process The left side of this window shows a sub process list the right side displays the name type and co...

Page 46: ...results as well Note the searching facility in other interfaces shall be performed in the same way The functional buttons are listed in the upper line including Export data Group Add Delete Update Ca...

Page 47: ...oup the next step is to set up grouping conditions There are four columns from left to right the first column is to set the logic relations logic And and logic Or between the previous and current cond...

Page 48: ...ns of the item in the delegate information interface i e the content in one row stands for one option if the user wants to redefine or modify an option just type the word in the right textbox and clic...

Page 49: ...he current meeting are listed in the right list and the function of the right Group is the same as the left The functional buttons in the middle column are Copy From Copy the participators of another...

Page 50: ...One clear the arranged seat of a participator Export Map export arranged seat to picture format Bmp or JPG Import Export import arranged seat from text file or export arranged seat to text file Opera...

Page 51: ...gure below the area with lime background is Area1 Auto Layout click this button to arrange participators to the seats in a created area the area should be selected first in the combo box of Area in th...

Page 52: ...ith Right click on one participator in the list and select Find Seat in pop up menu the associated seat is pointed at 7 Adjust arrangement If some individuals need to be rearranged use Clear One and L...

Page 53: ...ist current meeting using units are listed at right side list Some functional buttons are deposited in the middle including Copy from add add all delete delete all replace z Copy from copy data from o...

Page 54: ...nits status CMU Control Panel 6 1 Hot Backup Hot spare backup server starts upon startup of the meeting If the system server fails the backup server will take over and control the CMU automatically Re...

Page 55: ...genda The agenda can be edited added modified or deleted in the meeting The interface of the agenda control is shown in the figure above It displays the agenda list and the status of each agenda done...

Page 56: ...ator including Start Restart Stop and Display Sign in Status The delegate sign in information can be displayed by different delegate type Start Restart Sign in start or restart seat key press sign in...

Page 57: ...to the corresponding seats respectively Figure Microphone Control Click the Microphone Control button to enter the interface as in figure above The arranged microphones are shown in the interface The...

Page 58: ...In the System Parameters Setup module check Video Track to perform automatic video tracking when the microphone is on The camera turns automatically to the predefined position of the associated deleg...

Page 59: ...est of the delegate microphones enter the request to speak state if connected with a PC the operator can approve the request if not connected with a PC the microphone ranking first in the request to s...

Page 60: ...nu Turn On turn on a delegate s microphone Add to Request add a delegate into the request list Approve approve a delegate s request and open the microphone Reject reject a delegate s request Turn Off...

Page 61: ...ve a time limit when giving speech Close microphone when time out if checked delegate s microphone will be turned off automatically in speech timing mode Cumulative Speaking Time if checked a delegate...

Page 62: ...sts Turn Off All Mic turn off all delegates microphones It has no effects on the chairman and the VIP microphones Show Info display delegate information name team photo etc to large screen When a micr...

Page 63: ...s display with dual head VGA adaptor equipped Display2 is a preview of chairman s display with quad head VGA adaptor equipped The control of topic and voting Select a proposal select a proposal from...

Page 64: ...he upper right side End end voting Display Result display voting result to large screen Name List display voting name list Print print voting result Voting result display mode numeric bar pie Default...

Page 65: ...In voting status Figure Topic and Voting in voting status When the multi head VGA adaptor is installed the large screen will display Figure Topic and Voting large screen in voting status 61...

Page 66: ...result status Figure Topic and Voting in display voting result status When the multi head VGA adaptor is installed the large screen will display Figure Topic and Voting large screen in display voting...

Page 67: ...ormal display 1 3 columns 1 column display No Voting 2 columns or 3 columns cannot display No Voting At most 30 rows including topic row can be displayed in one page Use Prev Page and Next Page button...

Page 68: ...nel Video 1 4 Line Doubler VGA1 Audio the corresponding input channel will be displayed in specific color and the current output channel will also be displayed 2 Click an input channel the selected in...

Page 69: ...nput channel will be displayed in a specific color and current output channel will also be displayed 2 Click an input channel the selected input channel will be switched to the selected output channel...

Page 70: ...lect a display page the selected page will be displayed on all screens Check Preview Page and select a display page the selected page will be displayed on the operator screen to preview it Preview scr...

Page 71: ...e microphone in the booth Gain the operator can adjust output gain for current active microphone in the booth LF MF HF the operator can adjust output balance for current active microphone in the booth...

Page 72: ...he active microphone of the current output channel Low Cut the operator can cut low band of the audio for the active microphone of the current output channel Reset reset gain and balance value for the...

Page 73: ...thin 30 seconds the low battery capacity or no signal prompt will be showed in status bar double click this prompt the dialog box pops up as above figure to help operator change the battery timely Fin...

Page 74: ...6 13 CMU Control Panel Figure main unit control panel Control and monitor the control panel of conference main unit including Active Microphones Operation Mode and Volume control etc 70...

Page 75: ...save and print the related information of the conference including conference information proposal list delegate information sign in result vote result summarizing voting result and more reports incl...

Page 76: ...own Figure Conference information report In this interface the operator can view the contents of report and export the reports as files The available file formats are RTF file open and edit in MS Word...

Page 77: ...osal List Click Proposal list the following figure is shown Figure Proposal list report 7 3 Delegate Information Click Delegate Info button and the figure below is shown Figure Delegate Information re...

Page 78: ...terface Enter the Report System interface Click the Voting Result button to enter the interface as in figure above At the upper left side all proposals of current meeting are listed select a proposal...

Page 79: ...ton to view the name list which lists the names of the delegates who voted for a candidate an attitude yes no and abstain etc as shown in the figure below Figure Name list interface Preview preview th...

Page 80: ...7 6 Summarizing Voting Result Summarizing the voting result of all proposals of the meeting 76...

Page 81: ...Click Export data button to export the related information to save edit print and so forth The exportable file formats include Excel export to MS Excel directly CSV file open edit in MS Excel Text fi...

Page 82: ...to a proper level The Audio file format can be wav and mp3 alternatively Record if the automatic record is inactive the operator is able to select the speech of a specified participator to record the...

Page 83: ...functional buttons from left to right are Play Pause Forward Backward and Stop if Playback All is checked the record is to be played sequentially Delete includes Delete Current File and Delete All Fi...

Page 84: ...e the DVR status can be displayed simple DVR control can be achieved with this interface Start Record start record manually on selected channel Stop Record stop record manually on selected channel Cha...

Page 85: ...it voting map interface 8 5 Delegate Detail Figure Delegate Detail View the delegate detail in the meeting including name team gender photo etc The delegate detail can be displayed on large screen and...

Page 86: ...d the whole process and operation of the meeting including sign in microphone operation voting operation and voting result Note conference log cannot be deleted when the meeting started 8 7 Discussion...

Page 87: ...needs to be imported for the afternoon meeting 8 8 Edit shortcut button Figure Edit Short cut Key The shortcut buttons in the primary window can be edited 1 Select button group from the group box in...

Page 88: ...Operation Interface Lock operation interface to protect the meeting information temporarily in case the operator leaves for a short time Chapter 9 Help Provide on line help click F1 key in any interfa...

Page 89: ...de 3 Run backup console application on the backup computer as in the figure below Figure Software Hot spare Dual Server Input server s IP addresses and press Connect button If the IP address is unknow...

Page 90: ...m server continue the meeting the key press sign in information will be kept Select one option and click Start Meeting to start the meeting from the backup server it will connect to the main unit auto...

Page 91: ...www taiden com TAIDEN INDUSTRIAL CO LTD Copyright by TAIDEN Last Revision 11 2011...

Reviews: