


User Manual
Acuros
®
CQD
®
Camera
56 |
P a g e
9.4.4
Link Exposure Time to Each NUC Table after Upload
Each firmware NUC is created with an exposure time that must be linked to the table after upload.
This is done via the Send Host Message and uses Hex representation for the assigned NUC table
and exposure time. The example below links NUC table 3 to a 5.5ms exposure time with the
master clock set to High.
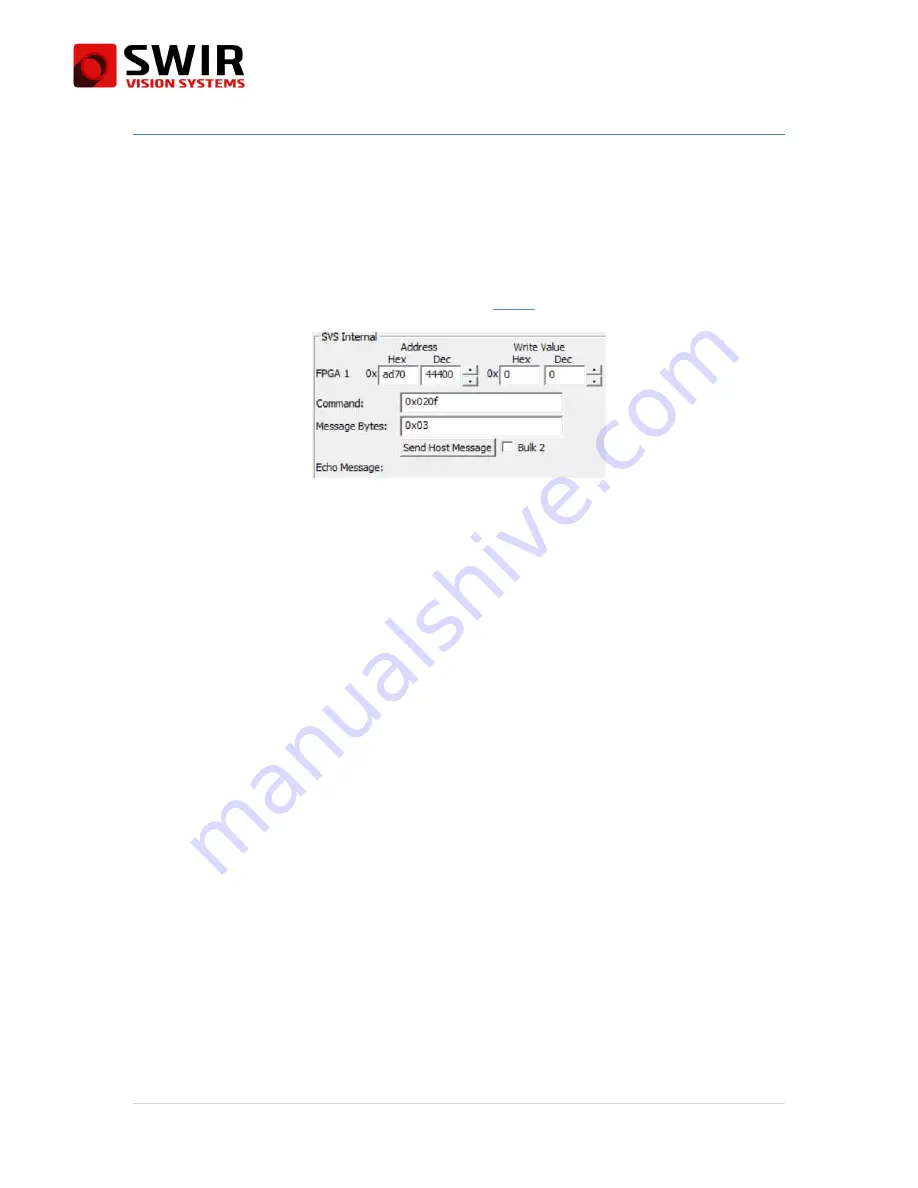
1.
Enter the
SetNucExposure
command bytes (0x020f) in the Command field in the lower-
right corner of SVSImagIR dialog. See Section
10.3.4
for more information.
Figure 46: Hex-Decimal Converter, Command, and Message Byte Fields
2.
Enter the first message byte, which corresponds to the NUC table number
a.
0x00 for NucTable 0
b.
0x01 for NucTable 1
c.
0x02 for NucTable 2
d.
0x03 for NucTable 3 (used in this example)
3.
Two ways exist to convert the exposure time to the required hex format.
a.
The FPGA 1 fields can be used to convert the exposure time represented as a 4-
byte decimal integer to the required hex format.
i.
Convert the exposure time to a 4-byte integer format:
Master Clock Low: 4-byte integer = 4,000 x Texp (in msec)
Master Clock High: 4-byte integer = 8, 000 x Texp (in msec)
ii.
Type the 4-byte integer into the Decimal entry to obtain the hex format.
iii.
For our example with high clock: 5.5ms x 8,000 = 44400, the hex result is
AD70.
iv.
Reset the hex and decimal fields after calculations are complete.
v.
Using the 4-byte value that represents the exposure time
(
0x0000AD70)
, enter it into the remaining message bytes.
The bytes
must be comma separated and the list must be ordered lowest byte to
highest byte.
b.
Use the
Calcul commandes NUC Tables
spreadsheet to calculate the hex
string with input clock speed and exposure times. Copy and paste the string
associated with the desired exposure time.
Summary of Contents for Acuros CQD Series
Page 13: ...User Manual Acuros CQD Camera 13 P a g e Figure 3 Acuros CQD 1920 GigE with F mount...
Page 14: ...User Manual Acuros CQD Camera 14 P a g e Figure 4 Acuros CQD 1280 USB with C mount...
Page 15: ...User Manual Acuros CQD Camera 15 P a g e Figure 5 Acuros CQD 1280 GigE with C Mount...
Page 16: ...User Manual Acuros CQD Camera 16 P a g e Figure 6 Acuros CQD 640 USB with C Mount...
Page 92: ...User Manual Acuros CQD Camera 92 P a g e...
Page 101: ...User Manual Acuros CQD Camera 101 P a g e 5 0x00 Unused 6 0x00 Unused...
Page 108: ...User Manual Acuros CQD Camera 108 P a g e 8 0x00 Unused...
Page 110: ...User Manual Acuros CQD Camera 110 P a g e 6 0x00 Unused...