34
SwannEye IP Camera
Administra
tor
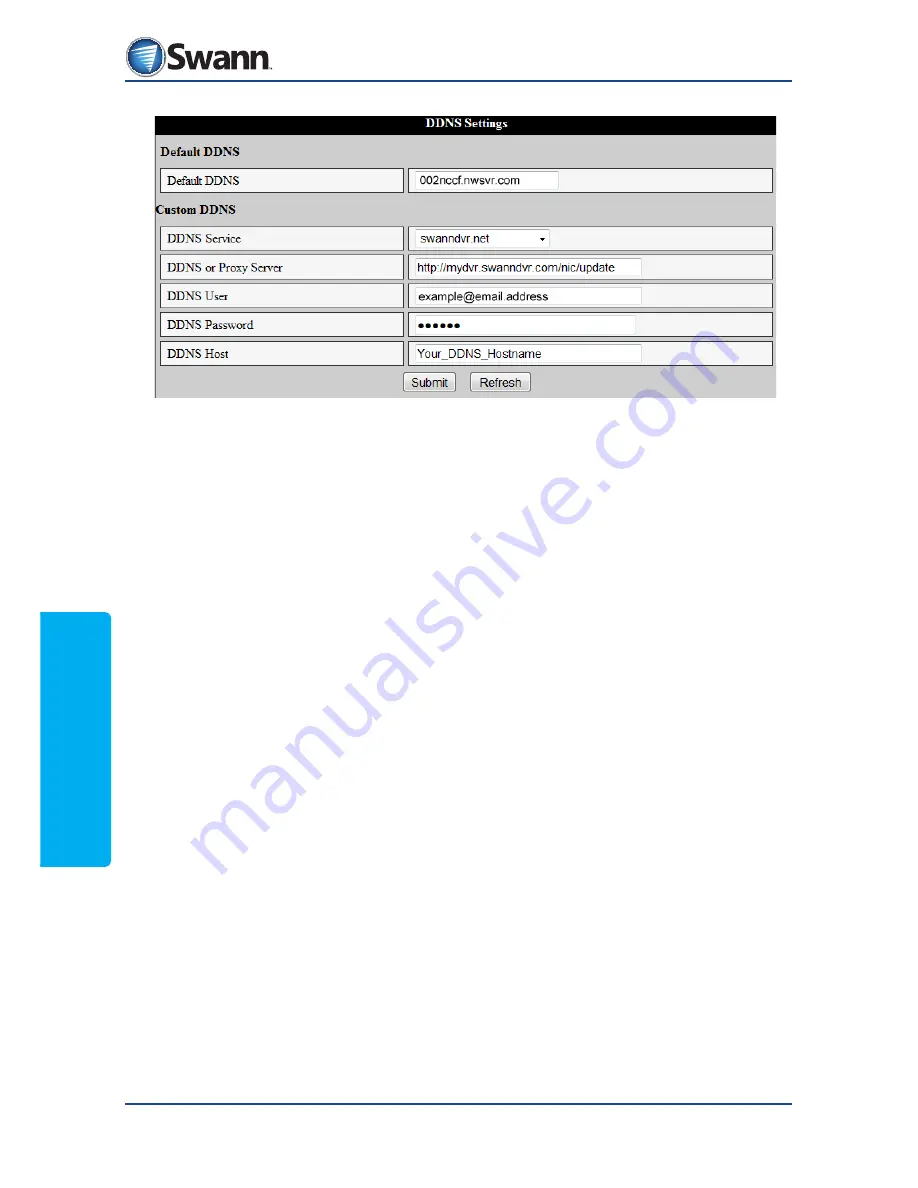
8.4.10. Network: DDNS Settings
If you do not already know what DDNS is, it may seem one of the most daunting
aspects of setting up a device to be accessible from the internet.
See the section “10. Accessing the camera from the internet” on page 51 for
an explanation on what DDNS is and why you might want to use it. You almost
definitely will want to use it if you intend to access your IP camera from the
internet (outside the local network it is connected to).
To enter your DDNS details:
DDNS Service
: Enter the DDNS provider. You will need an account at one of the
listed providers but the main DDNS providers are supported.
DDNS User
: Enter DDNS provider username. This is not your hostname, but the
account you use to log in and maintain your DDNS names.
DDNS Password
: Enter your DDNS provider password.
DDNS Hostname
: This is the DDNS hostname you registered at your DDNS
provider.
Re-Update Ignoring All Error
:
For DYNDNS users only.
This will force an update
of the DDNS even if there are issues.
•
Click ‘submit’ to save your settings
•
Restart the camera by clicking on ‘Reboot Device’
•
Wait for the camera to restart and then log in to the camera again as
Administrator.
•
Click ‘Device Info’ to access the ‘Device Status’ page. If the DDNS has worked
and updated successfully, the DDNS Status field will report success. Your
camera has now been successfully linked to your new DDNS hostname and
can be accessed by that name instead of the IP address.
•
If it has not been successful, review your DDNS Service settings.


