5-8
S
uper
W
orkstation 5037A-I User's Manual
1
Screw#1
Screw#2
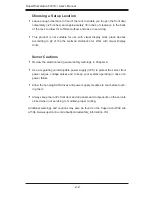
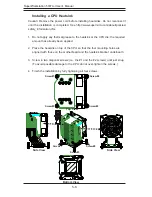
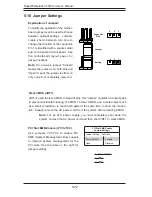
Installing a CPU Heatsink
Caution: Remove the power cord before installing heatsinks. Do not reconnect it
until the installation is completed. See http://www.supermicro.com/about/policies/
safety_information.cfm.
1. Do not apply any thermal grease to the heatsink or the CPU die; the required
amount has already been applied.
2. Place the heatsink on top of the CPU so that the four mounting holes are
aligned with those on the motherboard and the heatsink bracket underneath.
3. Screw in two diagonal screws (i.e., the #1 and the #2 screws) until just snug.
(To avoid possible damage to the CPU do not over-tighten the screws.)
4. Finish the installation by fully tightening all four screws.
Screw#3
Top View
Bottom View
Side View
Side View
Screw#1
Screw#2
Screw#3
Screw#4
Summary of Contents for 5037A-I
Page 1: ...SuperWorkstation 5037A I SUPER USER S MANUAL 1 0...
Page 5: ...v Preface Notes...
Page 14: ...SuperWorkstation 5037A I User s Manual 1 6 Notes...
Page 59: ...Chapter 6 Advanced Chassis Setup 6 7 Figure 6 4 Removing a Chassis Fan...
Page 66: ...6 14 SuperWorkstation 5037A I User s Manual Notes...
Page 92: ...7 26 SuperWorkstation 5037A I User s Manual Notes...
Page 94: ...A 2 SuperWorkstation 5037A I User s Manual Notes...

