Chapter 5: Chassis Setup and Maintenance
5-7
5-7 System Fans
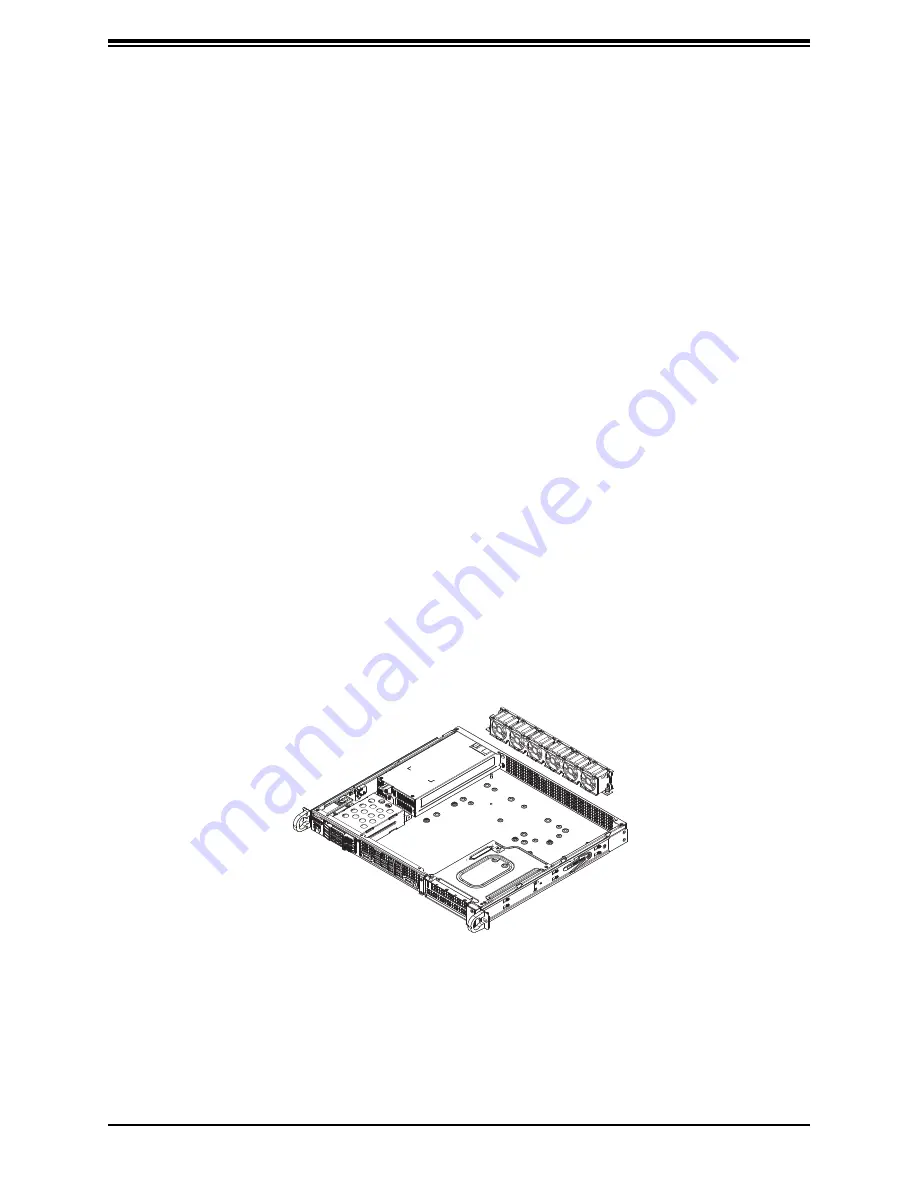
The SC513B chassis comes with four heavy-duty fans and supports a total of up to six. It
has additional sockets for two more optional fans to provide additional cooling, if needed.
Replacing a System Fan
1.
If necessary, open the chassis cover as described in section 5-4 while the power is running
to determine which fan requires changing. (Never run the server for an extended period
of time with the chassis open.)
2.
Power down the system as described in section 5-2.
3.
Remove the failed fan's cable from the connector on the motherboard.
4.
Lift the fan housing and the two fans inside it up and out of the chassis. Gently pull upward
to remove a failed fan from the housing.
5.
Place the new fan into the vacant space in the housing. Make sure that the arrows on the
sides of the fan (indicating air direction) point in the same direction as the arrows on the
other fans.
6.
Plug the fan's cable into the connector on the motherboard.
7.
Place the fan housing into the chassis and secure it with the screws previously set aside.
8.
Plug the power cord into the rear of the power supply, power up the system and check
that the fan is working properly before replacing the top cover.
Figure 5-7. Installing System Fans
SC513BTQC-350B


