40
41
④
Press 3 in ‘Y (1~99)’ using touch pad.
⑤
Press 200 in ‘X interval’ using touch pad.
⑥
Press –200 in ‘Y interval’ using touch pad.
⑦
Set Y in ‘X/Y Design Priority’ using arrow button.
⑧
Press 1 in ‘Design Interval’ using touch pad.
⑨
Leave ‘Mirror’ not selected.
⑩
Checking all the settings, press apply button.
⑪
To save the edited design, press “Design >> Save” button and select the room number that you
want.
❷
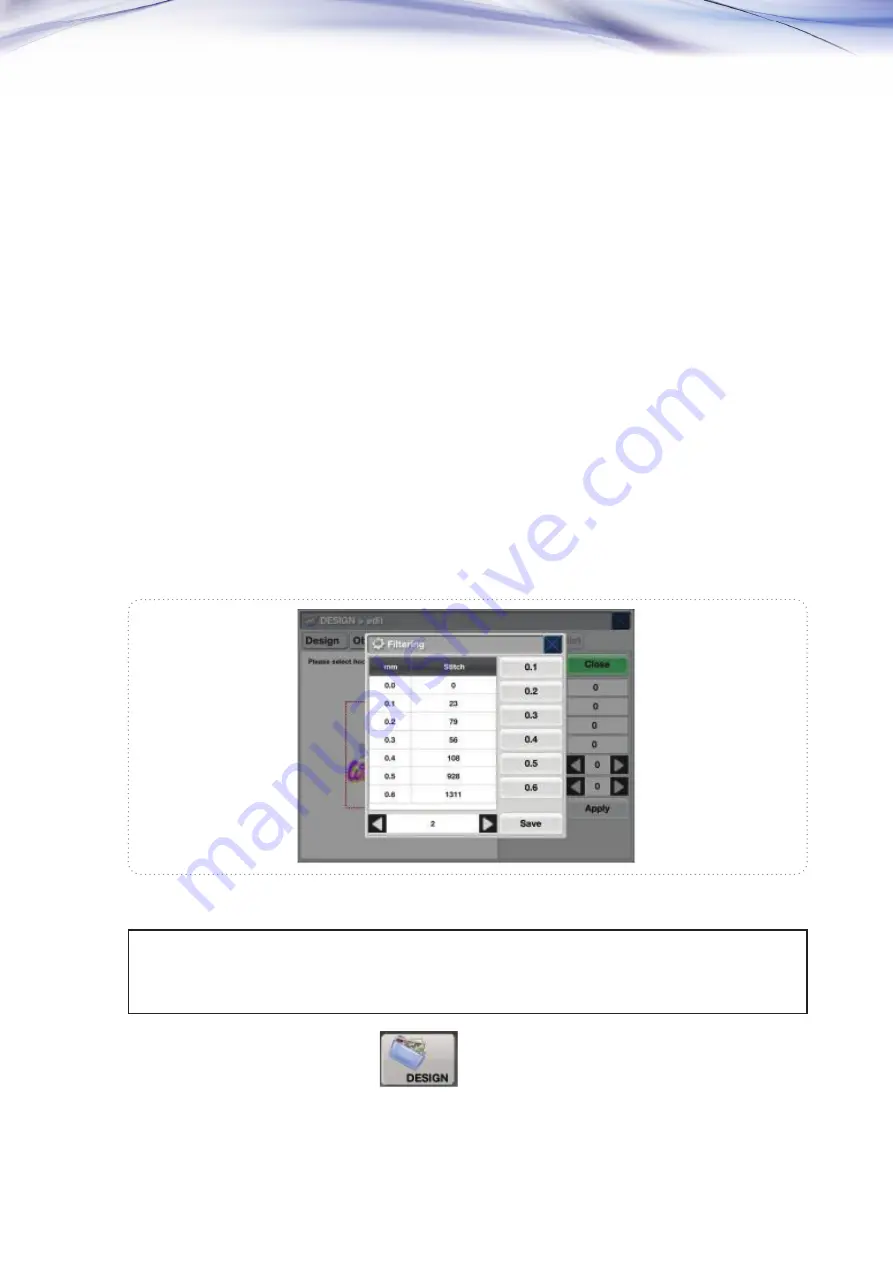
Filtering
Sometimes the length between one stitch and the next one in a selected design is so short(0.1~0.3mm)
that the thread can be often broken during the work. Filtering helps avoid thread breaking by making the
short stitches that are below the set value added to the very next stitches, which results in all the stitches
of the selected design above the set value. Please refer to the <Fig. 5.2.3.3-5>.
①
Press a design that you want in Press
(Regarding the design calling, please refer to ‘5.2 Design.’)
<Fig.5.2.3.3-5>
[Example 5.2.3.3-2] If there are stitches below 0.3mm in the design
called, set to embroider except the stitches below 0.3.


