


101519 Rev. A
3
Q R- E D
I .
TERMINOLOGY FOR OPERATING
YOUR SYSTEM
NOTE:
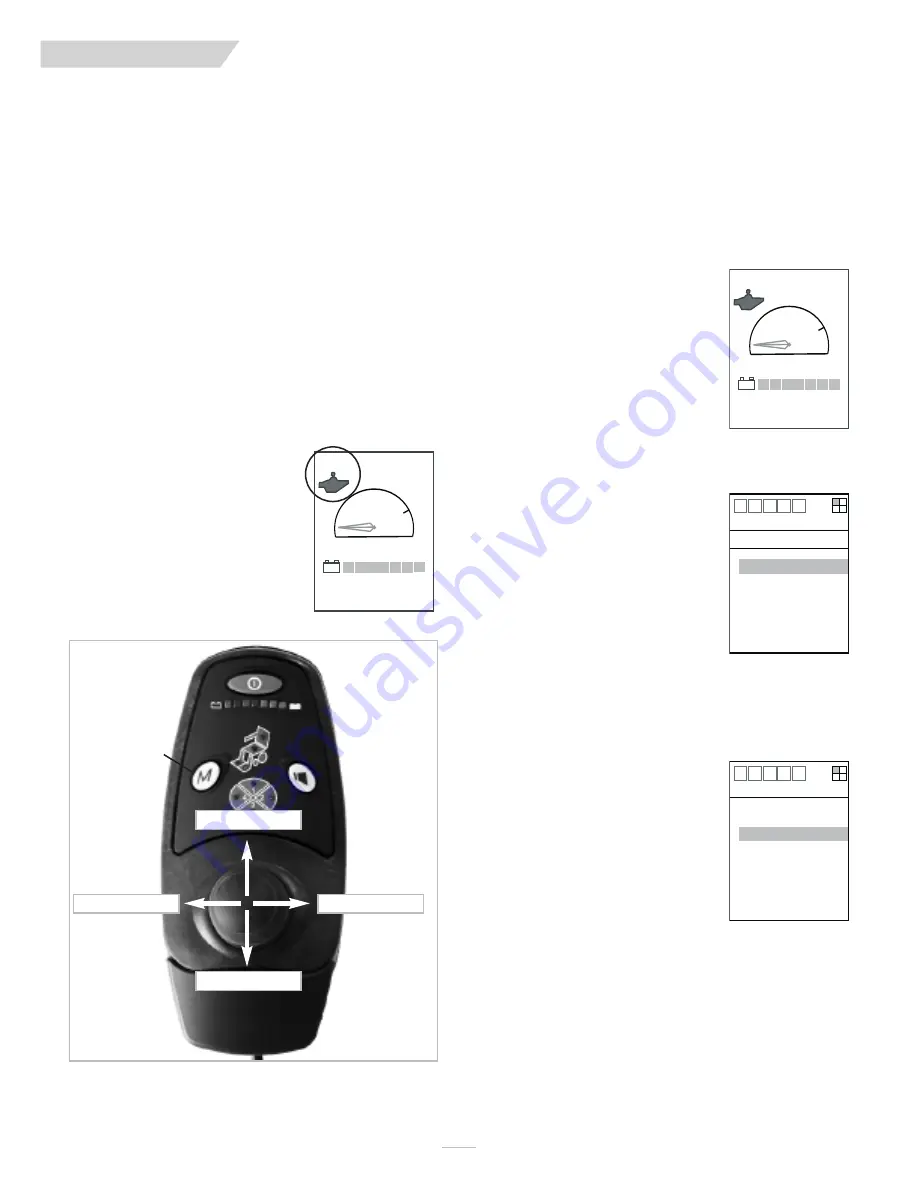
The instructions throughout this manual refer to a “mode but-
ton” and a “toggle direction”. All systems will have either a
joystick or a specialized input device, such as proportional
head control, Sip & Puff control, etc, that is used to drive the
power chair. On a joystick (as shown below) there is a Mode
button located on the device. In the case of a specialized sys-
tem, the mode button may be a switch plugged into the
Quickie Specialty Control Input Module (QR-SCM). If your sys-
tem does not have another switch, you may be using time to
go from driving to non-driving functions. Please review this
with your supplier to understand your set-up. Throughout this
manual all “mode button” commands are equivalent, mean-
ing the button on the joystick functions just like a button
plugged into the QR-SCM and just like using time.
NOTE:
As you are using your driving system to navigate through
menus, a “toggle direction” command is equivalent to a
“directional input command”. Please contact the chair’s sup-
plier or technician if there is any confusion concerning how to
operate a specialized input system.
NOTE:
If chair operation is through a
specialized control device, the
drive icon in the top left corner of
the menu screen will be different
from the handcontrol icon in the
menu illustrations at right.
(See specialized icons listed on
page 5.)
3 MAIN MENUS
There are three primary screens in the Quickie Enhanced Display:
The Drive display screen, the Driver Menu screen, and the Main
Menu screen. The majority of operations are accessible through the
first two. Movement between these menu screens is described
below.
Detailed descriptions of each screen are in the following pages.
Toggle Right
Toggle Left
Toggle Up
Toggle Down
Mode Button
Drive 4
Bat
00000 mi
0.0 mi
Drive 4
Bat
00000 mi
0.0 mi
1 2
3 4
+
+
Driver Menu
Operate
Horn
Satellite
IR Control
GEWA
All Lights On
All Lights Off
12
3 4
Main Menu
Operate
Information
Monitor
Faults
Drive Display
Driver Menu
Main Menu
Drive Display
This is the ready-to-drive screen. When
in this screen, inputs to your driver con-
trol will move the chair.
To move to the Driver Menu, press
the mode button or if a timed function,
wait the programmed number of
seconds to move to Driver Menu.
Purpose: The Drive Display features realtime
feedback on the chair’s performance.
It helps users more easily gauge the
chair’s operation.
Driver Menu
This screen is a short cut list of all the
functions you are most likely to use. To
return to the Driving Display, press
mode button or give a quick left com-
mand. If timed, wait the programmed
number of seconds.
To enter the Main Menu, toggle left and
hold for 5 seconds. This opens the
Operate Menu. Left toggle again to the
Main Menu.
Purpose: The Driver Menu provides a list of
short-cuts to commonly used menu
items. The Driver Menu eliminates
time consuming navigation required
to locate these items in the elec-
tronic menu tree.
Main Menu
Press mode button to return to the
Drive Display.
Purpose: The Main Menu is the starting point
of the electronic menu tree. This
tree contains all the available elec-
tronic parameters accessible through
the Enhanced Display.