


Unpacking the Autoloader
Remove the packaging, accessories, and Autoloader from the box
one layer at a time. Place the Autoloader on a level work surface.
Carefully remove the foam padding and then the bag from the
Autoloader. Save the packaging materials to move or ship the
Autoloader in the future.
Identifying product components
11358
1
2
7
8
5
4
6
3
9
Confirm that you received the following product components:
1.
Parallel SCSI cable (parallel SCSI Autoloaders — ordered
separately)
2.
U320 parallel SCSI terminator (one per parallel SCSI drive)
3.
Fibre Channel cable (Fibre Channel Autoloaders — ordered
separately)
4.
SAS fanout cable (SAS Autoloaders)
5.
Ethernet cable (ordered separately)
6.
Power cord (ordered separately)
7.
Two rack rails
8.
Three packets of rack hardware
9.
Product documentation
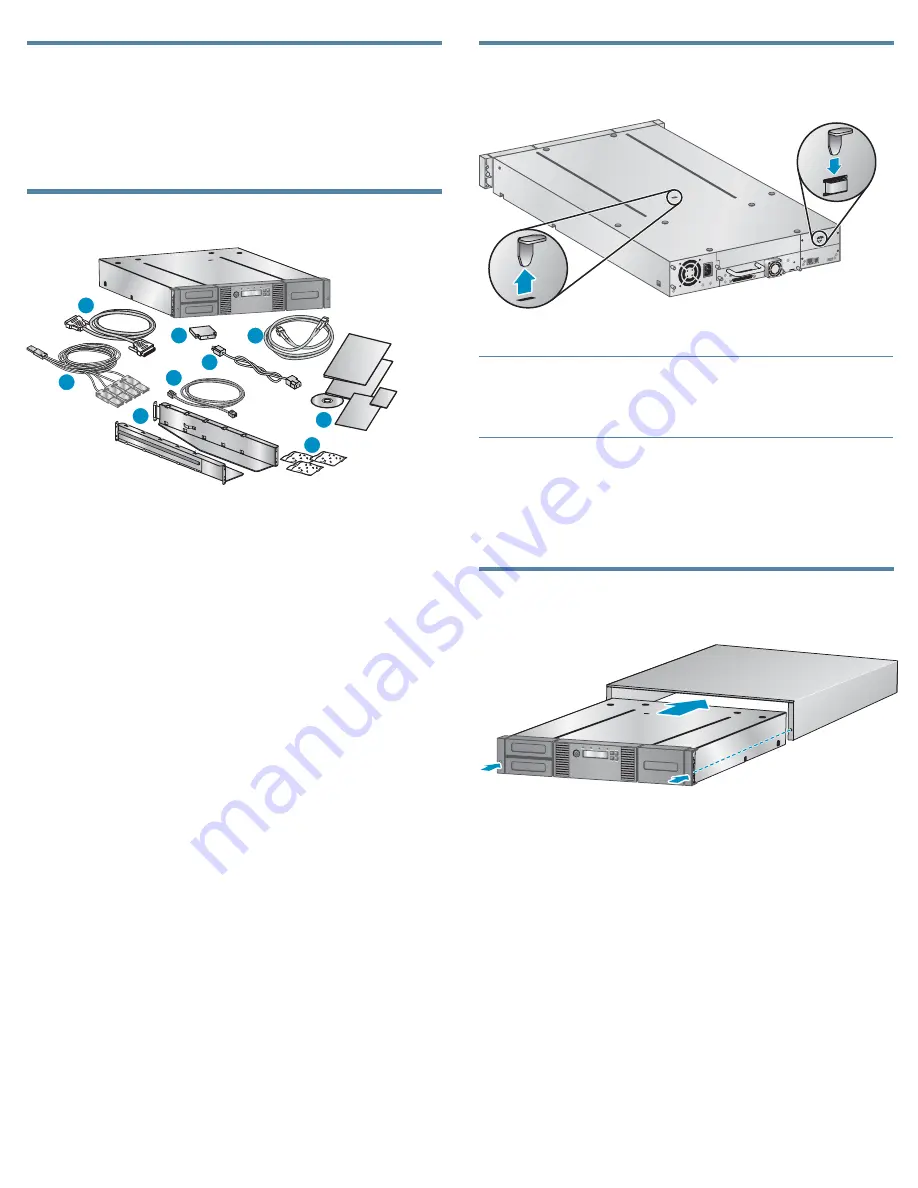
1 Removing and storing the shipping
lock
11400
IMPORTANT:
Shipping lock:
The shipping lock must be removed for the
robotics to work properly.
A robot move error is displayed if the
shipping lock is not removed.
The shipping lock prevents the robotic transport mechanism from
moving during shipment and must be removed and stored before
powering on the Autoloader.
Locate the adhesive tape holding the storage lock at the top of the
Autoloader. Remove the adhesive tape, then remove the storage lock
and store it as shown.
Optional: Installing the tabletop
conversion cover
11349
Skip this step if you are mounting the Autoloader in a rack.
Place the cover on the work surface behind the Autoloader. Slide the
Autoloader into the cover until the front panel of the Autoloader
is aligned with the cover.
Tighten the two captive screws on the front bezel to secure the
Autoloader in the cover.
Page 4