


14 Labeling tape cartridges
11894
Attaching a bar code label to each tape cartridge enables the
Autoloader and application software to identify the cartridge quickly,
thereby speeding up inventory time. Make it a practice to use bar
code labels on your tape cartridges.
IMPORTANT:
The misuse and misunderstanding of bar code technology can
result in backup and restore failures. To ensure that your bar
codes meet Sun’s quality standards, always purchase them from an
approved supplier and never print bar code labels yourself.
11895
LTO tape cartridges have a recessed area located on the face of the
cartridge next to the write
‐
protect switch. Use this area for attaching
the adhesive
‐
backed bar code label. Only apply labels as designated.
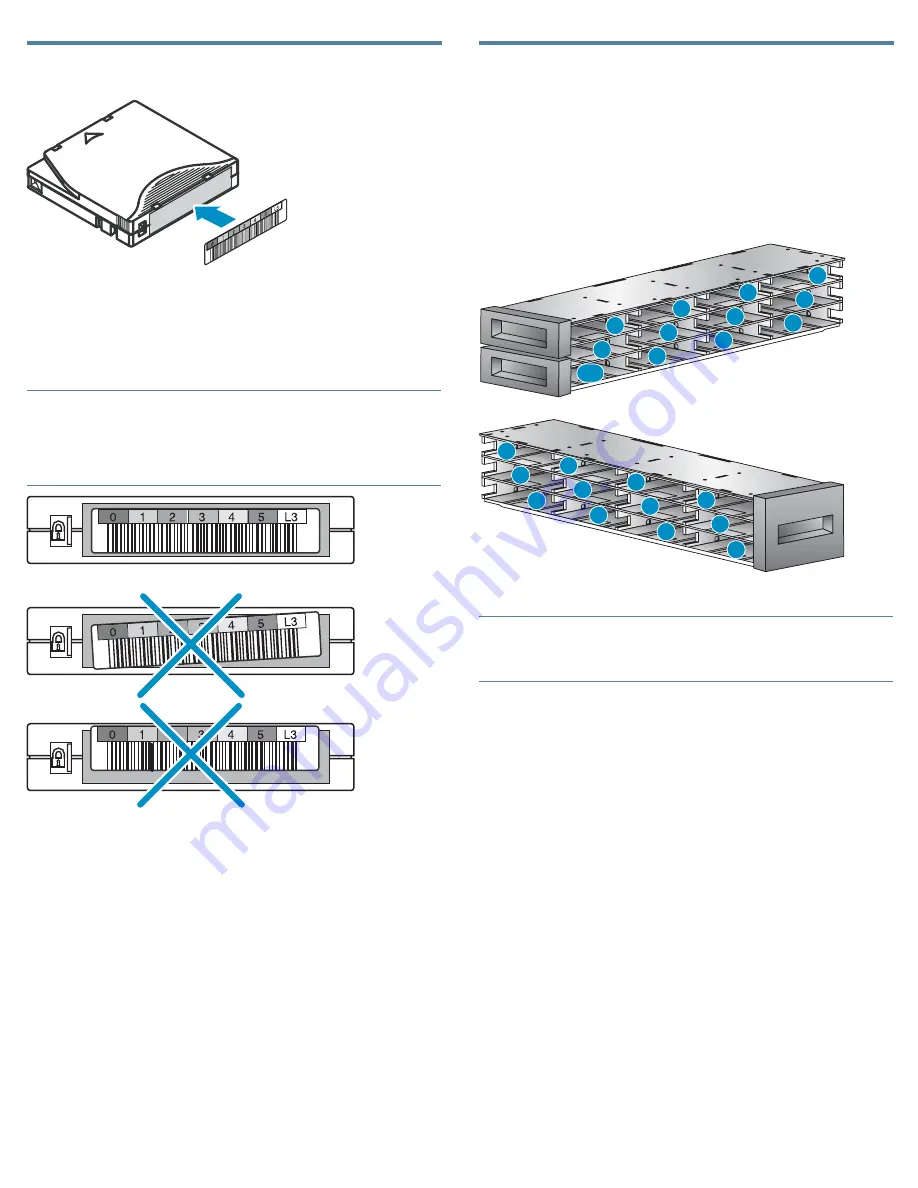
15 Loading cartridges
Use the front panel
Operations > Unlock Left Magazine
option
to release the left magazine. Pull the magazine straight out of the
front of the Autoloader. You might be requested to provide the
administrator password to access the magazines.
Insert the tape cartridges into the slots. By default, the slots are
numbered 1 to 24, starting with the bottom front left slot.
To use the mailslot feature, leave the bottom slot in the front of the left
magazine empty. The rest of the slot numbers are adjusted as shown.
10771
1
2
3
4
5
6
7
8
9
10
11
12
13
14
15
16
17
18
19
20
21
22
23
M1
NOTE:
When the mailslot is disabled, the mailslot becomes slot 1 and all
other slots are renumbered.
Replace the magazine in the Autoloader.
Repeat for the right magazine. The right magazine does not have
a mailslot.
Page 10