Chapter 5
Servicing Infrastructure Boards and Components
5-23
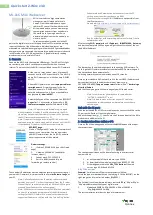
5.8.4
Installing HDD Cables in a SATA Configuration
To install two Hard Disk Drive cables, Disk 0-3 and Disk 4-5 in SATA configuration,
do the following.
1. Install the disk 0-3 cable.
a. Install the connector in the Hard Disk Drive backplane.
The connector is on the left from the front of the server.
b. Route the cable down in front of fan board 0 to prevent it from blocking the
air stream.
Lay it through the opening in the midwall opposite the other disk backplane
connector.
c. Plug the connector into the connector on the motherboard.
2. Install the disk 4-5 cable.
a. Plug the backplane connector into the Hard Disk Drive backplane.
b. Route the cable over the Disk 0-3 cable in the same channel through the
midwall.
c. Plug the connectors into the three connectors on the motherboard
The connector labeled 4 plugs into the connector labeled SATA4.
The connector labeled 5 plugs into the connector labeled SATA5.
The unlabeled rectangular connector plugs into the connector directly behind
the two SATA connections.
Note –
Note the key direction before plugging in this connector.
3. Dress the cables in the cable tie downs, and then secure the cable tie downs.
4. Reinstall the fans to fan board 0.
5. Return the server to operation.
a. Install the top cover.
See
Section 6.1, “Installing the Top Cover” on page 6-2
.
b. Install the server into the rack.
See
Section 6.2, “Reinstalling the Server in the Rack” on page 6-3
.
Summary of Contents for Sun Fire X4140
Page 1: ...Sun Fire X4140 Server Service Manual Part No 820 2401 14 September 2010 Revision A...
Page 24: ...1 12 Sun Fire X4140 Server Service Manual September 2010...
Page 35: ...Chapter 2 Preparing to Service the System 2 11...
Page 36: ...2 12 Sun Fire X4140 Server Service Manual September 2010...
Page 94: ...4 40 Sun Fire X4140 Server Service Manual September 2010...
Page 126: ...6 6 Sun Fire X4140 Server Service Manual September 2010 FIGURE 6 5 Front Panel Power OK LED...
Page 140: ...C 4 Sun Fire X4140 Server Service Manual September 2010 FIGURE C 1 BIOS Utility Menu Tree...