Chapter 4
Installing Optional Hardware Components
4-5
1. If your server is new and you have just removed it from its packaging, go straight
to Step 3.
If your server is currently in use, but you need to open it to install or replace a
hardware component, then:
a. Shut down and power off the server.
b. Disconnect the power cord(s).
c. Disconnect all other cables.
2. If you have installed the server into a rack or cabinet, remove it from the rack or
cabinet.
3. Place the server on a grounded ESD surface and use an antistatic wrist strap.
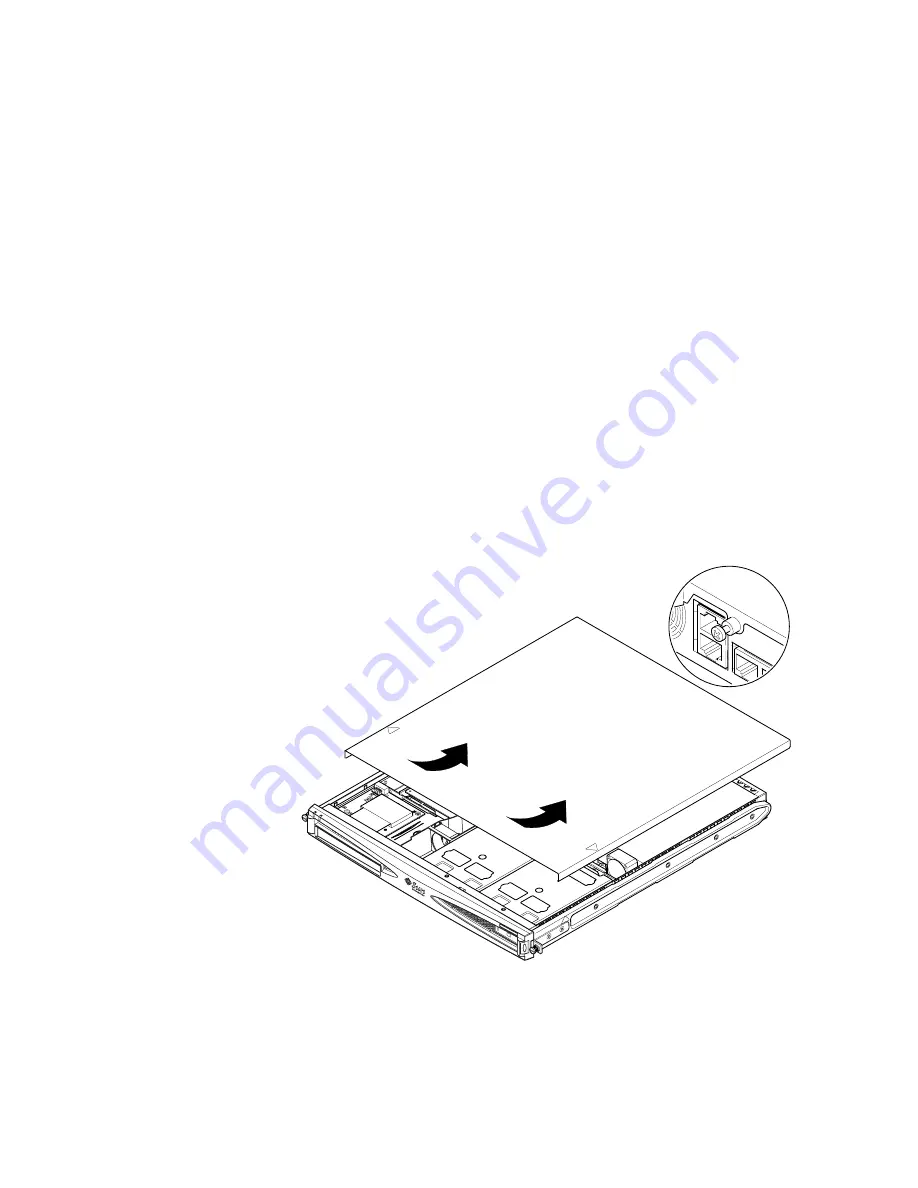
4. Remove the server’s top cover (see
FIGURE 4-3
):
a. Undo the captive screw at the rear center of the unit (see
FIGURE 4-3
).
b. Slide the top cover back and lift it off (see
FIGURE 4-3
).
FIGURE 4-3
Removing the Top Cover
Step 4b
Step 4a
Summary of Contents for Netra 120
Page 10: ...x Sun Fire V120 and Netra 120 Server User s Guide December 2001...
Page 14: ...xiv Sun Fire V120 and Netra 120 Server User s Guide December 2001...
Page 16: ...xvi Sun Fire V120 and Netra 120 Server User s Guide December 2001...
Page 22: ...xxii Sun Fire V120 and Netra 120 Server User s Guide December 2001...
Page 23: ...PART I Installation and Configuration...
Page 24: ......
Page 48: ...3 10 Sun Fire V120 and Netra 120 Server User s Guide December 2001...
Page 64: ...4 16 Sun Fire V120 and Netra 120 Server User s Guide December 2001...
Page 99: ...PART II Remote and Local Management...
Page 100: ......
Page 124: ...8 24 Sun Fire V120 and Netra 120 Server User s Guide December 2001...
Page 138: ...9 14 Sun Fire V120 and Netra 120 Server User s Guide December 2001...
Page 139: ...PART III Troubleshooting and Maintenance...
Page 140: ......
Page 154: ...10 14 Sun Fire V120 and Netra 120 Server User s Guide December 2001...
Page 177: ...PART IV Appendixes...
Page 178: ......
Page 184: ...A 6 Sun Fire V120 and Netra 120 Server User s Guide December 2001...
Page 192: ...C 6 Sun Fire V120 and Netra 120 Server User s Guide December 2001...


