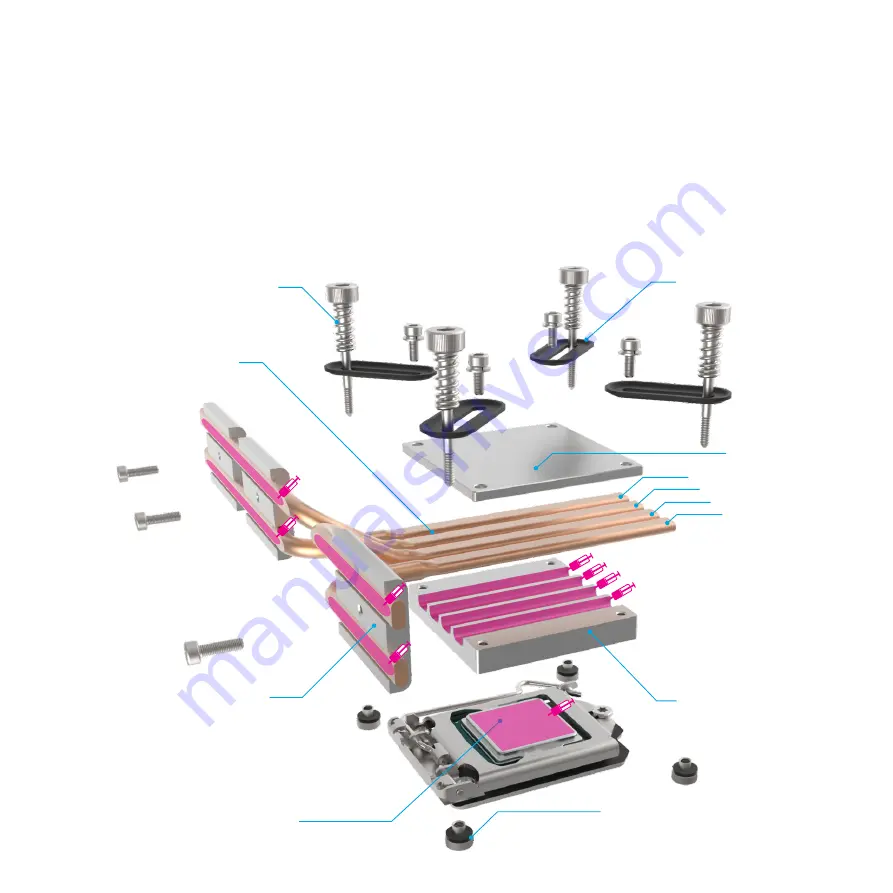
CPU Cooler Assembly & Installation Overview
The fanless CPU cooler assembly comprises of 3 main parts.
1- The CPU mount assembly
( upper + lower CPU mount, and arms) that couples the heat pipes to
the CPU / motherboard using the spring loaded screws.
2 - The heat sink mounts
that couple the heat pipes to the case side panel (heat sink).
3 - The heat pipes
that transfer the heat from the CPU to heat sink. The heat pipes are supplied in plastic sleeves which are numbered1, 2, 3, 4 to assist with identifying them.
The use of thermal paste is ESSENTIAL to ensure efficient heat transfer and must be applied to ALL the surfaces indicated below.
We recommend first trying the assembly without applying thermal paste as this will allow you to test and adjust the alignment without making a mess. Once you
have a good approximation of the positioning, apply thermal paste initially to the lower CPU mount heat pipe grooves, then lock the heat pipes between the upper
and lower CPU mounts using the 4 HEX screws. The screws should be slightly loose to allow the arms to rotate and adjust to align with the CPU cooler mounting
nuts. With this assembled, you can now remove it from the case and apply thermal paste to the CPU and heat pipe area which will make contact with the heat sink.
Spring Loaded Screw
Adjustable Arms
CPU
CPU Cooler Mounting Nut
Heat Sink Mount
CPU Mount (Lower)
Heat Pipes
CPU Mount (Upper)
# 4
# 3
# 2
# 1
6


