background image


18


4

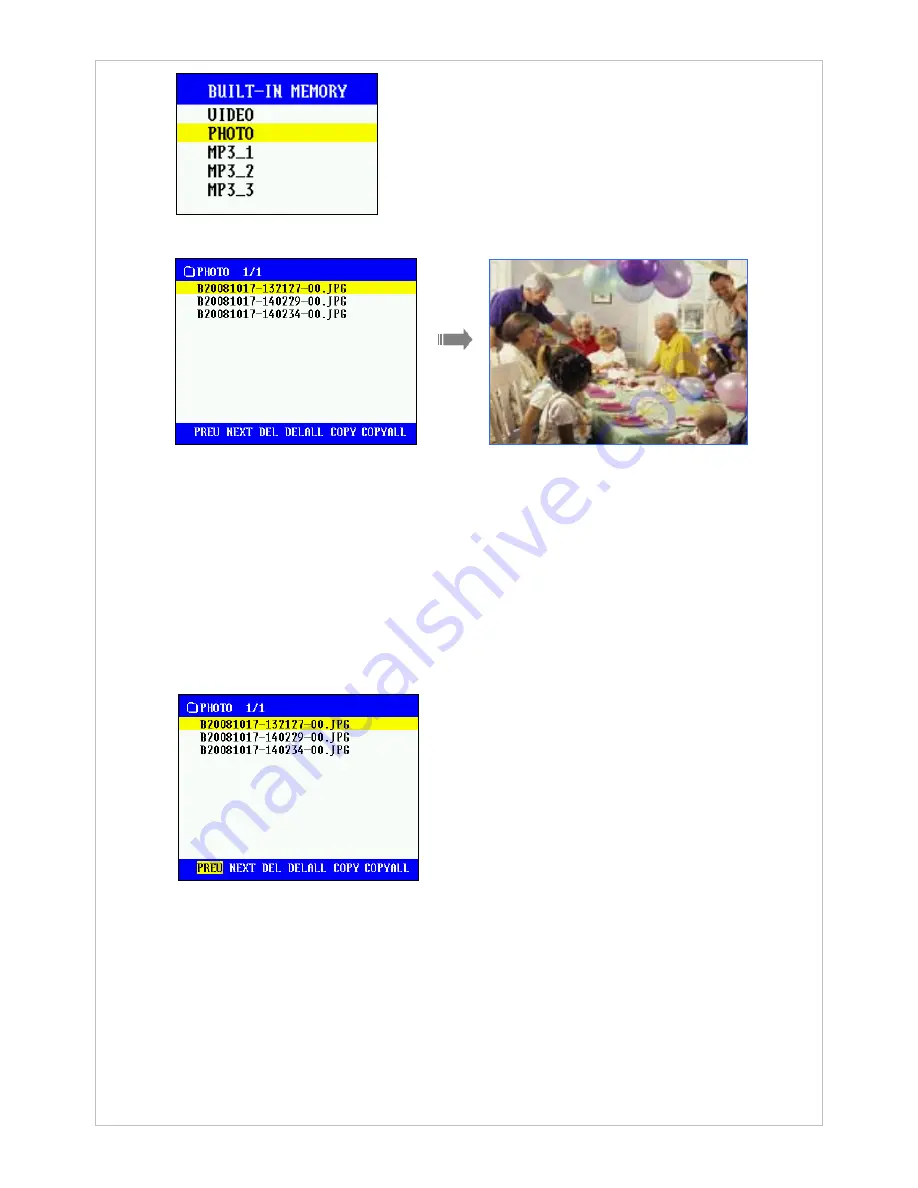
  Place the curser on the file you wish to view and press the 

Center 

button. 


5

  While a photo is being displayed, press the [

] button to view the previous file and the [

button to view the next file. 

6

  To end photo viewing and return to the file selection menu, press and hold over two seconds 

the [

] button. 

7

  To return to the previous menu, press the [

] button. 


(2)  Editing of Photos 

1

  From the file selection menu, press the [

] button to access the edit options at the bottom of 

the menu. 


2

  Place the cusor on the desired edit option and press the 

Center 

button to edit. 

„


Previous/Next

: Opens the previous/next page (if there are multiple pages of files). 

„


Delete/Delete All

: Delete selected file or files. 

„


Copy/Copy All

: Copy selected file or files from the built-in memory to the external memory 

or vice versa. 

3

  After you’ve finished editing, press the [

] button to exit the edit menu. To return to the 

previous menu, press the [

] button. 


Summary of Contents for CamBall SG-30

Page 1: ...CamBall SG 30 SG 31 User Manual World s Smallest Camcorder REV 00 20090709...

Page 2: ...er Using excessive force to clean the lens surface can damage the lens itself or cause CamBall to malfunction Dust and buildup on the lens can cause poor recording quality Use a dust remover or lens c...

Page 3: ...et is also violation of international treaties regardless of whether or not the distribution is free or paid Important Notice y The content of this manual is subject to change without prior notice y S...

Page 4: ...nstructions by Recording Type 24 4 3 3 Motion Detection Recording in Detail SG31 Only 27 4 4 MP3 Mode 28 4 4 1 Enabling Disabling MP3 Mode 28 4 4 2 Editing MP3 Files 29 5 Initial Configurations 31 5 1...

Page 5: ...xed with care y Check to make sure all of the following items are included in the standard package of CamBall Contact your retailer if any of these items are missing y Application Generation of User C...

Page 6: ...tinuous electric power and placing it where you want to 1 2 2 Vehicle Pack SG VHP y When you use CamBall for vehicle drive recording like kind of a vehicle black box or vehicle security this pack SG V...

Page 7: ...ed for playing back and editing of them y You can use it as an external monitor screen when you change the configuration of your CamBall and also as an external battery 3 7V 700Ma for supplying electr...

Page 8: ...8 1 4 Front 1 5 Rear LED Lamps 8 Direction Buttons 4 Center Button External Memory Slot USB Port Line of Sight Microphone Camera Reset Button...

Page 9: ...cord at the same time by using the USB Adaptor SG 95 in the Surveillance Pack SG SVP sold separately 2 2 Inserting a Micro SD Card y CamBall supports Micro SD cards up to 16GB y Insert the Micro SD ca...

Page 10: ...der allows you to fixate CamBall s camera angle and position It also allows you to mount CamBall on the table or even on the wall using double side adhesive tape y Necklace Necklace connects to both s...

Page 11: ...11 y Sport Band CamBall Holder...

Page 12: ...powers up Press and hold the Center button over two seconds to power CamBall off The indication lamps will blink in rotation three times as the CamBall powers down y Status Check When you power on Ca...

Page 13: ...matically If Memory Full Indication option is enabled the MEM indication lamp blinks in red five times In order to continue recording the recorded flies need to be erased You can save the recorded fil...

Page 14: ...Initial Configurations and 6 CamBall Configurations of this manual and configure the date time monitor and memory settings before taking snapshots 4 1 1 Snapshots without an External Display Device 1...

Page 15: ...ds to change the recording types Normal Surveillance Vehicle and Angel 4 Press and hold over 2 seconds to set CamBall on off MP3 mode 5 Press to check the status of CamBall features if Lamp Indication...

Page 16: ...us menu press the button Note Taking Pictures when Memory is Full You will not be able to take additional pictures any more when the memory is full CamBall reaches full memory capacity and if you have...

Page 17: ...d from CamBall renames the disk name on the PC to CamBall_SD Otherwise the disk name will display as Removable Disk Drive 4 1 3 2 Viewing and Editing Photos from on an External Display Device TV or Ca...

Page 18: ...Editing of Photos 1 From the file selection menu press the button to access the edit options at the bottom of the menu 2 Place the cusor on the desired edit option and press the Center button to edit...

Page 19: ...start recording If the REC indication lamp is turned on in both green and red this indicates that both video and audio are being recorded To record video or audio only you have to change the configura...

Page 20: ...saved in the VIDEO folders 3 Open the VIDEO folder and select video files to playback or edit Note To Playback Video on a PC Video files created by CamBall can be played back from Windows Media Player...

Page 21: ...recording started In addition file names carry either a B or an M prefix B is for files recorded to built in memory whereas M is for files recorded to external memory Micro SD B20090430 141523 00 avi...

Page 22: ...n 2 Editing of Videos 1 From the file selection menu press the button to move the cursor at the bottom of the menu Then you can access the edit options 2 Place the curser on the edit option you have c...

Page 23: ...23 Playback Edit Buttons Short Volume Up Short Pause Play Long Power On Off TV Lamp Green TV Mode Short Next Long Fast Forward Short Previous Long Exit Short Volume Down Long TV Mode On Off...

Page 24: ...ed repetition of recording and standby regardless of motion When ignition is turned off Motion Detection Application Examples Sport Camcorder Hands free Motion Activated Surveillance Device Vehicle Bl...

Page 25: ...t Vehicle Recording TYPE Lamp Green Connect CamBall to Car Mount SG80 Car Adapter SG87 and Car Adapter Cable SG88 sold separately Ignite the engine and CamBall will automatically start Vehicle Recordi...

Page 26: ...30secs and standby 1 9mins At emergencies press the Center button to immediately record breaking up the standby The duration time of emergency recording can be set beforehand among 1 to 9 minutes Note...

Page 27: ...hen motion is detected CamBall records video and audio only for the configured duration Both power and memory saved but audio interrupted during playback ALWAYS When motion is detected CamBall records...

Page 28: ...ive of CamBall Connect the earphones and the earphone gender to CamBall CamBall being in Standby Mode press and hold the button over 2 seconds to enable MP3 Mode CamBall will automatically start playi...

Page 29: ...epeat All Pressing and holding of the button over 2 seconds to access the next folder is applicable only in the Repeat Folder playback type 4 4 2 Editing MP3 Files 4 4 2 1 Editing from a PC Refer to 4...

Page 30: ...30 5 To end MP3 playback and return to the previous menu press and hold the button over 2 seconds...

Page 31: ...ations Basic Configurations include language setting monitor type selection and date time settings 5 1 4 Initial Configuration Guide Initial Configurations is performed using CamBall Manager CamballMa...

Page 32: ...of CamBall Firmware is available CamBall Manager will automatically commence the upgrade process after you make your language selection When the following dialog prompts click Safely Remove Hardware...

Page 33: ...s Configurations menu will be displayed 5 3 2 Language Selection Since you ve already made your language selection during the upgrading process you can skip this step However if you wish to change yo...

Page 34: ...connect your CamBall from the PC Before disconnecting however make sure to click Safely Remove Hardware first Select the device you wish to remove from the PC and click Stop When you see the following...

Page 35: ...35 After a few moments you will see Update Done dialog Click Apply Date Time to complete your Initial Configurations...

Page 36: ...tput to the external display device y Activating TV Mode displays the following menu y Place the curser on SETUP and press the Center button 6 1 1 Language Choose OPTION LANGUAGE SET and select the de...

Page 37: ...ode status indication Enable disable using the and buttons Enabling this option allows clearer recording under low light level conditions The frame rate will decrease however The default setting is On...

Page 38: ...ng only Choose OPTION RECORD SET and place the cursor on AUDIO and then press the Center button to enable disable the option The default setting is On 6 1 3 3 Overwrite Setting Enabling this option wi...

Page 39: ...uality 9 Ultra High 70 larger than High 9 High Reference Size 9 Medium 40 smaller than High 9 Low 45 smaller than High The default setting is High 6 1 3 6 Resolution This option is set to 320X240 6 1...

Page 40: ...uration CamBall will return to motion detection status sleep mode The default setting is 10 seconds Note With Audio Recording disabled If CamBall is configured to record video only motion detection wi...

Page 41: ...e OPTION and place the cursor on DATE TIME SET and then press the Center button Use the buttons to move the cursor and buttons to change the setting Press the Center button to apply the changes 6 1 6...

Page 42: ...d the MEM indication lamp will blink in red five times to notify you that memory reaches full capacity The default setting is Off 6 1 6 4 Memory Format Choose OPTION MEMORY SET place the cursor on FOR...

Page 43: ...the indication lamps are on at all times which consumes the battery power fast The default setting is Always On 6 1 7 4 Recording Duration After Engine Shutoff This option applies to Vehicle Recordin...

Page 44: ...ECORD TIME 5 30secs STANDBY TIME 1 9mins EMERGENCY RECORD 1 9mins Default settings are 10 seconds 2 minutes and 1 minute respectively 6 1 7 6 CamBall Reset This option resets all CamBall settings to t...

Page 45: ...OK button 6 2 1 Language Select the desired language from Language Set and then click Apply 6 2 2 Camera Settings 6 2 2 1 Brightness Choose Camera Set Brightness and adjust the brightness level using...

Page 46: ...ding Choose RECORD SET VIDEO SET and check the box and then click Apply to enable The default setting is On checked 6 2 3 2 Audio Recording Choose RECORD SET AUDIO SET and check the box and then click...

Page 47: ...RECORDING SET QUALITY SET and select the desired quality and click Apply The default setting is High 6 2 3 6 RESOLUTION Choose RECORD SET IMAGE RESOLUTION and select the desired size and then click A...

Page 48: ...etected After recording for the configured duration CamBall will return to motion detection status sleep mode The default setting is 10 seconds Note With Audio Recording disabled If CamBall is configu...

Page 49: ...K SET MP3 PLAYBACK SET and select the setting Setting options available are Shuffle Repeat Repeat Folder and Repeat All The default setting is Repeat All 6 2 5 Date Time Choose DATE TIME SET and set t...

Page 50: ...pply to enable The default setting is Off unchecked 6 2 6 4 Memory Format Note Memory Format and Default Set Memory Format erases all recorded data from the selected memory and should not be confused...

Page 51: ...OTHERS STATUS INDICATION LAMP ON TIME and make your selection and then click Apply The default setting is Always 6 2 7 4 Recording Duration After Engine Shutdown Choose OTHERS VEHICLE BATTERY TIME an...

Page 52: ...52 6 2 7 6 CamBall Reset Click Set Default under Default Set A confirmation message will then prompt Click Yes to reset all settings to default...

Page 53: ...CamBall as if it had been created by CamBall In order for video files to be played in CamBall however the video codec must be MPEG 4 and the audio codec MP3 If the codecs do not match or if you wish...

Page 54: ...oad Title Enter a title for your video Description Enter a description for your video Video Category Select the applicable category Tags Enter tags for your video Broadcast Option Select whether you w...

Page 55: ...s Motion Detect Audio On Detection Playback Settings Video Playback Normal MP3 Playback Repeat All Memory Settings Built in Memory On Memory Full Status Indication Off Misc Settings Auto Power Off 5 m...

Page 56: ...25fps 320x240 pixels Audio Input Built in Microphone Video Audio Output TV output port 1Vpp NTSC PAL Storage Capacity Continuous Recording 72hrs Max Motion Detection 720hrs Max 16GB 25fps Battery Time...

Page 57: ...tem Tray 2 Following dialog will prompt Select the device you wish to disconnect and click Stop 3 Select the device you wish to disconnect once more and then click OK 4 When you see the following mess...

Page 58: ...Rep P u r c h a s e D a t e R e t a i l e r Warranty Period For 12 months from date of purchase Name of Purchaser A d d r e s s Warranty Policy Any malfunction during the warranty period and under nor...

Reviews: