background image


                                                                                                                       Software Manual 


119


■ Activation Pulse Width 

Select how long the signal to open the cash drawer will be sent. 

■ Post Activation Pause 

Select how long the pause between cash drawer open signals will be. 


For cash drawer 2, the power distribution and delay times are fixed to 200 msec. 


4.8.5.  Deleting a Printer or Cash Drawer 

Click “Delete” on the right of each text box to delete a target printer or cash drawer. 

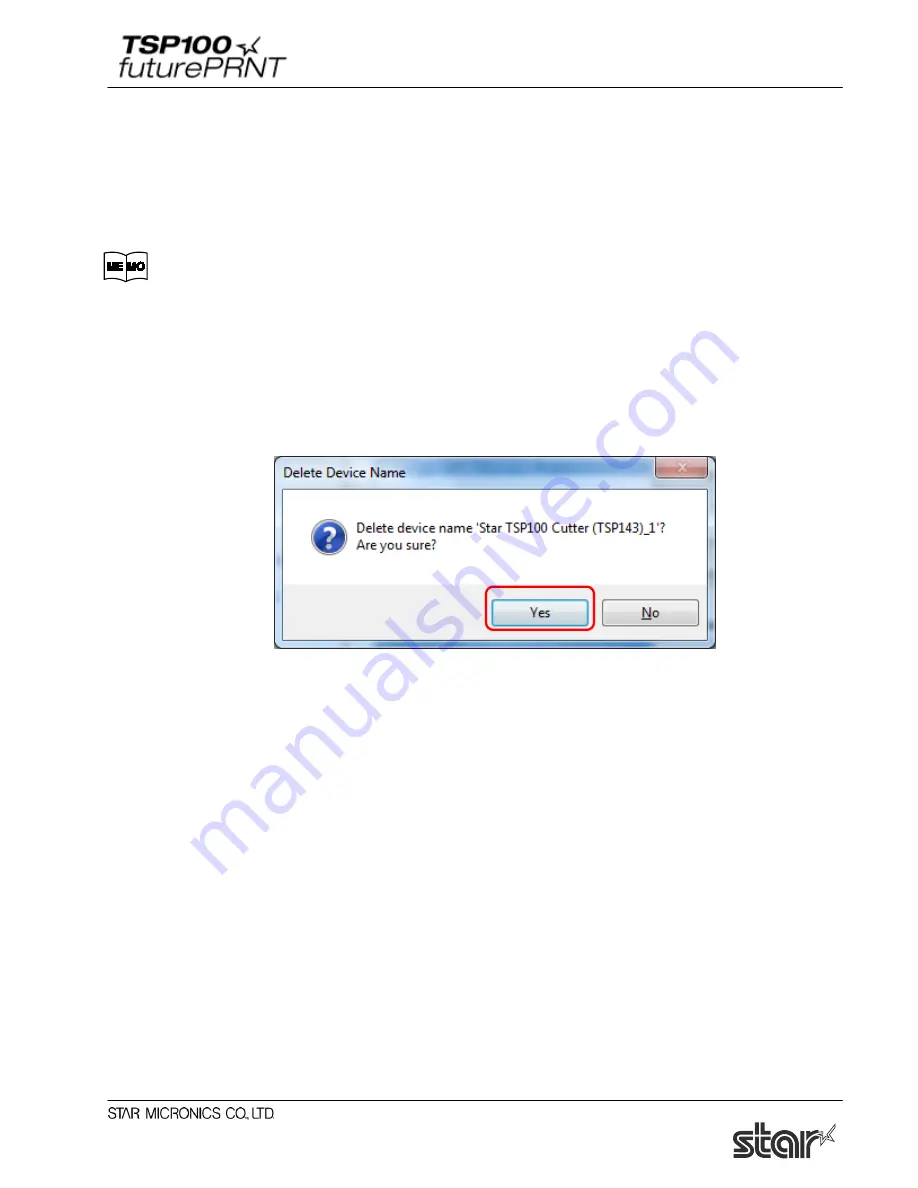
(1)  Select the printer or cash drawer to be deleted, and click “Delete”. 
(2)  Before deletion is executed, the following confirmation dialog box appears. To continue, click 

“Yes”. 


This will delete the selected printer or cash drawer. 

Summary of Contents for Star futurePRNT TSP100GT

Page 1: ...Rev 7 0 Software Manual Applicable Models TSP100IIILAN TSP100IIIW TSP100ECO TSP100GT TSP100LAN TSP100U PUSB ...

Page 2: ...al TCP IP Port Emulator TSP100LAN Only 37 3 Windows Printer Driver Usage 38 3 1 Device Settings 38 3 2 Paper Size Settings 45 3 2 1 Standard Paper Sizes 46 3 2 2 User Defined Paper Size 47 3 3 Device Font Usage 48 3 4 Control Font Usage 51 3 4 1 Control Font list 51 3 4 2 Control Font Usage 53 3 5 Barcode Font 54 3 5 1 Barcode Font List 54 3 5 2 Enter the Barcode font 54 3 5 3 Barcode Font Usage 5...

Page 3: ... 5 Delete 111 4 7 6 Check Health 112 4 7 7 Sample Application 112 4 8 JavaPOS Installation Star Line mode only 113 4 8 1 Add a New Printer Device 116 4 8 2 Configure a Printer Device 116 4 8 3 Add a New Cash Drawer Device 117 4 8 4 Configure a Cash Drawer Device 117 4 8 5 Deleting a Printer or Cash Drawer 119 4 8 6 Check Health 120 4 9 Seral Port Star Serial Port Emulator 122 4 9 1 Creating a Virt...

Page 4: ... Virtual TCP IP Ports TSP100LAN Only 152 4 17 1 Creating a Virtual TCP IP Port 153 4 17 2 TCP IP Port Emulator Service Setting 154 4 17 3 Deleting a Virtual TCP IP Port 154 4 17 4 Health Check 154 4 18 Print Job Routing Write Printer ESC POS Mode Only 155 5 Guidelines for Printing Documents 156 5 1 Important Information about Microsoft Word 156 5 2 Restrictions and Cautions 157 6 Guidelines for Us...

Page 5: ...t except WindowsRT Windows 7 32 bit and 64 bit Limitation for Windows 10 8 1 8 Star original Printer Driver Function e g Logo Setting can not be changed from Modern UI However once the setting of its function is changed from Desktop mode these function can be used on Modern UI as well USB Printer will not be appeared in Device and Printer if its power is off Error status e g Paper empty during pri...

Page 6: ...lity application is updated by a user having the administrative right and having used the old version for the smooth data migration To install the driver utility application follow the procedure shown below 1 1 Installing futurePRNT Software Notes futurePRNT 7 0 Software installation requires computer administrator privileges Execute steps 1 to 12 before connecting the TSP100 futurePRNT TSP100III ...

Page 7: ...ert the CD ROM supplied with the TSP100 futurePRNT into the CD ROM drive of your computer 2 When the following window appears click Run Autorun exe In Windows 8 8 1 10 Toast pop up will be appeared after CD ROM is set After that click Run Autorun exe ...

Page 8: ... the following window will appear Click Installation on the menu 4 Read this software license agreement carefully If you agree to the terms of this license click I Accept 5 The User Account Control window will appear Click Yes ...

Page 9: ...Software Manual 4 6 Click Next to continue 7 Choose the user and then click Next to continue ...

Page 10: ...ware Manual 5 8 Choose the Typical installation option to be sure that all of the TSP100 futurePRNT s options are installed and then click Next to continue 9 Click Install to begin the installation process ...

Page 11: ...led on the computer 11 At this point all drivers and programs have been installed Click Finish to close the wizard If the Launch Star Cloud Services Web site check box is checked default Star Cloud Services website will open after the installation wizard is finished ...

Page 12: ... to close the following window 13 The subsequent steps vary depending on the model you are using 1 2 Adding a Printer TSP100U PU GT ECO 1 3 Adding a Printer TSP100LAN 1 4 Adding a Printer TSP100IIIW 1 5 Adding a Printer TSP100IIILAN ...

Page 13: ...ardware manual To view the hardware manual select Documents SDK on the CD auto menu and click Hardware Manual 2 Turn the TSP100 futurePRNT on With Plug and Play the computer detects a new hardware product and automatically installs the printer driver Then the following window will appear in the lower right of the Windows screen 3 In Control Panel select Devices and Printers If Star TSP100 appears ...

Page 14: ...rdware manual Notes Printer addition requires computer s administrator privileges 1 3 1 Printer LAN Settings 1 Turn the TSP100 futurePRNT on 2 From the Windows Start menu select Programs All Programs StarMicronics Star TSP100 Ethernet Setup Tool 3 User Account Control window will appear Click Yes 4 If the Windows Security Alert screen is displayed click Allow access Notes If you click Cancel you w...

Page 15: ...igned Subnet mask 0 0 0 0 Unassigned Default gateway 0 0 0 0 Unassigned Use DHCP ENABLE Selected If at least one of the following conditions applies you will not be able to configure an IP address for any printers with factory default settings which have no IP address assigned Using F W V 2 0 or older Using CD Vol 5 4 or older Before starting operations specify the IP address for the printer refer...

Page 16: ...wish to use the IP address assigned by the DHCP server click the Add printer queue button Then proceed to Section 1 3 2 Creating a Printer Queue below If you wish to assign a fixed IP address for the printer click Change TCP IP Setting You can find the printer s MAC address by printing a self test Hold the FEED button down as you turn the printer ON to run self printing Go to step 7 Go to section ...

Page 17: ...ot assigned to any IP address To use such a printer follow the steps below to specify the IP address 1 Select a printer that is not assigned to any IP address and then click Configuration 2 Enter a temporary IP address to assign and then click Apply 3 The Configuration screen is displayed showing the entered temporary IP address in the IP address field Continue setting up a fixed IP address ...

Page 18: ... when multiple terminals are connected simultaneously If Disconnect Message is set to Enable NO HOST CONNECTION will be printed when the printer has been disconnected This function is available in firmware version 110 110 100 or later of the printer If you click Initialize all settings including the password setting return to their factory defaults It is possible to set a fixed IP address from ano...

Page 19: ...g that the configuration was applied Click OK and then proceed to Section 1 3 2 Creating a Printer Queue Note After the printer reset it may take a short time perhaps 20 seconds for the printer to be found again If the printer fails to reappear on the printer list after a noticeable amount of time has passed retry the search by clicking again on the Discovery button ...

Page 20: ... can change them to anything you prefer If you wish to use this printer as your default printer check Default Printer If you want to output a test print after completing the settings check Print Test Page After making appropriate settings click Apply The following characters can be used in queue and port names Queue name Uppercase and lowercase letters numerals 0 to 9 hyphens underscores periods s...

Page 21: ...king to confirm application The printer queue is created A message is displayed indicating that setup is complete Click OK 4 In Control Panel select Devices and Printers If the Star TSP100LAN printer is found in the window installation is completed ...

Page 22: ...futurePRNT on 2 Use WPS to connect the printer to the network Set your wireless access point to wait for a WPS connection and then hold down the PAIR button on the rear of the printer until the printer LED blue blinks When the WPS connection is made the printer LED blue stops blinking and stays lit For details on WPS connections see the TSP100IIIW Online manual Setup Connecting with a Tablet PC 3 ...

Page 23: ... screen is displayed If the printer you want to install is not listed in the LAN printer list click Discovery The factory network settings of the TSP100IIIW printer are as follows Network Mode Ad Hoc IP address 0 0 0 0 Unassigned Subnet mask 0 0 0 0 Unassigned Default gateway 0 0 0 0 Unassigned Use DHCP ENABLE Selected The printer automatically enters the infrastructure mode when it connects over ...

Page 24: ...nnection to check whether you can communicate with the printer The connected printer s LED blue will blink If you wish to use the IP address assigned by the DHCP server then proceed to Section 1 4 2 Creating a Printer Queue below If you wish to assign a fixed IP address for the printer click Configuration Go to step 8 Go to section 1 4 2 ...

Page 25: ...ddress To use such a printer follow the steps below to specify the IP address 1 Select a printer that is not assigned to any IP address and then click Configuration 2 Enter a temporary IP address to assign and then click Apply 3 Connect to the printer using the temporarily assigned IP address The Web Configuration screen is displayed see step 8 and the subsequent steps to complete the setting of a...

Page 26: ...ed password or the default password public The default login name and password are as follows Login name root Password public 9 The following message is displayed when you are using the default password Select OK to change the password or Cancel to not change the password If OK is selected a screen to change the password will open After changing the password return to the following step ...

Page 27: ...he menu button on the upper left open Save select Save Configuration Printing Restart device and tap Execute The settings are saved to the printer and printed out 12 The settings are saved to the printer and printed out Then proceed to Section 1 4 2 Creating a Printer Queue Note After the printer reset it may take a short time perhaps 20 seconds for the printer to be found again If the printer fai...

Page 28: ... can change them to anything you prefer If you wish to use this printer as your default printer check Default Printer If you want to output a test print after completing the settings check Print Test Page After making appropriate settings click Apply The following characters can be used in queue and port names Queue name Uppercase and lowercase letters numerals 0 to 9 hyphens underscores periods s...

Page 29: ...king to confirm application The printer queue is created A message is displayed indicating that setup is complete Click OK 4 In Control Panel select Devices and Printers If the Star TSP100IIIW printer is found in the window installation is completed ...

Page 30: ... manual Setup Connect Tablet PC Notes Printer addition requires computer s administrator privileges 1 5 1 Printer LAN Settings 1 Turn the TSP100 futurePRNT on 2 From the Windows Start menu select Programs All Programs StarMicronics Star TSP100 Ethernet Setup Tool 3 User Account Control window will appear Click Yes 4 If the Windows Security Alert screen is displayed click Allow access Notes If you ...

Page 31: ... the printer you want to install is not listed in the LAN printer list click Discovery The factory network settings of the TSP100IIILAN printer are as follows IP address 0 0 0 0 Unassigned Subnet mask 0 0 0 0 Unassigned Default gateway 0 0 0 0 Unassigned Use DHCP ENABLE Selected ...

Page 32: ...onnection to check whether you can communicate with the printer The connected printer s LED blue will blink If you wish to use the IP address assigned by the DHCP server then proceed to Section 1 5 2 Creating a Printer Queue below If you wish to assign a fixed IP address for the printer click Configuration Go to step 7 Go to section 1 5 2 ...

Page 33: ...ddress To use such a printer follow the steps below to specify the IP address 1 Select a printer that is not assigned to any IP address and then click Configuration 2 Enter a temporary IP address to assign and then click Apply 3 Connect to the printer using the temporarily assigned IP address The Web Configuration screen is displayed see step 7 and the subsequent steps to complete the setting of a...

Page 34: ...ed password or the default password public The default login name and password are as follows Login name root Password public 8 The following message is displayed when you are using the default password Select OK to change the password or Cancel to not change the password If OK is selected a screen to change the password will open After changing the password return to the following step ...

Page 35: ...e menu button on the upper left open Save select Save Configuration Printing Restart device and tap Execute The settings are saved to the printer and printed out 11 The settings are saved to the printer and printed out Then proceed to Section 1 5 2 Creating a Printer Queue Note After the printer reset it may take a short time perhaps 20 seconds for the printer to be found again If the printer fail...

Page 36: ... can change them to anything you prefer If you wish to use this printer as your default printer check Default Printer If you want to output a test print after completing the settings check Print Test Page After making appropriate settings click Apply The following characters can be used in queue and port names Queue name Uppercase and lowercase letters numerals 0 to 9 hyphens underscores periods s...

Page 37: ...ing to confirm application The printer queue is created A message is displayed indicating that setup is complete Click OK 4 In Control Panel select Devices and Printers If the Star TSP100IIILAN printer is found in the window installation is completed ...

Page 38: ...grams or All Apps StarMicronics Star TSP100 Uninstall 3 In the User Account Control dialog box click the Yes 4 When the following confirmation dialog box appears click Yes to continue 5 If the following window appears select Do not close applications and click OK 6 If the following window appears click OK ...

Page 39: ...Software Manual 34 7 The uninstaller launches to remove all of the TSP100 futurePRNT software form your computer ...

Page 40: ...ral Unit 2 No Use Buzzer 1 On Time 500 milliseconds Buzzer 1 Off Time 2000 milliseconds Buzzer 1 Repeat 5 2 2 OPOS Driver OPOS OLE for Retail POS was created by industry leaders as a device standard for POS hardware OPOS is a Win32 based architecture for POS device access The benefits of this standard are realized in the ease of access to hardware in not only outputting data to devices but also re...

Page 41: ... TSP100 Software 20151201 JavaPOSExamples 32 bit Java Operation Environment Program Files x86 StarMicronics TSP100 Software 20151201 JavaPOSExamples To use this driver under the JavaPOS application you should set the Java runtime environment to Java Runtime Environment JRE 1 5 or later To use this driver in Java Runtime Environment version 1 4 2 configure the following settings as a starting optio...

Page 42: ... The functions logo printing journal etc of the TSP100 futurePRNT remain usable even when you print in the ESC POS mode For information about how to use the ESC POS mode refer to 4 18 Print Job Routing Write Printer 2 6 Star Virtual TCP IP Port Emulator TSP100LAN TSP100IIIW and TSP100IIILAN only You can use the TSP100LAN Setup Utilities to set up virtual TCP IP ports This will enable you to contin...

Page 43: ... 8 1 and 8 change the setting from Desktop UI in order to change settings First follow the steps shown below to open the Properties window Notes Device settings require computer administrator privileges 1 In Control Panel select Devices and Printers 2 Right click on the icon of the target printer queue Then in the pull down menu select Printer Properties 3 Click Device Settings ...

Page 44: ...s up to the last page Value Default Details No Cut No intermediate pages are fed to the cutter Partial Cut All intermediate pages are fed to the cutter and are partially cut Document Cut Type You can choose the Cut action for the final page Cutter Model Value Default Details No Cut The final page is not fed to the cutter Partial Cut The final page is fed to the cutter and partially cut Tear Bar Mo...

Page 45: ...te that the Page Top and Page Bottom selections are not available if you have set the Peripheral Unit Type to Cash Drawer Value Default Details No Use Peripheral unit 1 not used Document Top Activate at top of document Page Top Activate at top of page Page Bottom Activate at bottom of page Document Bottom Activate at bottom of document Peripheral Unit 2 This setting selects the action timing for p...

Page 46: ...t as 0 7 sec 800 milliseconds Pulse width is set as 0 8 sec 900 milliseconds Pulse width is set as 0 9 sec 1 000 milliseconds Pulse width is set as 1 0 sec 1 100 milliseconds Pulse width is set as 1 1 sec 1 200 milliseconds Pulse width is set as 1 2 sec Buzzer1 On Time If the Peripheral Unit Type is set to Buzzer this setting selects the beep ON time for the buzzer operating as peripheral unit 1 V...

Page 47: ...conds Silent on for 0 5 sec 1 000 milliseconds Silent on for 1 0 sec 2 000 milliseconds Silent on for 2 0 sec 5 000 milliseconds Silent on for 5 0 sec Buzzer1 Repeat If the Peripheral Unit Type is set to Buzzer this setting selects the number of beeps produced by buzzer 1 when it is activated Each beep will sound for the specified ON time followed by silence for the specified OFF time Note that yo...

Page 48: ...000 milliseconds Sound on for 1 0 sec 2 000 milliseconds Sound on for 2 0 sec 5 000 milliseconds Sound on for 5 0 sec Buzzer2 Off Time If the Peripheral Unit Type is set to Buzzer this setting selects the beep OFF time for the buzzer operating as peripheral unit 2 Value Default Details 20 milliseconds Silent for 0 02 sec 40 milliseconds Silent for 0 04 sec 100 milliseconds Silent for 0 1 sec 200 m...

Page 49: ...eeps produced by buzzer 2 when it is activated Each beep will sound for the specified ON time followed by silence for the specified OFF time Note that you can force the buzzer off at any time by pressing the FEED button Value Default Details 1 1 beep 2 2 beeps 3 3 beeps 5 5 beeps 10 10 beeps 15 15 beeps 20 20 beeps ...

Page 50: ...that includes Receipt in the paper size name and set Paper Type to Receipt When configuring paper size settings note that those of a print application have priority over paper size er the user s settings If a print application does not provide any paper size setting item configure the following setting 1 In Control Panel select Devices and Printers 2 Right click on the icon of the target printer q...

Page 51: ...he list of the custom paper sizes supported by this printer driver Built in paper sizes Width Length 72 mm x 200 mm 72 mm 200 mm 72 mm x Receipt 72 mm 3 000 mm 51 mm x 200 mm 51 mm 200 mm 51 mm x Receipt 51 mm 3 000 mm A4 210 mm Printable area is 72 mm 297 mm Letter 8 5 inch Printable area is 72 mm 11 inch The paper width is set as printable area For example if you use 80 mm width roll paper set p...

Page 52: ...e Create a new form checkbox 5 Change the name currently displayed in the Form name field and specify a new name 6 Select the units of measurements either Metric or English in the Form description field Then enter the desired value in Width and Height under Paper size 7 Click Save Form Click OK to close the window Notes The allowable paper sizes are as follows A user defined paper size must be cre...

Page 53: ...ord or Excel specify height 24 pixels 8 5 points Device Font Name Width Pixels Height Pixels Number of digits 72 mm 576 dots Details Printer 7cpi 30 24 19 Printer font ANK font A Printer 7cpi Tall 30 48 19 Printer 8cpi 26 24 22 Printer 8cpi Tail 26 48 22 Printer 8 5cpi 24 24 24 Printer 8 5cpi Tail 24 48 24 Printer 14cpi 15 24 38 Printer 14cpi Tail 15 48 38 Printer 16cpi 13 24 44 Printer 16cpi Tail...

Page 54: ...8 48 Printer Front B 20cpi 10 24 57 Printer Front B 20cpi Tall 10 48 57 Printer Front B 22 5cpi 9 24 64 Printer Front B 22 5cpi Tall 9 48 64 Printer Front B 8 5cpi RED 24 24 24 Printer Front B 8 5cpi Tall RED 24 48 24 Printer Front B 10cpi RED 20 24 28 Printer Front B 10cpi Tall RED 20 48 28 Printer Front B 11cpi RED 18 24 32 Printer Front B 11cpi Tall RED 18 48 32 Printer Front B 17cpi RED 12 24 ...

Page 55: ...Details Control 12 24 48 Device control font ESC_FONT 1 24 576 UPC E 12 24 48 Barcode device font UPC A 12 24 48 JAN EAN 8 12 24 48 JAN EAN 13 12 24 48 CODE39 12 24 48 ITF 12 24 48 NW 7 Codaber 12 24 48 QR_CNTL 1 24 576 2D code font PDF417 1 24 576 DATA1 1 24 576 DATA2 1 24 576 DATA3 1 24 576 ...

Page 56: ...0 mSec d Open cash drawer 2 for 200 mSec 6 LF 7 CR F Full Cut P Partial Cut a Set Left Alignment b Set Center Alignment c Set Right Alignment e Set 3mm line feed spacing 1 8 inch f Set 4mm line feed spacing 1 6 inch g Select USA international character set h Select France international character set i Select Germany international character set j Select England international character set k Select ...

Page 57: ... character set s Select Latin America international character set t Select turn over printing u Cancel turn over printing v Select the customer display w Deselect the customer display x Clear the customer display Notes The settings above will be ignored if a specified control character is not supported by the printer ...

Page 58: ...rol Font Please set the control font s character size to the standard value 8 5 points 1 Choose the control font from your editor s font menu 2 Enter the characters for the printer actions which you want to use The specified function is performed by printing Example Enter A Open cash drawer 1 for 50 mSec Enter P Partial Cut ...

Page 59: ...aracters Character Set UPC E 12 0 9 UPC A 12 0 9 JAN EAN 8 8 0 9 JAN EAN 13 13 0 9 CODE39 1 or more 0 9 SP A Z Start Stop ITF 1 or more even 0 9 NW 7 Codabar 1 or more 0 9 A D It is unnecessary to input Start and stop code since they are entered automatically 3 5 2 Enter the Barcode font Enter the barcode font character z to terminate the barcode Example Using the CODE39 device font enter as follo...

Page 60: ...ot 5 2 dot 4 Minimum module width e N A 3 dot 8 4 dot 8 Minimum module width f N A 4 dot 10 6 dot 12 Minimum module width g N A 2 dot 4 2 dot 6 Minimum module width h N A 3 dot 6 3 dot 9 Minimum module width i N A 4 dot 8 4 dot 12 Minimum module width o heght 32 dot 4 mm p heght 64 dot 8 mm q heght 96 dot 12 mm r heght 128 dot 16 mm s heght 160 dot 20 mm t heght 192 dot 24 mm u heght 224 dot 28 mm...

Page 61: ...Software Manual 56 3 5 3 Barcode Font Usage Usage of the Barcode device font must be done as follows Select Barcode Font 1 Choose the barcode device font from your editor s menu ...

Page 62: ...oftware Manual 57 Input Barcode font Print result sample Please set the barcode device font s character size to the standard value 8 5 points 2 Input code The specified function is performed by printing ...

Page 63: ...xFF is possible DATA2 x20 x7F replace x60 xBF DATA3 x20 x5F replace xC0 xFF ESC_FONT Output x20 x7F Output x20 x7F is possible 3 6 1 Entering a 2D Code Font QR Code Follow the steps below to describe a QR code 1 2D code type setting Only describe the parameters to be changed because the default value is set to each setting item 2 2D code data setting Describe parameters and 2D code data following ...

Page 64: ... code printing 1 Describe 0A which indicates the number of bytes 10 bytes of 2D code data in hexadecimal notation in the low order byte A and high order byte 0 respectively Printing result 3 6 2 2D Code Command Setting Font QR code setting fonts QR_CNTL QR_CNTL Fonts Function Output Code 0 Use for Parameter x00 1 Use for Parameter x01 2 Use for Parameter x02 3 Use for Parameter x03 4 Use for Param...

Page 65: ... A0 QR code data setting automatic data analysis x1b x1dyD1 x00 B QR code data setting manual data analysis x1b x1dyD2 P Print QR code data x1b x1dyP The correct errors level can also be set using the correction rate enclosed by parentheses PDF417 setting fonts PDF417 Character Function Driver output code 0 Used for parameter of each PDF417 setting command x00 1 Used for parameter of each PDF417 s...

Page 66: ...rameter of each PDF417 setting command x09 S Specifies the PDF417 code size x1b x1dxS0 E Specifies the PDF417 security level ECC x1b x1dxS1 M Specifies the X direction size of the PDF417 module x1b x1dxS2 A Specifies the aspect ratio of the PDF417 module x1b x1dxS1 D Specifies PDF417 code data x1b x1dxS3 P Prints a PDF417 code x1b x1dxP I Obtains PDF417 code expansion information x1b x1dx1 ...

Page 67: ...69 xC9 x2A x2A x0A x6A xCA x2B x2B x0B x6B xCB x2C x2C x0C x6C xCC x2D x2D x0D x6D xCD x2E x2E x0E x6E xCE x2F x2F x0F x6F xCF 0 x30 x30 x10 x70 xD0 1 x31 x31 x11 x71 xD1 2 x32 x32 x12 x72 xD2 3 x33 x33 x13 x73 xD3 4 x34 x34 x14 x74 xD4 5 x35 x35 x15 x75 xD5 6 x36 x36 x16 x76 xD6 7 x37 x37 x17 x77 xD7 8 x38 x38 x18 x78 xD8 9 x39 x39 x19 x79 xD9 x3A x3A x1A x7A xDA x3B x3B x1B x7B xDB x3C x3C x1C x...

Page 68: ...2 x32 x92 xF2 S x53 x53 x33 x93 xF3 T x54 x54 x34 x94 xF4 U x55 x55 x35 x95 xF5 V x56 x56 x36 x96 xF6 W x57 x57 x37 x97 xF7 X x58 x58 x38 x98 xF8 Y x59 x59 x39 x99 xF9 Z x5A x5A x3A x9A xFA x5B x5B x3B x9B xFB x5C x5C x3C x9C xFC x5D x5D x3D x9D xFD x5E x5E x3E x9E xFE _ x5F x5F x3F x9F xFF x60 x60 x40 xA0 a x61 x61 x41 xA1 b x62 x62 x42 xA2 c x63 x63 x43 xA3 d x64 x64 x44 xA4 e x65 x65 x45 xA5 f ...

Page 69: ... Character Code ESC_FONT DATA1 DATA2 DATA3 r x72 x72 x52 xB2 s x73 x73 x53 xB3 t x74 x74 x54 xB4 u x75 x75 x55 xB5 v x76 x76 x56 xB6 w x77 x77 x57 xB7 x x78 x78 x58 xB8 y x79 x79 x59 xB9 z x7A x7A x5A xBA x7B x7B x5B xBB x7C x7C x5C xBC x7D x7D x5D xBD x7E x7E x5E xBE x7F x7F x5F xBF Cannot be entered using a character ...

Page 70: ...orrection rate 15 Printer Print S3 Module size setting size 3 dot Printer Print B1 Bar code data setting manual data analysis number of blocks Printer Print 2 Alphanumeric characters data type Printer Font Name DATA1 DATA1 0x0000 0x005F Printer Print Chr H35 Printer Print Chr H20 Printer Font Name ESC_FONT ESC_FONT 0x0020 0x007F Printer Print http www star m jp Bar code data 21 bytes Printer Font ...

Page 71: ...tting Printer Print Eq Error correction level setting correction rate 25 Printer Print S7 Module size setting size 7 dot Printer Print A0 Bar code data setting automatic data analysis Printer Font Name DATA1 DATA1 0x0000 0x005F Printer Print Chr H35 Printer Print Chr H20 Printer Font Name ESC_FONT ESC_FONT 0x0020 0x007F Printer Print http www star m jp Bar code data 21 bytes Printer Font Name QR_C...

Page 72: ...ies the barcode size Printer Print E3 Specifies the ECC level Printer Print M3 Specifies the X direction size of the PDF417 module Printer Print A3 Specifies the aspect ratio of the PDF417 module Printer Print D Specifies bar code data Printer Font Name DATA1 DATA1 0x0000 0x005F Printer Print Chr H2A Specifies the number of barcode data bytes Printer Print Chr H20 Printer Font Name ESC_FONT ESC_FO...

Page 73: ...ies the barcode size Printer Print E3 Specifies the ECC level Printer Print M3 Specifies the X direction size of the PDF417 module Printer Print A3 Specifies the aspect ratio of the PDF417 module Printer Print D Specifies bar code data Printer Font Name DATA1 DATA1 0x0000 0x005F Printer Print Chr H31 Specifies the number of barcode data bytes Printer Print Chr H20 Printer Font Name ESC_FONT ESC_FO...

Page 74: ...printing To perform two tone color printing and use special paper load the appropriate thermal paper in the printer and configure the following setting 1 In Control Panel select Devices and Printers 2 Right click on the icon of the target printer queue and select Printing preferences in the pull down menu ...

Page 75: ...ollowing Media Select normal type paper Color Select black and white check button For two tone color printing For color printing on two tone thermal paper select the following Media Select 2 color paper Color Select color check button For printing on special paper When you need to print darker than normal gray scale or use special paper such as high image stability paper select the following Media...

Page 76: ...administrator privileges There are the following two methods to launch the TSP100 configuration application Using the Windows Start menu Select Programs All Programs or All Apps StarMicronics Star TSP100 Configuration Utility and proceed to step 4 In Windows 8 1 and 8 Select Configuration Utility TSP100 tile Using Properties of the printer 1 In Control Panel select Devices and Printers 2 Right cli...

Page 77: ...le printer is not found the following window will appear When using the TSP100LAN click OK to start the Ethernet setup tool and add the required printer referring to 1 3 Adding a Printer TSP100LAN 1 4 Adding a Printer TSP100IIIW or 1 5 Adding a Printer TSP100IIILAN When using a non TSP100LAN printer click Cancel to stop the procedure and add the required printer referring to 1 2 Adding a Printer T...

Page 78: ...nter and click OK If the LAN function is installed you can select the Add TSP100LAN checkbox to start the Ethernet setup tool 7 Select a target emulation and click OK 8 The TSP100 Configuration window will be opened IMPORTANT After changing any setting in the TSP100 Configuration window be sure to click Apply Changes The changed setting is enabled by clicking Apply Changes ...

Page 79: ...n 2 Import Previously saved settings made using the TSP Configuration can be imported Import the file with the xml extension and then click Apply Note 1 The settings for the Star Line mode and ESC POS mode are saved separately When importing the settings confirm the selected mode and then import the setting file 2 The following settings made using the TSP Configuration cannot be imported or export...

Page 80: ...ump Mode 1 Change the folder where to save data in the HexDump mode setting window 2 Click Set ECO settings on demand function 1 In the ECO Settings window clear the Enable on demand checkbox once 2 Select the Enable on demand checkbox again 3 Click Apply Changes Journal function 1 In the Journal and Multi Copy window clear the Enable Journal checkbox once 2 Select the Enable Journal checkbox agai...

Page 81: ...rectness and the causes of errors can be investigated Print Dump Data All of the data transmitted to the printer from the computer is printed using hexadecimal code Output Dump Data to File All of the data transmitted to the printer from the computer is output as hexadecimal binary data in a file to the specified folder Note To apply the setting click Set and then click Set in the utility screen 4...

Page 82: ...display The setting items for the TSP Configuration can be displayed as a list or as icons 2 Language selection The display language can be selected STEP 1 On the View menu select Language selection to display the list of available languages ...

Page 83: ...ion By opening the TSP Configuration again the selected language will be displayed Note If the characters are corrupted change the settings in the Advanced tab in Regional Options in Control Panel in Windows 4 1 3 ECO When using the printer with the ECO settings the percentage of paper saved can be confirmed by enabling this function ...

Page 84: ...ing Select Enabled checkbox in the ECO Indicator window to start measurement 2 Check the result After printing open the ECO Indicator window again to check the result 3 Clear the accumulated result Click Clear to clear the accumulated result ...

Page 85: ...Software Manual 80 4 1 4 Management This is used to record logs and identify causes when communication errors occur 4 1 5 Help The software version can be confirmed using the Help menu ...

Page 86: ...Software Manual 81 4 2 Information The Information window displays device information of the printer to be configured ...

Page 87: ...nual 82 4 3 General Settings Click the General Settings tab in the left pane of the window When the printer driver is used for printing text and line spacing settings are available only when device fonts are used ...

Page 88: ...al character set is USA Changing the international character set will change certain characters in the character table to match those characters fitting the selected location Typically the changes are accented characters and currency symbols Code Page The default code page is Normal in the Star Line mode and ESC POS 437 USA std Europe in the ESC POS mode Changing the code page offers additional sp...

Page 89: ...under bulkier looking font If Large is specified for Font type a larger text is created based on a font design and it looks a little tight because the character space is the same as for the standard font type Character space Right ESC POS mode only 0 the default to 3 dots Use this feature to add extra space in dot units to the right of each character Extra spacing may improve appearance when you a...

Page 90: ...density allows for adjustment in the level of contrast to compensate for the different levels of sensitivity of different types and grades of thermal paper The recommended setting is 100 Default Print Speed Depending on the application it may be desirable to slow down the speed of printing This is typically done to adjust the quality of print based on the grade and type of paper used The recommend...

Page 91: ...hile Automatic Retry is set to Enable the sent data is resent from the beginning Retry processing is repeated up to five times The default is Enable for TSP100U PU LAN ECO and Disabled for TSP100GT Note 1 If Automatic Retry is set to Disabled the ETB command is enabled in the application side However check that the ETB is returned for one job before sending the next print data If print data is sen...

Page 92: ...the right margin is larger ESC POS compatible default Margins and line widths are the same as on a typical ESC POS printer Characters are the same size as with Star Line standard but padding is added so that printer area occupies the same area as on a true EPSON POS printer Using this function you can use legacy software solutions with no change If Star standard is selected the pitch value is not ...

Page 93: ...4 4 Star Cloud Services Click the Star Cloud Services tab on the left side of the dialog box To use the Star Cloud Services it is required to register a Star Cloud Services account in advance Please click Here for details ...

Page 94: ...assword of your registered Star Cloud Services account and click Register Device 2 The following dialog appears Click OK 3 When the device is registered successfully the account information of the connected Star Cloud Services appears You can change the device name by connecting the dashboard with the registered account from Connect to Dashboard Website When the device name is changed click to upd...

Page 95: ...t is uploaded on the Star Cloud Server The print size of QR code can be specified Print Sample Note To upload data on the Star Cloud Server the host device must be connected to the network Please note that data may not be uploaded on the Star Cloud Server even though a QR code is added on the receipt depending on the condition of network connection ...

Page 96: ...tings tab on the left side of the dialog box 4 5 1 Auto Reduction Setting This function reduces the overall size of the printing However to prevent any scanning errors the size of printed barcodes is not reduced even if the reduction settings are selected ...

Page 97: ... the left margin of the paper when printed If the printed barcode will be wider than 80mm 58mm the barcode data will not be printed Receipt length reduction TSP100ECO only The default setting is Original no reduction The printing area can be compressed 50 reduction or 25 reduction lengthwise Because the size of printed barcodes is not reduced even if the receipt length reduction settings are selec...

Page 98: ...mand This function reduces the amount of paper wasted on unnecessary printings by prompting the user to select whether or not to print the data Enable on demand To enable the on demand function select the check box When the on demand function is enabled the following confirmation dialog box will appear each time data is sent from the computer to the printer When YES is clicked the data will be pri...

Page 99: ...eted When Save is selected the data for the canceled printing will be saved in the following folder System Drive Star TSP100 Ondemand Note When the driver utility application is updated from future PRNT CD 5 5 or earlier the stored data for canceled printing is transferred to the above folder If data has not been transferred to the above folder please check the following folder Hard Disk Drive Use...

Page 100: ...ngs can be viewed In addition to print data that was saved from a canceled printing perform the following procedure 1 Click View Save Data 2 The Journal tool window appears Click Search to search for the saved data 3 Enter the date to start searching and click OK ...

Page 101: ...4 Enter the date to end searching and click OK This will search for the data saved in the specified period 5 Click the date to check data details in the preview screen The saved data appears Click Print to print the data ...

Page 102: ...r capacity In this case the cut command just before the buffer becomes full is the trigger When using a virtual serial port it is recommended to send the data one receipt data cut command at a time 2 Even if the write data is sent one line at a time the confirmation dialog box will not appear and the data will not be printed until a cut command is received 3 Send print data on a page basis data Cu...

Page 103: ...touts Use this feature to test or demonstrate the TSP100 futurePRNT s printing capabilities 4 6 1 Default Character Set Prints a table exhibiting the entire TSP100 futurePRNT default single byte character table Barcode Print Prints samples of all of the TSP100 futurePRNT s available barcodes ...

Page 104: ...pen Cash Drawer 2 Tests cash drawer 2 Buzzers 1 and 2 Star Line mode only Clicking Buzzer 1 or Buzzer 2 allows you to check that each buzzer is running normally Notes The buzzer test button is available only in the Star Line mode and it is not displayed in the ESC POS mode In the ESC POS mode you can click the cash drawer test button to check that the buzzer connected to the printer sounds 4 6 3 T...

Page 105: ... printer must be registered If a cash drawer is connected to the printer the cash drawer must also be registered Registration of the printer and cash drawer is accomplished through the configuration utility Note Before registering a printer or cash drawer confirm the control object registration status The registration procedure is different depending on the control object registration status ...

Page 106: ... adjusted 3 The printer is added and OPOS CCO OPOS common control object is selected in the Control Object Registration field Click Apply Changes to register the new printer device Notes 1 The print width must match between the setting above and general settings refer to 4 3 2 Print Width in General Settings If they do not match the print width specified in general settings is automatically change...

Page 107: ...le mode is checked the left and right margins are automatically adjusted 3 A printer is added Click Apply Changes to register the new printer device Notes 1 The print width must match between the setting above and general settings refer to 4 3 2 Print Width in General Settings If they do not match the print width specified in general settings is automatically changed to the setting above 2 The pri...

Page 108: ... box appears To register the recommended common control object OPOS CCO click Yes and proceed to step 3 To use a non Star control object click No and proceed to step 4 3 The following confirmation dialog box appears to check with you if you want to delete the currently registered control object To continue click Yes Notes Once a control object is deleted it cannot be recovered ...

Page 109: ...lick Apply Changes to register the new printer device Notes 1 If the Star printer is used with a non Star control object it may not run normally If this occurs register OPOS CCO OPOS common control object we recommend 2 The print width must match between the setting above and general settings refer to 4 3 2 Print Width in General Settings If they do not match the print width specified in general s...

Page 110: ... device name for a target printer 1 Select a target printer and click Configure 2 The following window appears Click Add New The setting value is displayed only when the print width of the printer is set to 51 mm 3 Enter the name and click OK This name is used to call the printer from the OPOS application ...

Page 111: ...Do Checked Block Printing checkbox Click Accept 4 7 3 Adding a Cash Drawer When no control object is registered Not Selected is selected in the Control Object Registration field 1 Click Add New 2 The following dialog box appears Enter the name of the cash drawer to be added and click OK ...

Page 112: ...Click Apply Changes to register the new cash drawer When OPOS CCO or Star CO is registered as a control object OPOS CCO or Star CO is selected in the Control Object Registration field 1 Click Add New When Star CO is selected 2 The following dialog box appears Enter the name of the cash drawer to be added Click OK to add the new cash drawer ...

Page 113: ... non Star control object is registered Others is grayed out in the Control Object Registration field 1 Click Add New 2 The following confirmation dialog box appears To register the common control object OPOS CCO click Yes and proceed to step 3 To use a non Star control object click No and proceed to step 4 ...

Page 114: ...log box appears Enter the name of the cash drawer to be added Click OK 5 When the cash drawer is added and the control object is changed to OPOS CCO OPOS common control object OPOS CCO is selected in the Control Object Registration field Click Apply Changes to register the new cash drawer Notes If a Star cash drawer is used with a non Star control object it may not run normally If this occurs regi...

Page 115: ... cash drawer When necessary you can configure cash drawer operations 1 Select a target cash drawer and click Configure 2 The following window appears Click Add New and enter the name Click Configure to decide the specified device name This name is used to call the cash drawer from the OPOS application 3 Cash drawer operation setting and after ...

Page 116: ...the cash drawer is opened select the Active checkbox If the open close detector switch is closed shorted while the cash drawer is opened clear the Active checkbox Drawer Number Select the number of the cash drawer Activation Pulse Width Specify the power distribution time of cash drawer 1 Post Activation Pause Specify the delay time of cash drawer 1 For cash drawer 2 the power distribution and del...

Page 117: ...orking properly under OPOS After the initial check a sample receipt will be printed to show the printer is printing with its full capability 4 7 7 Sample Application The sample application performs some demonstration printing but also serves to educate the operator on the capabilities of the TSP100 futurePRNT in an OPOS application ...

Page 118: ...S Methods Print Prints a list of the supported OPOS methods OPOS ESC Sequences Print Prints a list with examples of the supported ESC sequences Sample Print Prints a sample of the typical point of sale receipt To exit the sample application follow the steps below 1 Click DeviceEnabled False to disable the device in the application 2 Click Release to make the device available to other OPOS applicat...

Page 119: ...Software Manual 114 connected to the printer the cash drawer must also be registered Registration of the printer and cash drawer is accomplished through the configuration utility ...

Page 120: ...rinter and cash drawer First click Create JavaPOS XML Registry File to create a JavaPOS XML file If the JavaPOS XML file resides click Load JavaPOS XML Registry File to load the JavaPOS XML file Then to register printer and cash drawer execute the steps shown in the following page ...

Page 121: ... Device Click Add New next to the POSPrinter textbox Enter a logical name for your JavaPOS printer device in the resulting dialog 4 8 2 Configure a Printer Device Click Configure next to the POSPrinter textbox with the desired device highlighted ...

Page 122: ...dd New next to the Cash Drawer textbox Enter a logical name for your JavaPOS cash drawer in the resulting dialog 4 8 4 Configure a Cash Drawer Device Click Configure on the right of the text box in the JavaPOS CashDrawer window to configure cash drawer operations ...

Page 123: ...s function is available only when the selected cash drawer supports the open close detector switch Active Select the Active checkbox to choose whether the open setting of the compulsion switch is recognized as an open or closed cash drawer Drawer Number Choose whether the selected Cash Drawer is recognized as Cash Drawer 1 or Cash Drawer 2 ...

Page 124: ...wer 2 the power distribution and delay times are fixed to 200 msec 4 8 5 Deleting a Printer or Cash Drawer Click Delete on the right of each text box to delete a target printer or cash drawer 1 Select the printer or cash drawer to be deleted and click Delete 2 Before deletion is executed the following confirmation dialog box appears To continue click Yes This will delete the selected printer or ca...

Page 125: ...he printer Notes The check health function is not available in the 64 bit Java Runtime Environment RUN the below sample program to test JavaPOS functionality The location of the Java Sample Program is different for Windows 32 bit and 64 bit systems Installer Location for Windows 32 bit Environments Program Files StarMicronics TSP100 Software 20151201 JavaPOSExamples Installer Location for Windows ...

Page 126: ...lick the Advanced tab and then click Environment Variables 4 Select Path in the System variables list and then click Edit 5 At the Edit System Variable dialog box add the following path in the Variable value box Your JDK install folder bin Example c Program Files Java jdk1 6 0_18 bin 6 Click the OK button to close the Edit System Variable dialog box 7 Click the OK button to close the Environment V...

Page 127: ... a one document basis If print data is divided into many parts for sending the print speed will slow down compared to when sending on a one document basis This specification has been changed from version 5 0 To use an ETB command in a virtual serial port set Automatic Retry to Disabled in General Settings For more information refer to 4 3 2 General Settings When activated in the Star Line mode the...

Page 128: ... currently used POS application Example If the output destination port is named COM3 enter COM3 Error Action If Continuous printing is selected data will be held when a recoverable error such as paper out has occurred in a virtual serial port to be added When the port is recovered from an error in the specified time out period a print job will be continued from the position where printing has been...

Page 129: ...click OK For Input Port Name enter the name of the output destination port of the currently used POS application Example If the output destination port is named COM3 enter COM3 This port is used to erase the interrupted print data when an error is recovered 3 Click Apply Changes to complete the creation of a virtual serial port Notes Multiple virtual serial ports can be created but it is not recom...

Page 130: ...y cause errors when starting the service again Notes When stopping the service make sure any applications using a virtual serial ports are closed Neglecting to do so may cause errors when restarting the service 4 9 3 Removing a Virtual Serial Port Click Delete Port with the specific port selected to remove it from your system then click Apply Changes to complete the process 4 9 4 Check Health Clic...

Page 131: ... allows for the queuing of bitmap images jpg gif bmp format for later automatic printing An infinite number of images can be queued at any given time for fast and easy recall during printing 4 10 1 Adding an Image To add an image follow the steps below ...

Page 132: ...Software Manual 127 Click Add New to browse for an image to add to the list The following Image Import window appears ...

Page 133: ...to experiment with the settings to find which setting works best for any particular image After adjusting the image to your satisfaction click Use Image to add the image to the image list and make it available for use with the TSP100 futurePRNT s Logos and Cropping utility 4 10 2 Renaming an Image 1 Select an image to be renamed and click Rename 2 The following Rename image ID window appears Enter...

Page 134: ...ropping allows for the selection of images to be printed at the top of each receipt logos and images to be printed at the bottom of each receipt coupons The ability to crop a receipt for white space or logo coupon removal can also be configured here ...

Page 135: ...Software Manual 130 4 11 1 Logo Printing The following shows the setting required to print an image on a receipt ...

Page 136: ...image list registered in 4 8 1 Adding an Image and specify the image printing position in Alignment 3 Click Use 4 Multiple images can be specified in the image list When specifying multiple images select Cycle or Print All as a printing method Selecting Cycle prints the specified images in sequence Selecting Print All prints the specified image at the top of each receipt ...

Page 137: ...mage list registered in 4 8 1 Adding an Image and specify the image printing position in Alignment 3 Click Use 4 Multiple images can be specified in the bottom image list When specifying multiple images select Cycle or Print All as a printing method Selecting Cycle prints the specified images in sequence Selecting Print All prints the specified image at the bottom of each receipt ...

Page 138: ...ground of a receipt 1 Click Select in the Merge Image field 2 Select the desired image from the image list registered in 4 8 1 Adding an Image 3 Click Use 4 Select the Include logos and coupons when merging checkbox to apply the selected merge image to the entire printing area ...

Page 139: ...nting while leaving the blank spaces specified with the top and bottom crop lengths This function is available when not printing the top and bottom images that are pre specified in a higher level application Using this function allows you to ignore unnecessary printing without changing the setting of a higher level application ...

Page 140: ...panel allows for setting options that enable the TSP100 to detect certain Text Keys and modify each receipt based on them This panel also allows for configuring how the TSP100 futurePRNT will detect the end of page so that receipts can be properly buffered and modified in full ...

Page 141: ...order to modify receipts based on their contents Text Keys that will serve as triggers must be inputted 1 Click the Add Key button to input a new Text Key 2 When satisfied with the contents of the Text Key click OK to add it to the Text Key list ...

Page 142: ... With this option enabled it is possible to replace the selected Text Key with a new string This is useful if there is an old phone number or address that needs to be changed on a legacy application that cannot be changed programmatically Change Merge Setting With this setting enabled it is possible to change the merge image selected in the Logos Cropping section or completely disable merging all ...

Page 143: ...have this option selected are detected coupons are not added even if other coupon addition text keys are detected in the same receipt Note You cannot switch between the Add Multiple Coupons and Add Single Coupon settings using different text keys The option that you specify for the last coupon addition is the one that is enabled The Change Coupon Settings are processed for each page Coupon printin...

Page 144: ...and Select this option if the TSP100 futurePRNT should treat a Form Feed command as a signal that the receipt has ended Note In the page end detection function the Form Feed command is available only in the Star Line mode and not in the ESC POS mode Consecutive Line Feeds Select this option if the TSP100 futurePRNT should treat a configurable number of line feeds as a signal that the receipt has e...

Page 145: ...inter font for the barcode The final method is to print barcodes using a barcode font that resides on the host PC Printing via control codes or using the embedded printer font offers the best and most consistent quality and legibility Printing barcodes using barcode fonts typically TrueType Fonts can produce lackluster results if not configured properly When printing barcodes the following setting...

Page 146: ...d by preventing partial scanning ITF Barcode without Bearer Bars ITF Barcode with Bearer Bars 4 13 2 UPC A Guard Bar Length Guard bars act as reference points for the scanner to aid in proper reading of the barcode UPC A Barcode without Guard Bars Extended UPC A Barcode with Guard Bars Extended 2 mm ...

Page 147: ...he barcode JAN EAN 13 Barcode without Guard Bars Extended JAN EAN 13 Barcode with Guard Bars Extended 2 mm 4 13 4 CODE39 Guard Bar Length Star Line Mode Only Guard bars act as reference points for the scanner to aid in proper reading of the barcode CODE39 Barcode without Guard Bars Extended CODE39 Barcode with Guard Bars Extended 2 mm ...

Page 148: ... 143 4 13 5 CODE39 Character Set Star Line Mode Only Specify the character set for CODE39 barcode Selecting Standard sends only Code39 standard code data Selecting Extended sends all code data The default is Standard ...

Page 149: ...Software Manual 144 4 14 Journaling and Printing of Multiple Customized Copies Use this page to set up journaling and multi copy printing ...

Page 150: ... This function is helpful when issuing a receipt as a shop s or customer s copy You can print up to four copies and specify the header footer or merge image for each copy Furthermore you can only select the images that are pre registered in 4 8 1 Adding an Image This function is not available when the Enable checkbox is not selected ...

Page 151: ...e this function select the Enable Journal checkbox Follow the steps below to display and print saved data 1 Click View Journal 2 The following Journal window appears Click Search to search for the saved data 3 The following dialog box appears Enter the date to start searching and click OK ...

Page 152: ...oftware Manual 147 4 The following dialog box then appears Enter the date to end searching and click OK This will search for the data printed in the specified period when the journal function is enabled ...

Page 153: ...s saved into the following folder System Drive Star TSP100 Journal Note When the driver utility application is updated from future PRNT CD 5 5 or earlier the stored data for canceled printing is transferred to the above folder If data has not been transferred to the above folder please check the following folder Hard Disk Drive User Folder for logged on user name APPData Roaming Star TSP100 Journa...

Page 154: ...ounting If you are setting the printer upright or mounting it on the wall check this checkbox to invert the printing If the button is checked receipts are printed bottom to top so that they are easier to present correctly to the customer ...

Page 155: ...of the window Notes 1 This function is available only in the Star Line mode and not in the ESC POS mode 2 Conversion is possible only if the text before the conversion uses device fonts Text using a True Type font cannot be converted 3 Even if different types of device fonts are used before conversion they will all be converted to a single selected font 4 Conversion is possible only into the chara...

Page 156: ... C D E F G H I J K L M N O 5x P Q R S T U V W X Y Z _ 6x a b c d e f g h i j k l m n o 7x p q r s t u v w x y z DEL 8x ƒ ˆ Š Œ Ž 9x š œ ž Ÿ Ax NBSP ª SHY Bx µ º Cx À Á Â Ã Ä Å Æ Ç È É Ê Ë Ì Í Î Ï Dx Ð Ñ Ò Ó Ô Õ Ö Ø Ù Ú Û Ü Ý Þ ß Ex à á â ã ä å æ ç è é ê ë ì í î ï Fx ð ñ ò ó ô õ ö ø ù ú û ü ý þ ÿ Windows 1252 CP1252 Notes If a character other than those listed above is used it will be converted int...

Page 157: ...ing mode under which they are generated Virtual ports created under Star Line mode are registered as Star Line ports those created under ESC POS mode are registered as ESC POS ports Note that Star Line mode and ESC POS mode cannot use identical port numbers Notes To direct output to the virtual port the application must designate both the IP address for the PC on which this software is installed a...

Page 158: ... At the following dialog enter the output port number used by the application If the output port number is 9100 for example enter 9100 Then click OK 3 Click the Apply Changes button to create the port Notes Multiple virtual TCP IP ports can be created but it is not recommended This function is provided to hold the downward compatibility ...

Page 159: ...Start button Notes Before stopping the service make sure that you have closed all applications that are using virtual TCP IP ports If you stop the service while an application is still running you may get an error the next time you try to start it 4 17 3 Deleting a Virtual TCP IP Port Select the port that you wish to delete and then click Delete Port When the following dialog appears click Yes Nex...

Page 160: ...e ESC POS Routing checkbox on Print Job Routing Specify a serial port in the ESC POS mode Refer to 4 9 Serial Port Specify a virtual TCP IP port in the ESC POS mode Refer to 4 18 Virtual TCP IP Port If the Enable ESC POS Routing checkbox is not selected while any serial port or virtual TCP IP port is not specified data is printed in the Star Line mode therefore you will not be able to obtain the d...

Page 161: ...es Feel free to use user defined sizes as needed 5 1 Important Information about Microsoft Word Word 97 and later versions do not work correctly with the device fonts To enable correct use of device fonts when working with these versions of Word make settings as follows Notes for Using Microsoft Word 2007 1 Click the Office Button and then click the Word Options button Select Advanced and click La...

Page 162: ...nly one type of device font per line 2 Do not print device fonts and graphics on the same horizontal line This will cause the difference between the displayed document and the printed document 3 When you use the barcode device fonts characters will appear only on the computer s display You can see the printed result will be a barcode By this difference the length of the displayed document and the ...

Page 163: ...o set the temporary IP address for the printer 1 arp d printer s_temporary_IP_address 2 arp s printer s_temporary_IP_address printer s_MAC_address 3 ping printer s_temporary_IP_address 4 arp d printer s_temporary_IP_address How to find your printer s MAC address You can find your printer s MAC address on the test print sheet MAC address is listed under Network Configuration on that sheet To print ...

Page 164: ...ommand to connect directly to a TSP100LAN printer Begin with the following preliminary steps to ensure that Telnet is enabled 1 From the Start menu open the Control Panel 2 Select Programs and Features 3 Under Tasks select Turn Windows features on or off 4 When the User Account Control dialog appears click Continue ...

Page 165: ...0 5 If Telnet Client is not yet checked place a check next to it Then click OK 6 If you had to add the check in the previous step if Telnet Client was not already checked to begin with you must now restart your computer ...

Page 166: ...onnect to the printer you wish to set Example telnet 192 168 1 84 IP address of the printer you wish to set Notes You cannot connect to a printer that does not have an IP address If necessary set a temporary IP address for the printer before using telnet For instructions refer to Section 7 3 Manually Setting a Temporary IP Address 3 Log into the printer as root The factory default setting for the ...

Page 167: ...et Settings to Defaults 98 Save Restart 99 Quit Enter Selection Enter the number corresponding to the action you wish to carry out 5 When you have finished making settings select 98 Save and Restart and then select either 1 Save Restart device and Configuration printing or 2 Save Restart Device This will save the settings and reset the printer ...

Page 168: ...original receipt can be read by Barcode Scanner Code 39 Barcode Option Extended In this version Extended setting for Code 39 Barcode cannot be used Code 39 Barcode will not be printed on the appropriate position Print via Printer Driver You cannot use the following functions of the TSP100 Configuration Application when NoCut is set in the printer driver property settings Copy function Vertical Mon...

Page 169: ...re set valid the image data set for Header and Footer will be printed in the following position When Vertical Mount is disabled Left When Vertical Mount is enabled Right Logo Printing with Left Right Margin Setting Left Right Margin Setting is not valid for Logos Off Line Mode with Virtual Serial Port Even the Printer is in Off Line Mode the application can send Print data to Virtual Serial Port I...

Page 170: ...ending Print data in the following cases Virtual Serial Port WritePrinterAPI When multiple Cut Commands are sent in the one Print data the last Cut Command will be a Trigger for On Demand message When NO is selected and reprint the receipt data stored in PC the Cut actions will not happen in between the stored receipts but at the end of the last receipt Peripheral Control when On Demand is set val...

Page 171: ...ultaneously Windows Printer Driver OPOS JavaPOS Virtual Serial Port Virtual TCP IP Port Write Printer API If it is necessary to use multiple funcitons finish printing via one method before beginning via another Multiple usage of Virtual TCP IP Ports When sending print data to multiple Virtual TCP IP ports from one PC the print speed will be slow If one printer is powered OFF the other printer will...

Page 172: ...ePRNT series addition of font B PDF417 Standardization of ECO function manual support of OPOS version 1 13 and support of JavaPOS version 1 13 Rev 5 1 03 01 2011 Function addition of a part of OPOS Rev 5 2 10 26 2011 Function addition of a part of Text Processing Rev 5 3 10 18 2012 Windows 8 support Rev 5 4 06 12 2013 Added How to check the MAC address Rev 5 5 11 10 2013 Function addition of a par...

Page 173: ...http www starmicronics com support ...

Reviews: