background image


31 

www.

DEUBAXXL

.de 

This phase is for your cardiovascular system and muscles to recover. This is a repetition of the 
warm-up exercise, meaning reduce your pace and continue for about 5 minutes. The stretching 
exercises should now be repeated, being careful not to force or jerk your muscles into stretching. 
As you get fitter, you may need to exercise longer and harder. It is advisable to exercise at least 
three times a week and to spread the workouts as evenly as possible throughout the week. 
Muscle building   
To build muscle on your fitness bike, you need to set the resistance fairly high. This will put more 
strain on your leg muscles and you may not be able to work out as long as you would like. Also, 
if you're trying to improve your fitness, you'll need to modify your workout routine. During the 
warm-up  and  cool-down  periods,  you  should  exercise  as  usual,  but  towards  the  end  of  the 
exercise period, you should increase the resistance by making your legs work harder than normal. 
You will need to reduce your speed to keep your heart rate in the target range. 
Weight loss 
The most important factor here is the effort you put in. The harder and longer you push yourself, 
the more calories you burn, which is basically the same as if you were exercising to improve your 
fitness.  

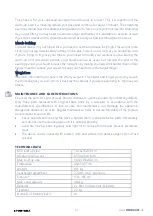
MAINTENANCE AND CARE INSTRUCTIONS  

Check all the parts for signs of wear. Do not continue to use the product if you find any defects. 
Only  have  parts  replaced  with  original  spare  parts  by  a  specialist  in  accordance  with  the 

manufacturer’s  specifications.  A  lack  of  care  and  maintenance  can  d

amage  the  appliance. 

Dangerous situations can arise. Regular maintenance helps to ensure the safety of the product 
and increases its service life.  


Check all parts before using the device, tighten them, replace defective parts immediately 
and do not use the device again until it is working properly. 


Lubricate  moving  parts  regularly  with  light  oil  to  reduce  friction  and  prevent  premature 
wear. 


The device can be cleaned with a damp cloth and a mild, non-abrasive agent, do not use 
solvents. 

TECHNICAL DATA  

Min. built up size  

70-76x53x126 cm 

Medium built up size 

87-94x53x118 cm 

Max. built up size 

99-107x53x109 cm 

Folded size 

45x53x137 cm 

Weight  

18,5 kg 

Seat height adjustment 

77-90,5 cm (7 positions) 

Size user 

150 

 185 cm 

Max. Load capacity 

140 kg 

Batteries 

2 x DC 1.5V AAA (not included) 

Flywheel  

2,5 kg 

Number of intensity levels 

10  


Summary of Contents for 109191

Page 1: ...www DEUBAXXL de BDA 109191 001 DE EN FR IT ES NL Fitnessfahrrad Eagle III Artikel Nr 109191 Modell Nr STFF002...

Page 2: ...Ihnen den bestm glichen Service Sollte ein Problem auftreten wenden Sie sich an unsere geschulten Mitarbeiter f r jede Art Service Reklamationen und technischen Support WICHTIG Lesen Sie vor der erste...

Page 3: ...ache mit einem Arzt zu halten Der Anwendungsbereich dieses Trainingsger ts ist der Heimbereich Das Ger t ist f r ein K rpergewicht von 140 kg Dauerbelastung gepr ft worden Bei unsachgem em Gebrauch di...

Page 4: ...und oder mangels Wissen benutzt zu werden SICHERHEITSHINWEISE SPEZIELL F R BATTERIE UND AKKUGER TE Verwenden Sie keine besch digten oder umgebauten Akkus Batterien oder Ger te Defekte oder modifizier...

Page 5: ...Modifikation am Produkt kann die Sicherheit negativ beeinflussen Gefahren verursachen und f hrt zum Erl schen der Gew hrleistung Nur f r den Hausgebrauch und nicht f r gewerbliche Nutzung geeignet AUS...

Page 6: ...8 1 Sattelst tze 9 1 Kugelbolzen M12 10 2 Sattel 11 1 U Scheibe M8 gerade 12 5 Mutter M8 13 5 Rahmen R ckenlehne 14 1 Schlossschraube M8x45 15 2 Griff 16 1 Innensechskant Rundkopfschraube M8x35 17 2 R...

Page 7: ...n klappen Sie ihn auf und richten Sie das innere Einstellrohr 25 aus dann verschrauben Sie es mit dem Kugelbolzen 10 2 Verbinden Sie den vorderen Standfu 2 und den hinteren Standfu 3 mit dem Hauptrahm...

Page 8: ...ibe 12 und der Nylonmutter 13 schrauben Sie dann das Sitzst tzrohr 26 mit dem Kugelbolzen 10 fest 4 Verbinden Sie den Rahmen 14 mit der Sattelst tze 9 mit der Schraube 15 der Unterlegscheibe 12 und de...

Page 9: ...l 7 sollte im Uhrzeigersinn und das Pedal 8 gegen den Uhrzeigersinn verriegelt werden Halten Sie die Pedale 8 und 7 w hrend des Trainings stets in verriegeltem Zustand Andernfalls werden die Z hne der...

Page 10: ...Sie abschlie end jede Schraube um sicherzustellen dass sie fest angezogen ist Batterien einsetzen und wechseln 2 x AAA Batterien nicht im Lieferumfang enthalten 1 ffnen Sie das Batteriefach an der R...

Page 11: ...rutschfeste Unterlage z B Gummimatte Holzplatte o unter das Ger t sofern der Aufstellort besonders gegen Druckstellen Verschmutzungen und hnliches gesch tzt werden soll Einstellposition Fahrrad Train...

Page 12: ...Funktionen auszuw hlen wenn Sie die Taste lange gedr ckt halten wird sie vollst ndig auf 0 gestellt SET Zum Einstellen der Werte f r Zeit Distanz Puls und Kalorien wenn nicht im Scan Modus RESET Zum Z...

Page 13: ...stanz im Bereich von 0 00 bis 99 99 km an 7 PULS RATE Dr cken Sie die MODE Taste bis PULSE angezeigt wird 6 7 Sekunden nach der Messung Ihrer Pulsfrequenz legen Sie bitte Ihre Handfl chen auf die beid...

Page 14: ...wobei die Trainingsintensit t recht hoch ist und eine erh hte Menge Kalorien verbraucht werden kann Entsprechend k nnen hier h here Ziele im Bereich Gewichtsreduktion und Muskelaufbau erzielt werden...

Page 15: ...iederholt werden wobei Sie darauf achten sollten dass Sie Ihre Muskeln nicht mit Gewalt oder ruckartig in die Dehnung bringen Wenn Sie fitter werden m ssen Sie m glicherweise l nger und h rter trainie...

Page 16: ...TxH zusammengeklappt 45x53x137 cm Gewicht 18 5 kg Sitzh henverstellung 77 90 5 cm 7 Positionen Gr e Benutzer 150 185 cm Max Belastbarkeit 140 kg Batterien 2 x DC 1 5V AAA nicht im Lieferumfang Schwung...

Page 17: ...andel unentgeltlich Zur ckgeben Sie k nnen die Batterien auch an uns zur cksenden Wir erstatten Ihnen das Briefporto f r die R cksendung der Altbatterie Die auf den Batterien abgebildeten Symbole habe...

Page 18: ...e service Should a problem occur please contact our trained staff for whatever kind of service complaints and technical support you require IMPORTANT Thoroughly read the manual in full before using th...

Page 19: ...nuous load Inappropriate use of this device e g excessive training jerky movements without prior warm up incorrect settings etc may cause damage to health Before starting the training a general fitnes...

Page 20: ...e changes to the device Do not modify or attempt to repair the unit or the battery accumulator Do not squeeze puncture or modify the battery expose it to water or dispose of it in the open or with hou...

Page 21: ...21 www DEUBAXXL de UNPACKING INSTRUCTIONS Open the box and remove the product After unpacking please check the product for damage and to ensure it is complete Subsequent complaints cannot be accepted...

Page 22: ...8 1 Seat post 9 1 Ball pin M12 10 2 Saddle 11 1 Washer M8 straight 12 5 Nut M8 13 5 Frame backrest 14 1 Carriage bolt M8x45 15 2 Handle 16 1 hexagon socket round head screw M8x35 17 2 Backrest 18 1 H...

Page 23: ...ve the main frame 1 from the box unfold it and align the inner adjustment tube 25 then screw it to the ball stud 10 2 Connect the front stand 2 and the rear stand 3 to the main frame 1 with the nut 6...

Page 24: ...t post 9 with the washer 12 and the nylon nut 13 then screw the seat support tube 26 with the ball stud 10 4 Connect the frame 14 to the seat post 9 with the bolt 15 washer 12 and nylon nut 13 then sc...

Page 25: ...and 29 respectively Note The pedal 7 should be locked clockwise and the pedal 8 counterclockwise Always keep pedals 8 and 7 locked during exercise Otherwise the teeth of the pedals 8 and 7 will be da...

Page 26: ...2 Insert the new batteries into the battery compartment Make sure that the polarity is correct 3 Close the battery compartment FITNESS BIKE INSTALLATION LOCATION When using your fitness bike you must...

Page 27: ...simultaneously moving the front frame to the desired position Release the ball pin 10 and fix it in place Lock it in place There are 3 positions for training and 1 position for storage See information...

Page 28: ...to the ODO position will be set to 0 FUNCTION AND OPERATION 1 SCAN Hold down the MODE button until SCAN appears the monitor will cycle through all 5 functions Time Speed Distance Calories ODO and Puls...

Page 29: ...atment 8 ALARM The computer will beep when you press MODE SET and RESET buttons 9 AUTO ON OFF AUTO START STOP In the absence of a signal for 4 minutes the power will be turned off automatically and as...

Page 30: ...The upper body and arms can also be trained with the tension bands 1 The warm up It is advisable to do a few stretching exercises as shown below Each stretch should be held for about 30 seconds do no...

Page 31: ...tor here is the effort you put in The harder and longer you push yourself the more calories you burn which is basically the same as if you were exercising to improve your fitness MAINTENANCE AND CARE...

Page 32: ...rolled manner that could harm the environment or human health Therefore please dispose of old devices via appropriate collection systems or send the device to the place where you purchased it for disp...

Page 33: ...ervice possibles Toutefois en cas de probl me ou de r clamation n h sitez pas contacter notre service client IMPORTANT Avant la premi re utilisation veuillez lire la notice attentivement et int gralem...

Page 34: ...l Cet quipement sportif est pens pour une utilisation domicile L appareil a t test pour un poids corporel de 140 kg en charge permanente maximum Une mauvaise utilisation de l appareil par exemple un e...

Page 35: ...ni re impr visible et entra ner un incendie des explosions ou des risques de blessures N exposez pas une batterie une pile ou un appareil au feu ou une temp rature excessive Un incendie ou des temp ra...

Page 36: ...s et entra ner l annulation de la garantie Uniquement con u pour un usage domestique et non pour un usage commercial CONSIGNES DE D BALLAGE Ouvrez le carton et retirez le produit Une fois le produit d...

Page 37: ...dale droite 7 1 P dale gauche 8 1 Tige de selle 9 1 Vis rotule M12 10 2 Selle 11 1 Rondelle plate M8 12 5 crou M8 13 5 Structure dossier 14 1 Vis M8x45 15 2 Poign e 16 1 Vis hexagonale t te ronde M8x...

Page 38: ...ure principale A du carton d pliez la et installez le Tube int rieur 25 puis vissez le avec la Vis rotule 10 2 Fixez le Pied avant 2 et le Pied arri re 3 la Structure principale 1 gr ce au Boulon t te...

Page 39: ...la Rondelle plate 12 et l crou 13 vissez ensuite le Tube de selle l aide de la Vis rotule 10 4 Fixez ensuite la Structure 14 la Tige de selle 9 l aide de la vis 15 de la Rondelle plate 12 et de l crou...

Page 40: ...7 doit tre viss e dans le sens horaire et la P dale 8 dans le sens anti horaire Assurez vous que les p dales 8 et 7 sont toujours enclench es durant l entra nement sans quoi les p dales risquent d tre...

Page 41: ...aire retirez les piles usag es 3 Placez les nouvelles piles dans le compartiment piles en respectant la polarit 4 Refermez le compartiment piles LIEU D INSTALLATION DU V LO FITNESS Lorsque vous utilis...

Page 42: ...t retirez la tout en ins rant la structure avant dans la position souhait e Revissez la Vis rotule 10 Il y a 3 positions d entra nement et 1 position de stockage voir informations sur l entra nement L...

Page 43: ...la distance et les calories Pour le moment la valeur est 0 Si vous maintenez le bouton RESET enfonc le chiffre pr s de la position ODO sera remis 0 FONCTION ET UTILISATION 1 SCAN Appuyez sur le bouton...

Page 44: ...pendant les 2 3 premi res secondes cause du brouillage du contact apr s quoi elle revient au niveau normal La valeur affich e ne peut pas tre utilis e comme base pour un diagnostic m dical 8 ALARME L...

Page 45: ...f qui ne cherchent pas d velopper leur musculature ou leur endurance seulement rester en forme et mobiles sans r aliser trop d efforts Cordons Vous pouvez galement exercer le haut de votre corps et vo...

Page 46: ...ort au moins trois fois par semaine et de r partir les s ances aussi uniform ment que possible durant la semaine D veloppement musculaire Afin de d velopper votre masse musculaire gr ce votre v lo de...

Page 47: ...e V rifiez toutes les pi ces avant d utiliser l appareil Serrez les et remplacez imm diatement toute pi ce d fectueuse N utilisez pas l appareil tant qu il ne fonctionne pas parfaitement Huilez r guli...

Page 48: ...cycl s pour ne pas nuire l environnement ou la sant humaine par une limination non appropri e Par cons quent veuillez d poser l appareil usag dans des points de collecte appropri s ou l envoyer au fou...

Page 49: ...e offriamo il miglior servizio possibile Se dovessi comunque riscontrare dei problemi ti preghiamo di contattare il nostro personale qualificato per qualsiasi tipo di richiesta reclamo o supporto tecn...

Page 50: ...sto dispositivo di allenamento l area domestica Il dispositivo stato testato per un peso corporeo di 140 kg di carico continuo L uso improprio di questo dispositivo ad es a causa di allenamento eccess...

Page 51: ...rre una batteria o un dispositivo a fuoco o temperatura eccessiva Incendi o temperature elevate superiori a 130 C 266 F possono provocare un esplosione Non apportare mai modifiche al dispositivo Non s...

Page 52: ...TRUZIONI DI DISIMBALLAGGIO Aprire il cartone di imballaggio ed estrarre il prodotto Dopo aver disimballato il prodotto verificare che sia integro e non presenti danneggiamenti Reclami tardivi non potr...

Page 53: ...nistro 8 1 Reggisella 9 1 Perno a sfera M12 10 2 Sella 11 1 Rondella a U M8 diritta 12 5 Dado M8 13 5 Schienale a telaio 14 1 Bullone a testa tonda M8x45 15 2 Impugnatura 16 1 Vite a testa cava esagon...

Page 54: ...cipale 1 dalla scatola aprirlo e allineare il tubo di regolazione interno 25 quindi avvitarlo con il perno sferico 10 2 Collegare il cavalletto anteriore 2 e il cavalletto posteriore 3 al telaio princ...

Page 55: ...a rondella 12 e il dado in nylon 13 quindi avvitare saldamente il tubo supporto sella 26 con il perno sferico 10 4 Collegare il telaio 14 al reggisella 9 con la vite 15 la rondella 12 e il dado in nyl...

Page 56: ...Nota il pedale 7 deve essere avvitato in senso orario e il pedale 8 in senso antiorario Tenere sempre bloccati i pedali 8 e 7 durante l allenamento In caso contrario i denti dei pedali 8 e 7 saranno...

Page 57: ...ssario rimuovere le vecchie batterie 3 Inserire le nuove batterie nell apposito vano Fare attenzione alle polarit indicate 4 Richiudere il coperchio POSIZIONE DI MONTAGGIO DELLA BICI DA FITNESS Quando...

Page 58: ...inserendo contemporaneamente il telaio anteriore nella posizione desiderata Posizione Lasciare andare il perno a sfera 10 e fissalo Ci sono 3 posizioni per l allenamento e 1 posizione per riporre il...

Page 59: ...e le calorie L attuale modifica dei dati 0 Se si tiene premuto RESET a lungo il display accanto alla posizione ODO viene impostato su 0 FUNZIONAMENTO E SERVIZI 1 SCAN premere il pulsante MODE finch no...

Page 60: ...irtuale per i primi 2 3 secondi a causa dell inceppamento del contatto dopodich torna al livello normale Il valore misurato non pu essere utilizzato come base per un trattamento medico 8 SVEGLIA Il co...

Page 61: ...cizio In questo modo si ottiene un intensit di allenamento leggera Questa la posizione di allenamento ideale per gli utenti che sono meno interessati a un allenamento intensivo per sviluppare muscoli...

Page 62: ...tua forma fisica migliora potresti aver bisogno di allenarti pi a lungo e pi intensamente Si consiglia di allenarsi almeno tre volte a settimana e di distribuire le unit di allenamento nel modo pi un...

Page 63: ...Controllare tutte le parti prima di utilizzare il dispositivo serrarle sostituire immediatamente le parti difettose e non utilizzare nuovamente il dispositivo finch non funziona correttamente Lubrific...

Page 64: ...ti in modo da non danneggiare l ambiente o la salute umana attraverso lo smaltimento incontrollato dei rifiuti Smaltire i vecchi dispositivi tramite adeguati sistemi di raccolta o inviare a smaltiment...

Page 65: ...cio posible Si surge un problema no dude en contactar a nuestro personal capacitado para hacer llegar sus quejas o si necesita alg n servicio y ayuda t cnica IMPORTANTE Antes de usar el equipo por pri...

Page 66: ...amiento debe utilizarse en el hogar El dispositivo ha sido probado para un peso corporal de 140 kg de carga continua El uso inadecuado de este dispositivo por ejemplo debido a un entrenamiento excesiv...

Page 67: ...uego o a una temperatura extrema El fuego o las altas temperaturas por encima de 130 C 266 F pueden causar una explosi n Nunca intente modificar ni reparar el dispositivo o la bater a No triture perfo...

Page 68: ...INSTRUCCIONES DE DESEMBALAJE Abra la caja y saque el equipo A continuaci n constate si el producto presenta alg n da o y compruebe que el contenido de la entrega est completo No se aceptar n reclamac...

Page 69: ...ierdo 8 1 Tija del sill n 9 1 Perno de bola M12 10 2 Sill n 11 1 Arandela M8 recta 12 5 Tuerca M8 13 5 Respaldo del marco 14 1 Tornillo carrocero M8x45 15 2 Mango 16 1 Tornillo de cabeza hueca hexagon...

Page 70: ...rincipal 1 de la caja desd blelo y alinee el tubo de ajuste interior 25 luego atorn llelo con el pasador de bola 10 2 Conecte el soporte delantero 2 y el soporte trasero 3 al marco principal 1 con la...

Page 71: ...2 y la tuerca 13 luego atornille el tubo de soporte del asiento 26 firmemente con el pasador de bola 10 4 Conecte el respaldo del marco 14 a la tija del sill n 9 con el tornillo carrocero 15 la arande...

Page 72: ...l 7 debe bloquearse en sentido horario y el pedal 8 en sentido antihorario Siempre mantenga correctamente bloqueados los pedales 8 y 7 durante el entrenamiento o podr a da ar los dientes de los pedale...

Page 73: ...vise cada tornillo para asegurarse de que est bien apretado Insertar y cambiar las bater as Se necesitan 2 bater as AAA no incluidas 1 Abra el compartimento de la bater a en la parte posterior del mon...

Page 74: ...ngehalten werden Coloque una superficie antideslizante adecuada por ejemplo alfombra de goma placa de madera etc debajo del dispositivo para evitar la presi n suciedad y similares Posici n de ajuste d...

Page 75: ...onar las funciones Si mantiene presionado el bot n durante mucho tiempo se configurar en 0 SET Se utiliza para configurar los valores de tiempo distancia frecuencia card aca y calor as cuando no se es...

Page 76: ...la distancia total que ha entrenado en el rango de 0 00 a 99 99 km 7 FRECUENCIA DE PULSO Presione el bot n de MODE hasta que aparezca la palabra PULSE 6 7 segundos despu s de medir su frecuencia card...

Page 77: ...e la intensidad del entrenamiento es bastante alta para consumir una mayor cantidad de calor as En esta posici n se pueden lograr objetivos para perder peso y ganar masa muscular El movimiento es m s...

Page 78: ...ios de estiramiento teniendo cuidado de no forzar o sacudir los m sculos A medida que se pone en forma es posible que deba entrenar m s y m s duro Es recomendable entrenar al menos tres veces por sema...

Page 79: ...ntes de usar el dispositivo apri telas reemplace las partes defectuosas inmediatamente y no use el dispositivo nuevamente hasta que funcione correctamente Lubrique regularmente las piezas m viles con...

Page 80: ...a ar el medio ambiente o la salud humana a causa de la eliminaci n incontrolada de desechos Por este motivo debe desechar los dispositivos viejos utilizando los sistemas de recolecci n adecuados o env...

Page 81: ...te en bieden u de best mogelijke service Als er een probleem optreedt kunt u terecht bij ons geschoold personeel voor elk soort service klachten en technische ondersteuning BELANGRIJK Lees voor het ee...

Page 82: ...toestel is getest op een lichaamsgewicht van 140 kg continue belasting Ondeskundig gebruik van dit toestel b v overtraining schokkerige bewegingen zonder voorafgaande opwarming verkeerde instellingen...

Page 83: ...ij accu of apparaat niet bloot aan vuur of hoge temperaturen Brand of hoge temperaturen boven 130 C 266 F kunnen een explosie veroorzaken Breng nooit wijzigingen aan het apparaat aan U mag het apparaa...

Page 84: ...84 www DEUBAXXL de UITPAKINSTRUCTIES Open de doos en neem het product eruit Controleer het product na het uitpakken op volledigheid en beschadigingen Latere klachten worden niet aanvaard...

Page 85: ...aal rechts 7 1 Pedaal link0073 8 1 Zadelpen 9 1 Kogelpen M12 10 2 Zadel 11 1 Sluitring M8 recht 12 5 Moer M8 13 5 Frame rugleuning 14 1 slotbout M8x45 15 2 Handvat 16 1 Binnenzeskantschroef M8x35 17 2...

Page 86: ...et hoofdframe 1 uit de doos vouw het uit en richt de binnenste afstelbuis 25 schroef het vervolgens op de kogelbout 10 2 Bevestig de voorstandaard 2 en de achterstandaard 3 aan het hoofdframe 1 met de...

Page 87: ...elpen 9 schroef vervolgens de zadelsteunbuis 26 vast met de kogelpen 10 4 Bevestig het frame 14 aan de zadelpen 9 met de bout 15 sluitring 12 en nylon moer 13 schroef vervolgens de rugleuning 18 aan h...

Page 88: ...Het pedaal 7 moet met de wijzers van de klok mee worden vergrendeld en het pedaal 8 tegen de wijzers van de klok in Houd de pedalen 8 en 7 tijdens de training altijd vergrendeld Anders zullen de tand...

Page 89: ...ningscomputer 2 Verwijder de oude batterijen indien nodig 3 Plaats de nieuwe batterijen in het batterijvak Zorg ervoor dat de polariteit juist is 4 Sluit het batterijvak PLAATS VAN DE FITNESSBIKE Wann...

Page 90: ...eruit terwijl u de voorlijst in de gewenste positie brengt Maak de kogelpen 10 los en zet hem vast Er zijn 3 plaatsen voor training en 1 plaats voor opslag zie informatie over de opleiding De fitness...

Page 91: ...etten De huidige gegevensverandering is 0 Als je RESET ingedrukt houdt wordt het display naast de ODO positie op 0 gezet FUNCTIE EN WERKING 1 SCAN Druk op de MODE knop totdat SCAN verschijnt de monito...

Page 92: ...an het contact daarna keert de aflezing terug naar het normale niveau De lezing kan niet worden beschouwd als een basis voor een medische behandeling 8 ALARM De computer geeft een pieptoon wanneer u o...

Page 93: ...is de ideale trainingspositie voor gebruikers die minder ge nteresseerd zijn in intensieve training om spieren of uithoudingsvermogen op te bouwen maar meer ge nteresseerd zijn in fit en mobiel blijv...

Page 94: ...ang sporten als u zou willen Ook als u uw conditie probeert te verbeteren zult u uw trainingsprogramma moeten aanpassen Tijdens de opwarmings en afkoelingsperiode moet u trainen zoals gewoonlijk maar...

Page 95: ...sche apparaten nooit bij het huishoudelijk afval Breng defecte apparaten of apparaten die u niet meer gebruikt naar een recyclingbedrijf Binnen de EU geeft dit symbool aan dat dit product niet bij het...

Page 96: ...confianza a nuestro personal capacitado NL U kunt bij ons geschoolde personeel terecht voor elke vorm van service klachten en technische ondersteuning Hergestellt f r Made for Deuba GmbH Co KG Zum Wie...

Reviews: