Configuration
26
27
Select “Start Configuration” by pressing
OK
on the remote. Then press
OK
again which selects
English as the system Language
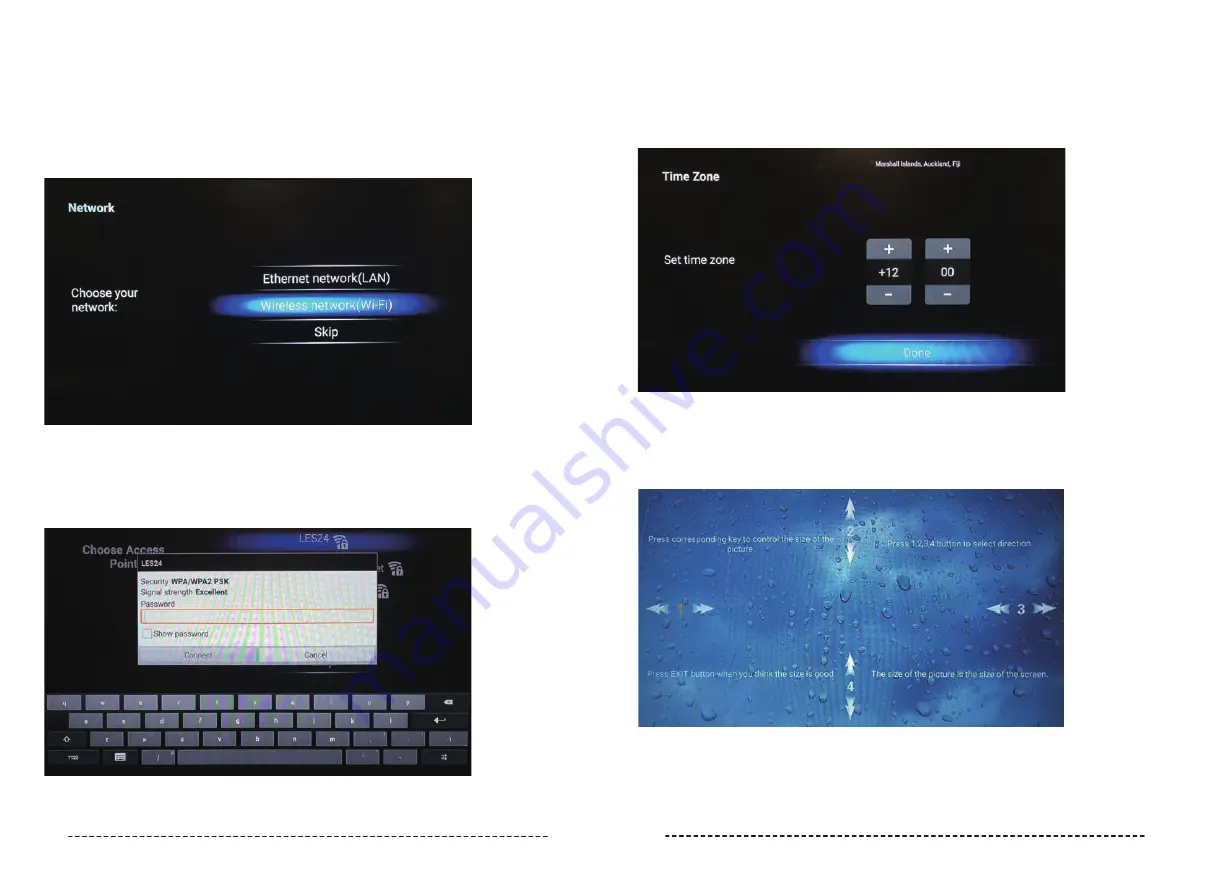
Next using the arrow keys on the remote, select either a WiFi or Ethernet Internet connection.
An Ethernet connection will immediately provide an Internet connection once you connect the
network cable to the RJ45 port at the back of the TV.
For WiFi, after you select it you will then be provided with a list of available WiFi networks. Using
the arrow keys on the remote and
OK
button, select your preferred WiFi network then input the
password using the arrow keys on the remote in conjunction with the on-screen keyboard.
If using the remote control, press
EXIT
button to remove the keyboard. Then using the
arrow keys on the remote, scroll down to select Connect, press the
OK
button and your Smart TV
will now be connected to the Internet!
Next you will be presented with the Date & Time screens. If you are connected to the Internet, this
information should be automatically completed so just press the
OK
button on the remote to cycle
through these screens.
Next press
OK
to complete the setup to move on to the calibration screen. You should not need to
make any adjustments on this screen but if you want to change the Smart TV screen’s size, cycle
options 1-4 using the arrow keys corresponding to the number highlighted in orange to move the
picture left/right/up and down. Press
OK
on the remote to cycle through each number and press
EXIT button on the remote when you are finished, or if you don’t need to make any
changes.


