


User Guide
22
Track Names
You can edit a song’s individual track names from its associated Channel
screen. For example, changing the default names Track 1 to Drums, Track 2 to
Keyboard, Track 3 to Lead Vocals, etc.:
To edit Track 1’s name:
1. Press Channel 1 knob.
2. Tap top left corner of the Channel screen.
3. Enter a new name for Track 1 and tap OK.
The edited name will appear at the top of the track’s Channel screen and
will also be embedded in the metadata of the rendered ISO (isolated)
files when using Render > Wav All Isos. See
Sharing Projects
for more
information.
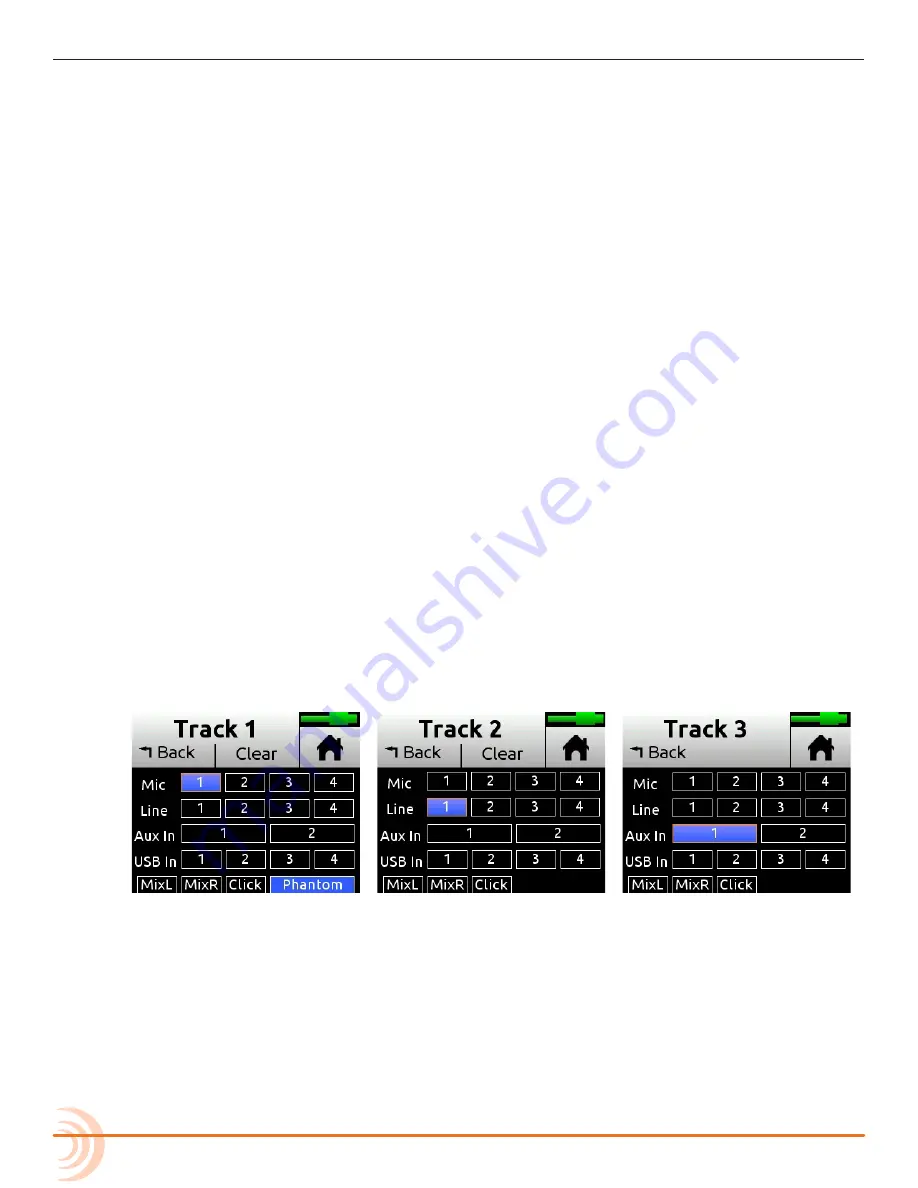
Setting Input Source
Input lets you select the input source for a track.
Any input can be routed to any channel. This reduces the need to rearrange
instruments plugged into inputs when you want to record that input to
a different track. You can also select the MixPre-6M’s mixer outputs (see
Bouncing
), a metronome click (see
Metronome
) or turn on Phantom power.
To route inputs:
1. Enter the Channel screen, tap Input. The Routing screen appears, as shown
in the two following examples.
2. Select an input for the track. A track can only have one live input source.
3. Select Phantom if you want to turn on Phantom power for a Mic source.
Phantom toggles 48V Phantom on and off. Turn Phantom on if a condenser
microphone is being used.
L
Notice in the previous screenshots how Phantom is only an option when a Mic
source is selected.
4. Select Click as an input for your track if you want to record the metronome
click into your song. This is useful should you want to later import the song
Summary of Contents for MixPre-6M
Page 1: ... MixPre 6M Multitrack Recorder USB Audio Interface User Guide ...
Page 20: ...User Guide 20 ...
Page 38: ...User Guide 38 ...
Page 49: ...49 RECORDING AND PLAYBACK ...
Page 50: ...User Guide 50 ...
Page 54: ...User Guide 54 ...
Page 62: ...User Guide 64 ...
Page 72: ...User Guide 74 ...
Page 76: ...User Guide 76 ...
Page 80: ......