33
Channel Manager Window
Chap
ter
3
Us
ing Z
ir
is
Vie
w
P
S
3 wit
h Z
ir
is
Cr
eat
e
1
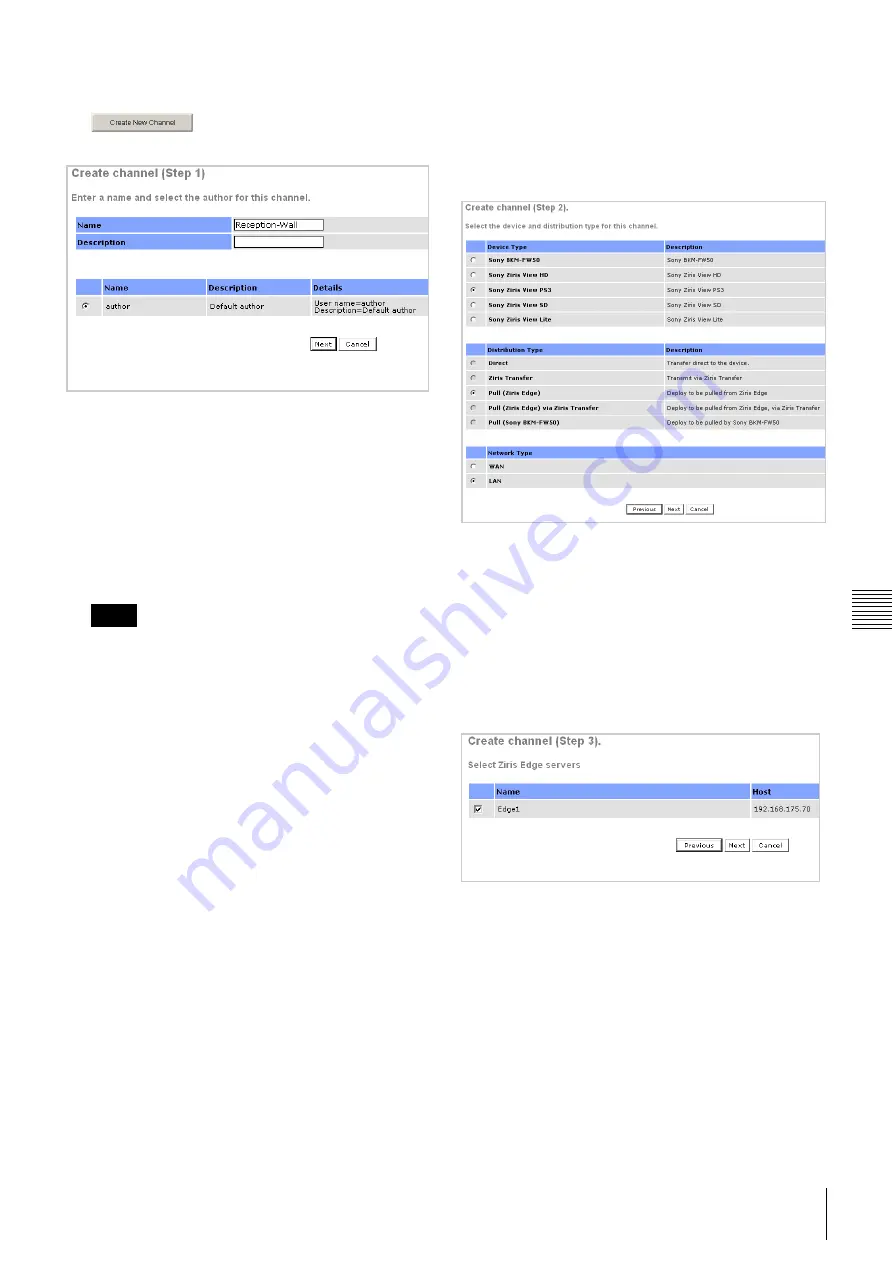
To start the Create Channel wizard click the
button. The first step of the wizard is
displayed.
Enter a name for the channel to be created and a
description, select the author to be assigned to that
channel from the displayed author account list.
For security the
Approval Required
check-box may
be ticked, the author for that channel will then be
required to seek approval from an approver before
content can be distributed.
When the details are entered click the [Next] button.
• The channel name must be unique.
• Channel names may be up to 64 characters long and
can contain only the characters a-z, A-Z, 0-9, '_' and
'-'. characters.
• A channel may only be assigned to a single author.
• It is not possible to change the author associated
with a channel once the channel has been created.
• Within the wizard, use the [Previous] or [Cancel]
buttons to edit changes made in previous steps or to
return to the Channel manager.
2
In this step choose the
Device Type
, in this case Sony
Ziris View PS3. The
Distribution Type
is restricted
to
Pull (Ziris Edge). The Network Type
is not
applicable and has no effect for Ziris View. When the
correct settings are chosen click [Next].
The example below shows the creation of a channel for
Ziris View with a Ziris Edge server. If your system
contains only one of these then choose the appropriate
radio buttons and follow the steps shown here,
ignoring the steps which do not apply.
Click [Next] when you have selected the correct radio
buttons.
3
Select Ziris Edge servers
Tick the check-boxes of the Ziris Edge servers which
are to be used with this channel.
When all the selections have been made, click the
[Next] button.
Notes


